I bought some need stainless steel for the "Project Type 3 Decklid Rack."

These are the stainless steel I bought, which i already bent and cut after measuring them on the decklid of Sharky 2.
This consists of five main frames.


Today, I went to the nearby welding shop for these stainless steels to be welded.
The frame on the right side is being welded on the middle frame.

The frame on the left side is being welded on the middle frame.

The left and right frames are now welded to the middle frame.


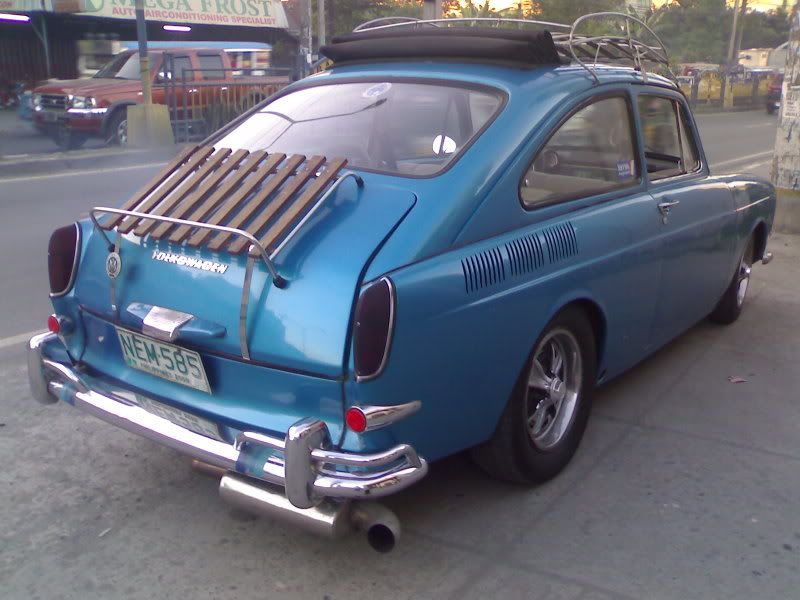
Next on the list. The two hallow square tubes that serves to hold the nine wood slats are welded into their respective places.


After everything is welded into place, I then grined the welded portions for a smoother finish.

Now, the polished decklid rack, sans holes for the wood slats.

I measured and marked the square tubes and placed nine lines/dots for each side. Thereafter, I buffed the decklid rack for a polished look.

Once all eighteen marked are made, I then used a nail to punch in the guide for the drill.

Then, I drilled both sides for the eighteen holes for the provisions of the bolts and nuts.

Of course, these rubbers are needed so that the decklid of my Fasty will not get some scratches.

Then, I went to the hardware and bought some wood to finish the looks.

Four woods are temporarily placed on the decklid rack. Five more to go.


The almost finished Decklid Rack for Sharky 2, sans bolts and nuts.
Thanks.