Cheers for the comments.
Not a trailer queen - definitely a driver.
The suspension, pan and wings will all be waxoyled after MOT - hopefully it will last another 40 yrs.
Ozzy - wish I had rebuilt the clock but was easier to just buy the quartz replacement - has kept time for 3 weeks now...
1970 Squareback Project
Re: 1970 Squareback Project
The variant Project
Re: 1970 Squareback Project
A ton of little jobs been going on.
first up the injection dual points vacuum distributor - the advance had gummed up and the whole thing full of old grease, so pulled it all apart (lots of parts in a dizzy!), replaced the fiber washers, cleaned everything and put together with moly grease and electronic ignition pickup. (retained the vacuum advance can for better street drive-ability).

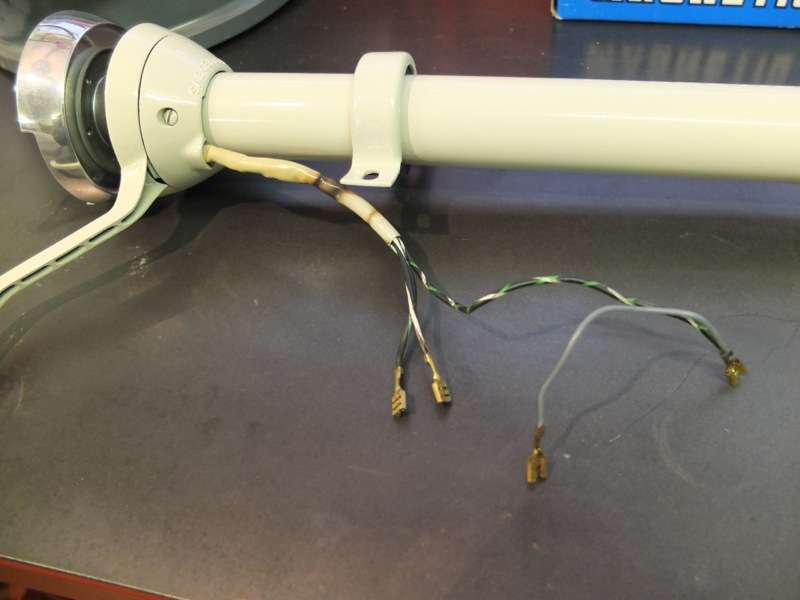
Got an early oval steering column and a 1950s hella accessory indicator arm with push switch on the end.
This needed re-wiring for use with relays for klaxon horn and indicators.
With the ignition switch in the dash the cars interior will look really simple.

The arm is really nice but really difficult to re-wire with limited space.
Used fibre sleeving and heat shrink on wiring. Some of these early arms had lights on the end to indicate (usually for semaphore indicators).
This one has a push button switch which will be used to switch a relay for the horn.

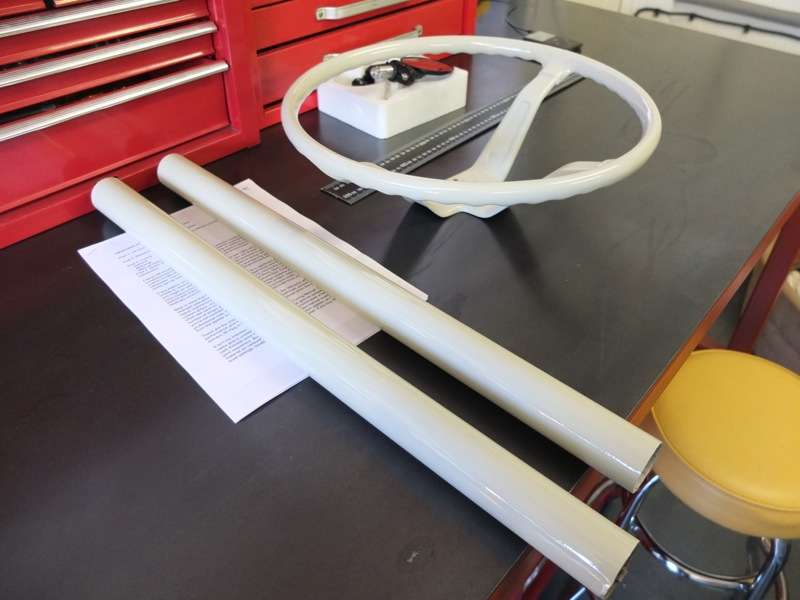
The VDM coach wheel I bought a few years ago without horn ring - running this with VDM boss which is very small and a simple horn push.
The rim had the usual cracks (filled with milliput) and primed - ready for off white with silver spokes.

Re-wired switch and associated column stuff.
Rear suspension and wiring next...

Finally got the 4.5 fuchs with the right 145 tyres fitted for the front of the square - using 195/65s out back.

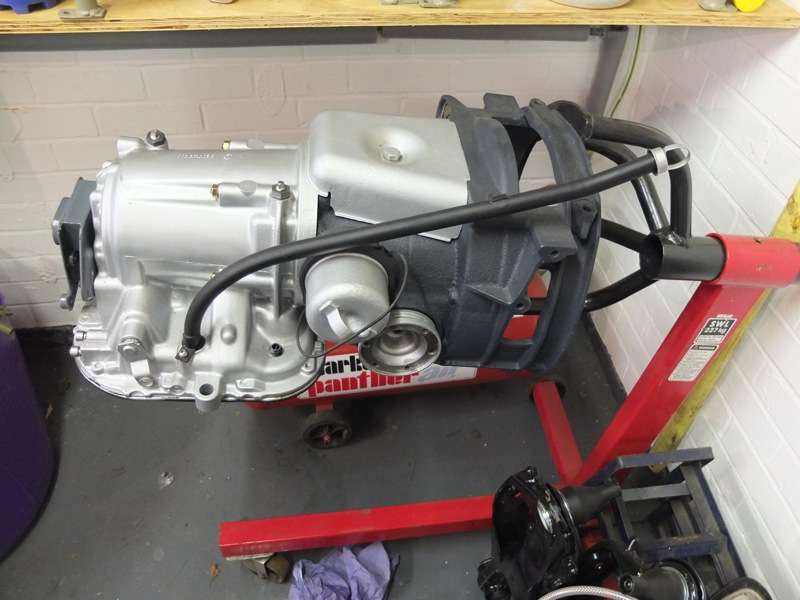
Flushed the torque converter with ATF a few times - no particles inside which is good so a coat of enamel and ready to go back in the auto-box.

first up the injection dual points vacuum distributor - the advance had gummed up and the whole thing full of old grease, so pulled it all apart (lots of parts in a dizzy!), replaced the fiber washers, cleaned everything and put together with moly grease and electronic ignition pickup. (retained the vacuum advance can for better street drive-ability).
Got an early oval steering column and a 1950s hella accessory indicator arm with push switch on the end.
This needed re-wiring for use with relays for klaxon horn and indicators.
With the ignition switch in the dash the cars interior will look really simple.
The arm is really nice but really difficult to re-wire with limited space.
Used fibre sleeving and heat shrink on wiring. Some of these early arms had lights on the end to indicate (usually for semaphore indicators).
This one has a push button switch which will be used to switch a relay for the horn.
The VDM coach wheel I bought a few years ago without horn ring - running this with VDM boss which is very small and a simple horn push.
The rim had the usual cracks (filled with milliput) and primed - ready for off white with silver spokes.
Re-wired switch and associated column stuff.
Rear suspension and wiring next...
Finally got the 4.5 fuchs with the right 145 tyres fitted for the front of the square - using 195/65s out back.
Flushed the torque converter with ATF a few times - no particles inside which is good so a coat of enamel and ready to go back in the auto-box.
The variant Project
Re: 1970 Squareback Project
OK - time for an update - a couple of projects got in the way!
first up - I managed to source a couple of 1960s beetle steering columns with switchgear and painted it all VW pearl white (L87).

finished the autobox rebuild - lots of bits inside! - managed to source a full rebuild kit from US for about £70 - VWHeritage stock a few of the main seals and pan gaskets but not the clutches.
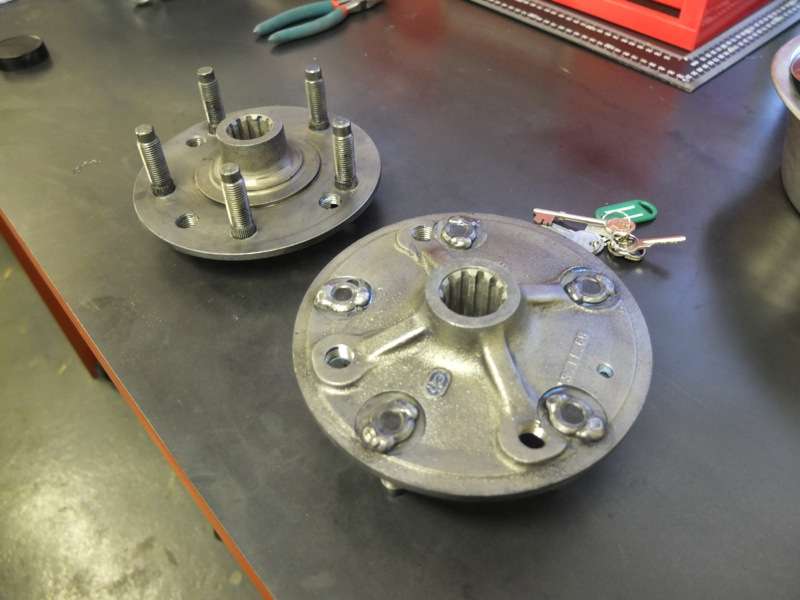
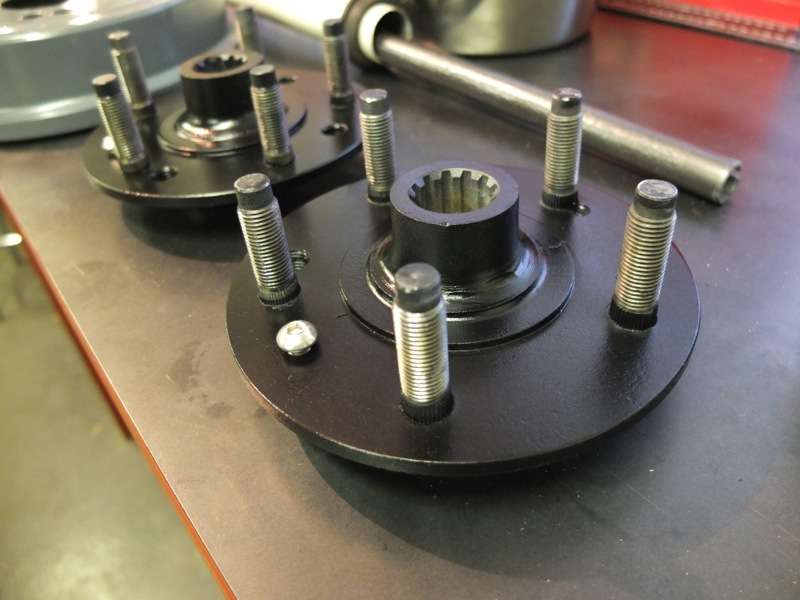
went for porsche patten on the square so I can run fuchs alloys with 145 and 195 tyres - the hubs were drilled for studs but the studs were not tight enough so I welded the back of the studs, stripped the powder-coat off! and repainted.
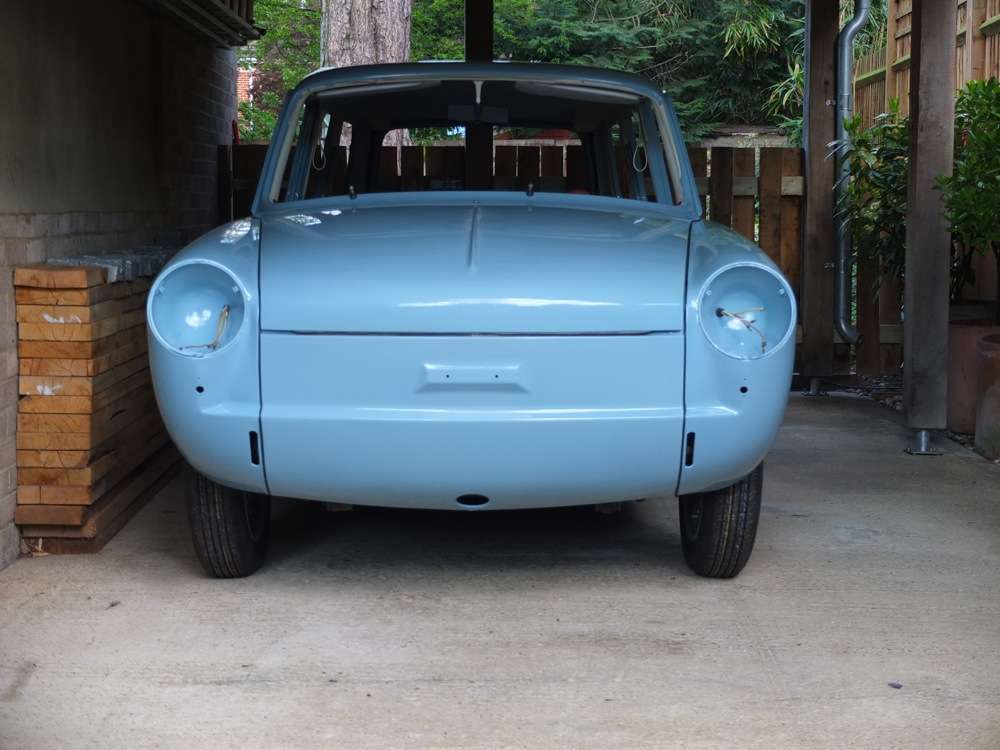
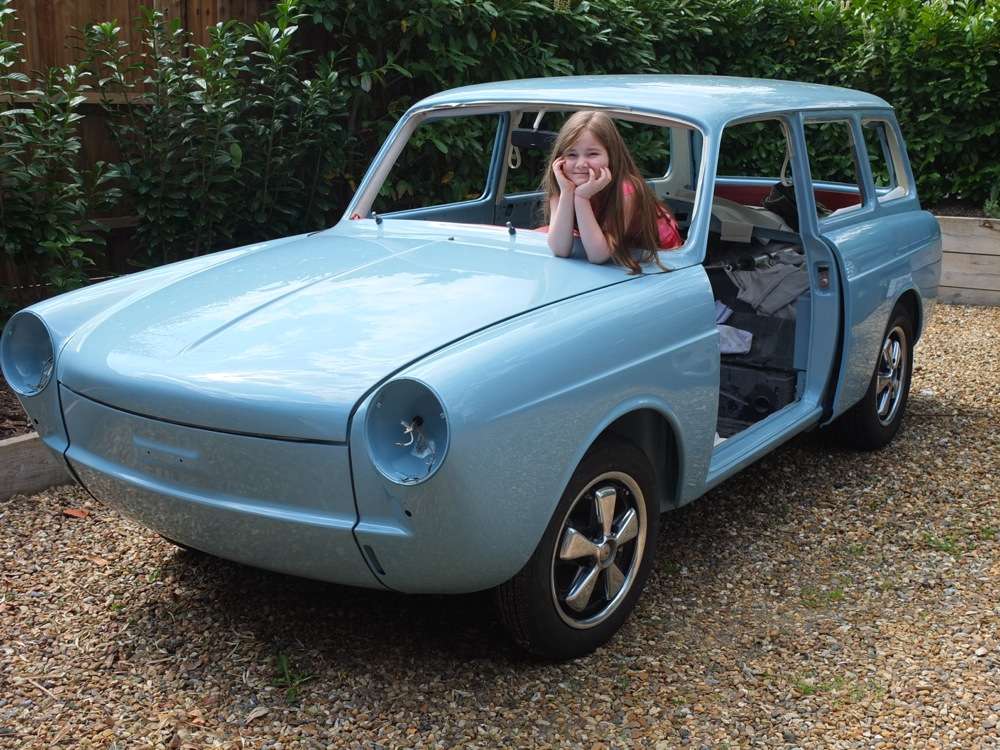
managed to get all the wings back on the car - just a few sections of beading to finish and then adjust the doors a little to get the panel gaps looking nice.

Got the rear subframe, trailing arms and rear brakes going back on this week - more updates to follow.
first up - I managed to source a couple of 1960s beetle steering columns with switchgear and painted it all VW pearl white (L87).
finished the autobox rebuild - lots of bits inside! - managed to source a full rebuild kit from US for about £70 - VWHeritage stock a few of the main seals and pan gaskets but not the clutches.
went for porsche patten on the square so I can run fuchs alloys with 145 and 195 tyres - the hubs were drilled for studs but the studs were not tight enough so I welded the back of the studs, stripped the powder-coat off! and repainted.
managed to get all the wings back on the car - just a few sections of beading to finish and then adjust the doors a little to get the panel gaps looking nice.
Got the rear subframe, trailing arms and rear brakes going back on this week - more updates to follow.
The variant Project
Re: 1970 Squareback Project
More little stuff today.
Sanded down the steering wheel and fitted the boss - loads of time doing the fiddly stuff.
Also built the steering column, switch and fitings.
Had a few options on the indicator switch - went with an original bug one - but not 100% - want to fit a rev counter on the column so looking for a switch that is not too bulky.
Painted the welded hubs ready to fit up tomorrow hopefully.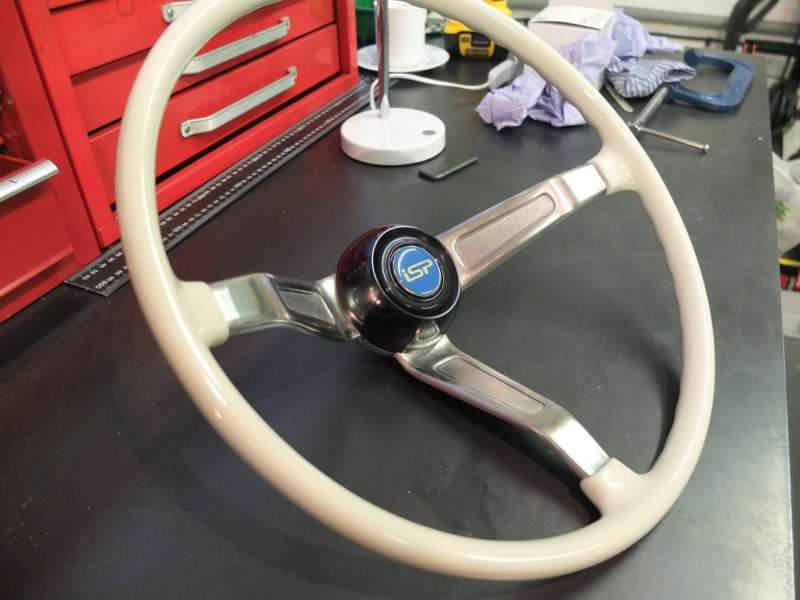
The variant Project
Re: 1970 Squareback Project
everything is looking great! I enjoy doing all these little jobs more than anything, the attention to detail is rewarding 
Mark.
Mark.
my 1968 Fastback Automatic build thread
viewtopic.php?f=4&t=6896
viewtopic.php?f=4&t=6896
Re: 1970 Squareback Project
cheers Mark - yes - nothing better than finishing a few time consuming bits - all you need is a steady flow of tea...
The variant Project
Re: 1970 Squareback Project
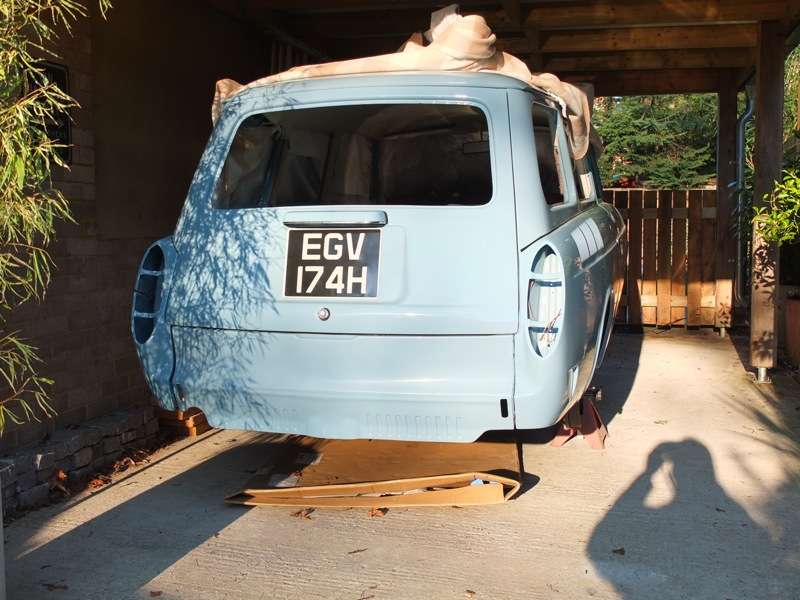
Finally, the old bird is on her feet - all brakes, hubs, wheels and suspension fitted - able to push it around now and get the panels fitted up nicely.
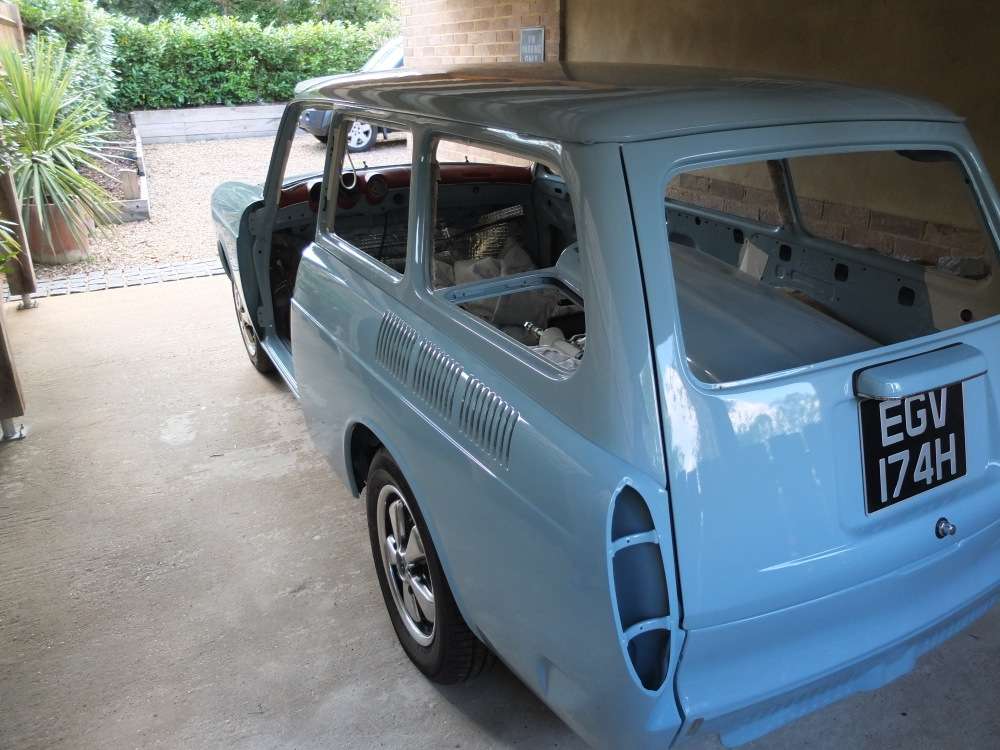
Next job was to strip all the pop outs, window trims and quarter lights and dechrome them ready for the other cal look window rubbers - not a great job.
Window fitting time next...
Next job was to strip all the pop outs, window trims and quarter lights and dechrome them ready for the other cal look window rubbers - not a great job.
Window fitting time next...
The variant Project
Re: 1970 Squareback Project
cheers Colin - how's the fback coming on...
col1600 wrote:class job my good man.......class job!
The variant Project
Re: 1970 Squareback Project
its coming along.......slowly....ive been at a number of things that have just chewed up a mountain of time, but what the heck there aint no hurry. ill be painting her the next week or so.
hey keep that quality build on the go its looking great..
colin.
hey keep that quality build on the go its looking great..
colin.
You Love It.!!!
Re: 1970 Squareback Project
Hi buddy, did you replace your quarter light rubbers too?!
I need to replace mine and give the frames a paint, where did you get the rubbers from and how much?!
Thanks
Gaz
I need to replace mine and give the frames a paint, where did you get the rubbers from and how much?!
Thanks
Gaz
If it ain't King James it ain't bible y'all........
Re: 1970 Squareback Project
Yes - got the rubbers from Custom & Commercial - they were 30.00 each but original so they fit!
http://www.customandcommercial.com/vw-t ... r_rubbers/
drilled the 2 pop rivets on frame and replaced with button head stainless M4 short bolts.
I used SEM Trim Black paint on the frames - 5 thin coats - really nice durable finish
http://www.customandcommercial.com/vw-t ... r_rubbers/
drilled the 2 pop rivets on frame and replaced with button head stainless M4 short bolts.
I used SEM Trim Black paint on the frames - 5 thin coats - really nice durable finish
The variant Project
-
type3willy

- Posts: 312
- Joined: 28th November 2004 - 10:02am
- Location: Santander (SPAIN)
Re: 1970 Squareback Project
cheers - appreciate the comments - lots more to do until its ready to roll...
type3willy wrote:Best work ever seen on a Type 3. Congratulations!.
The variant Project
Re: 1970 Squareback Project
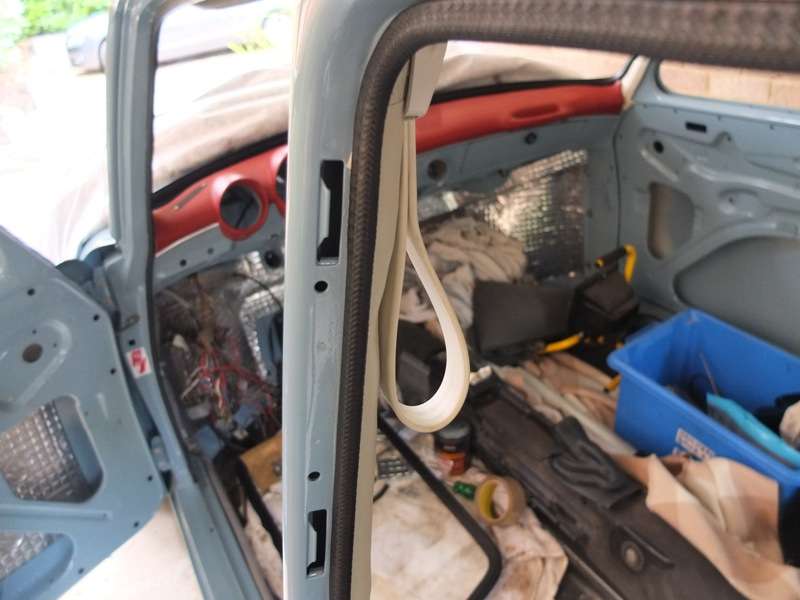
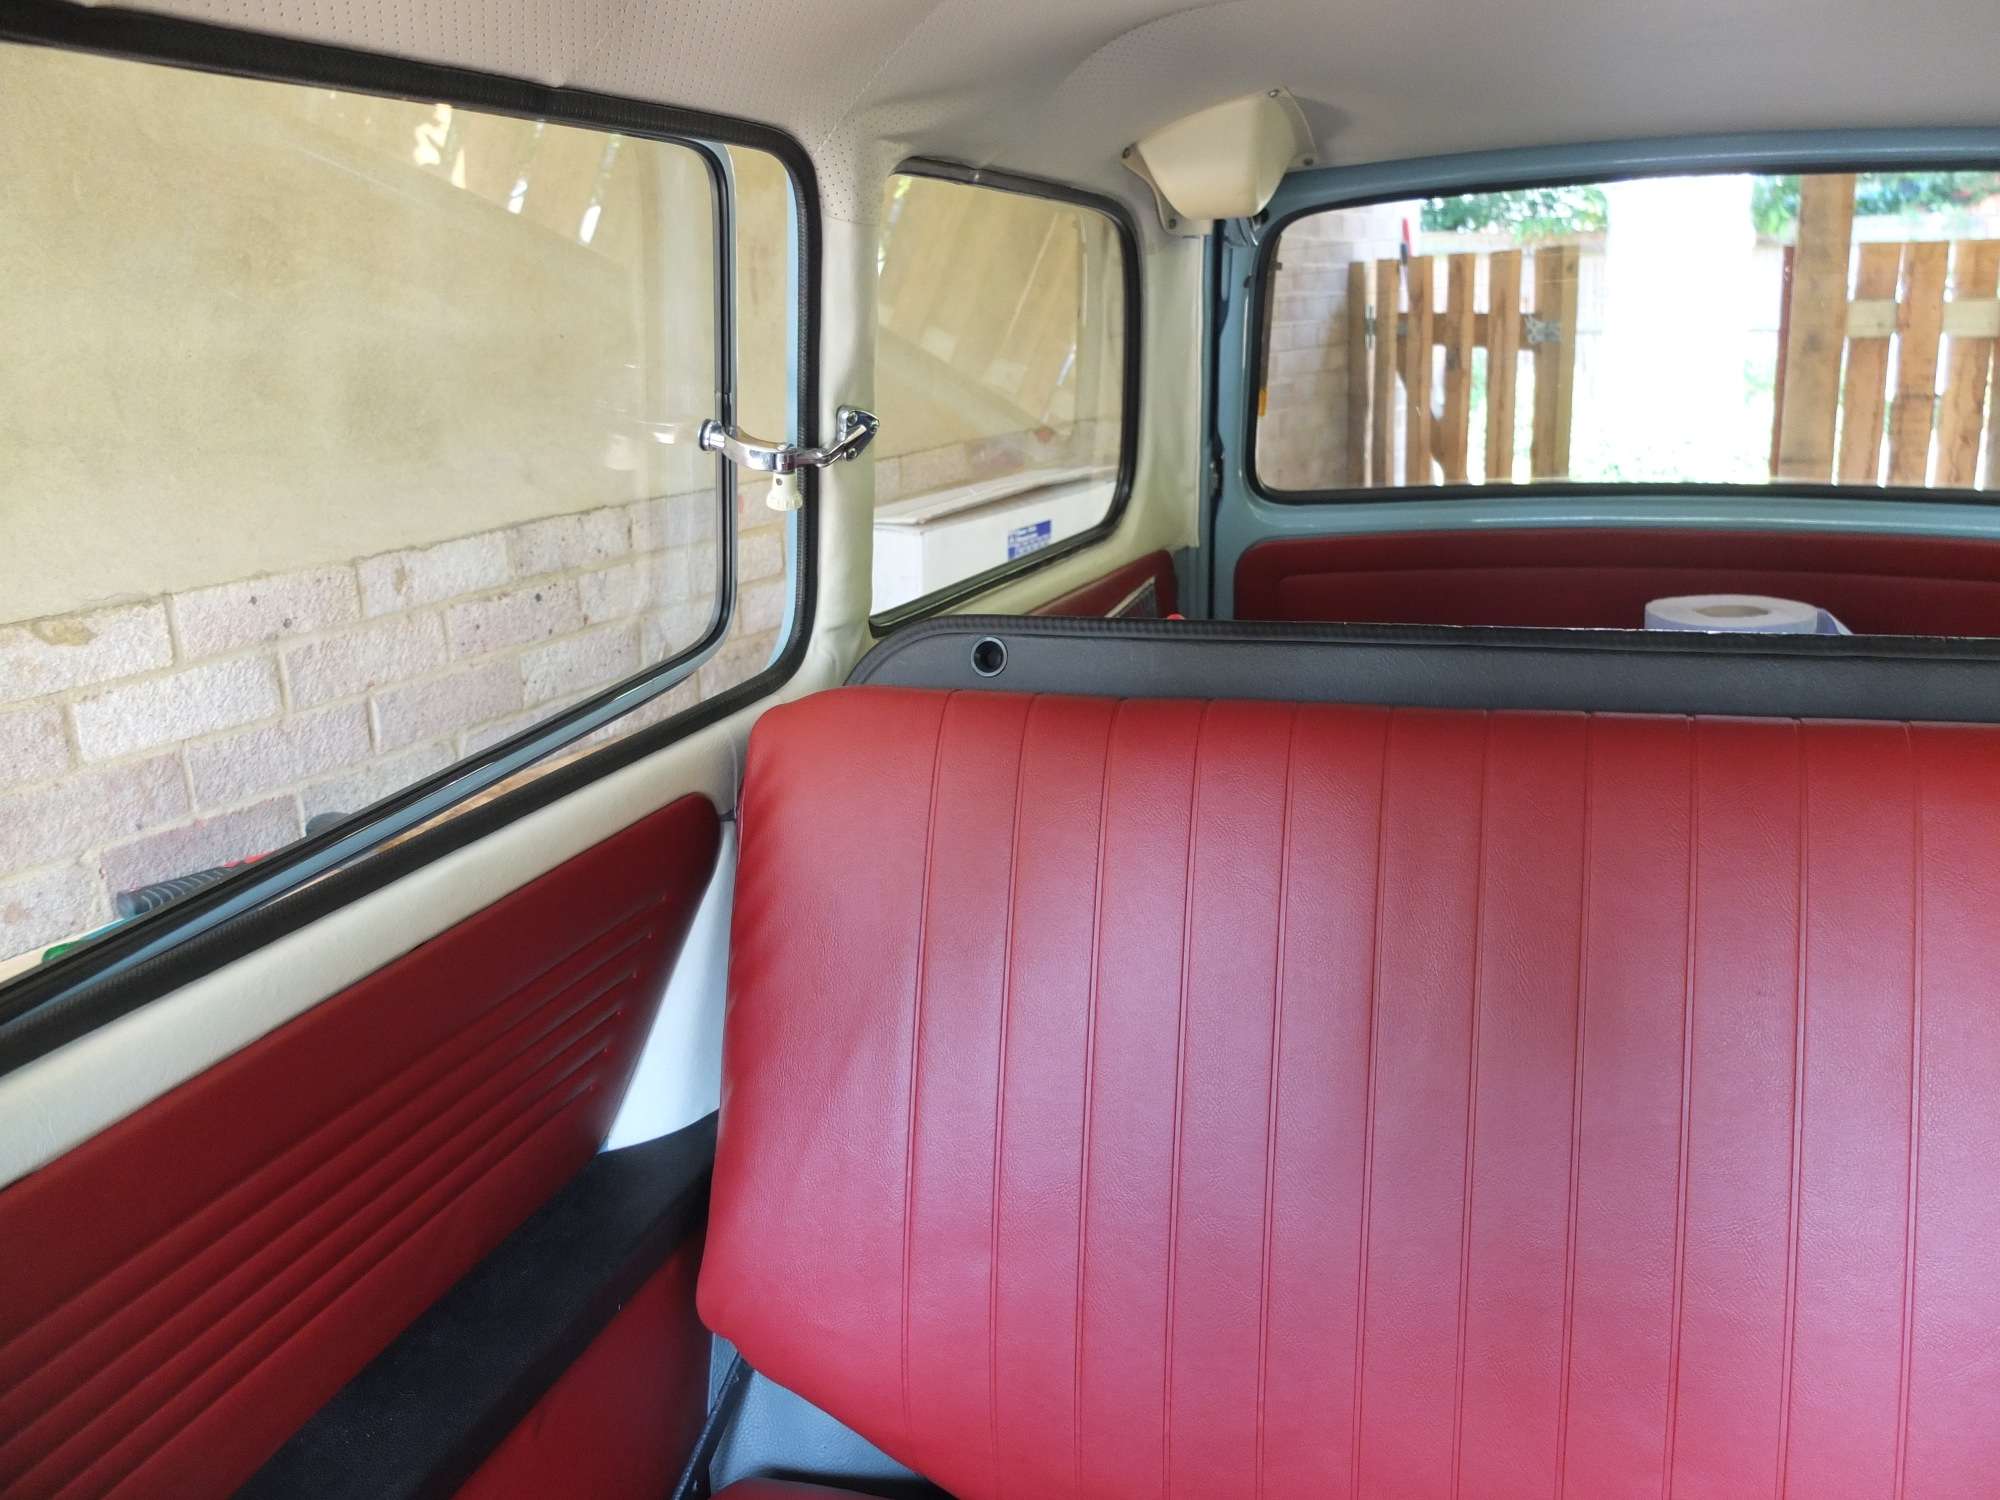
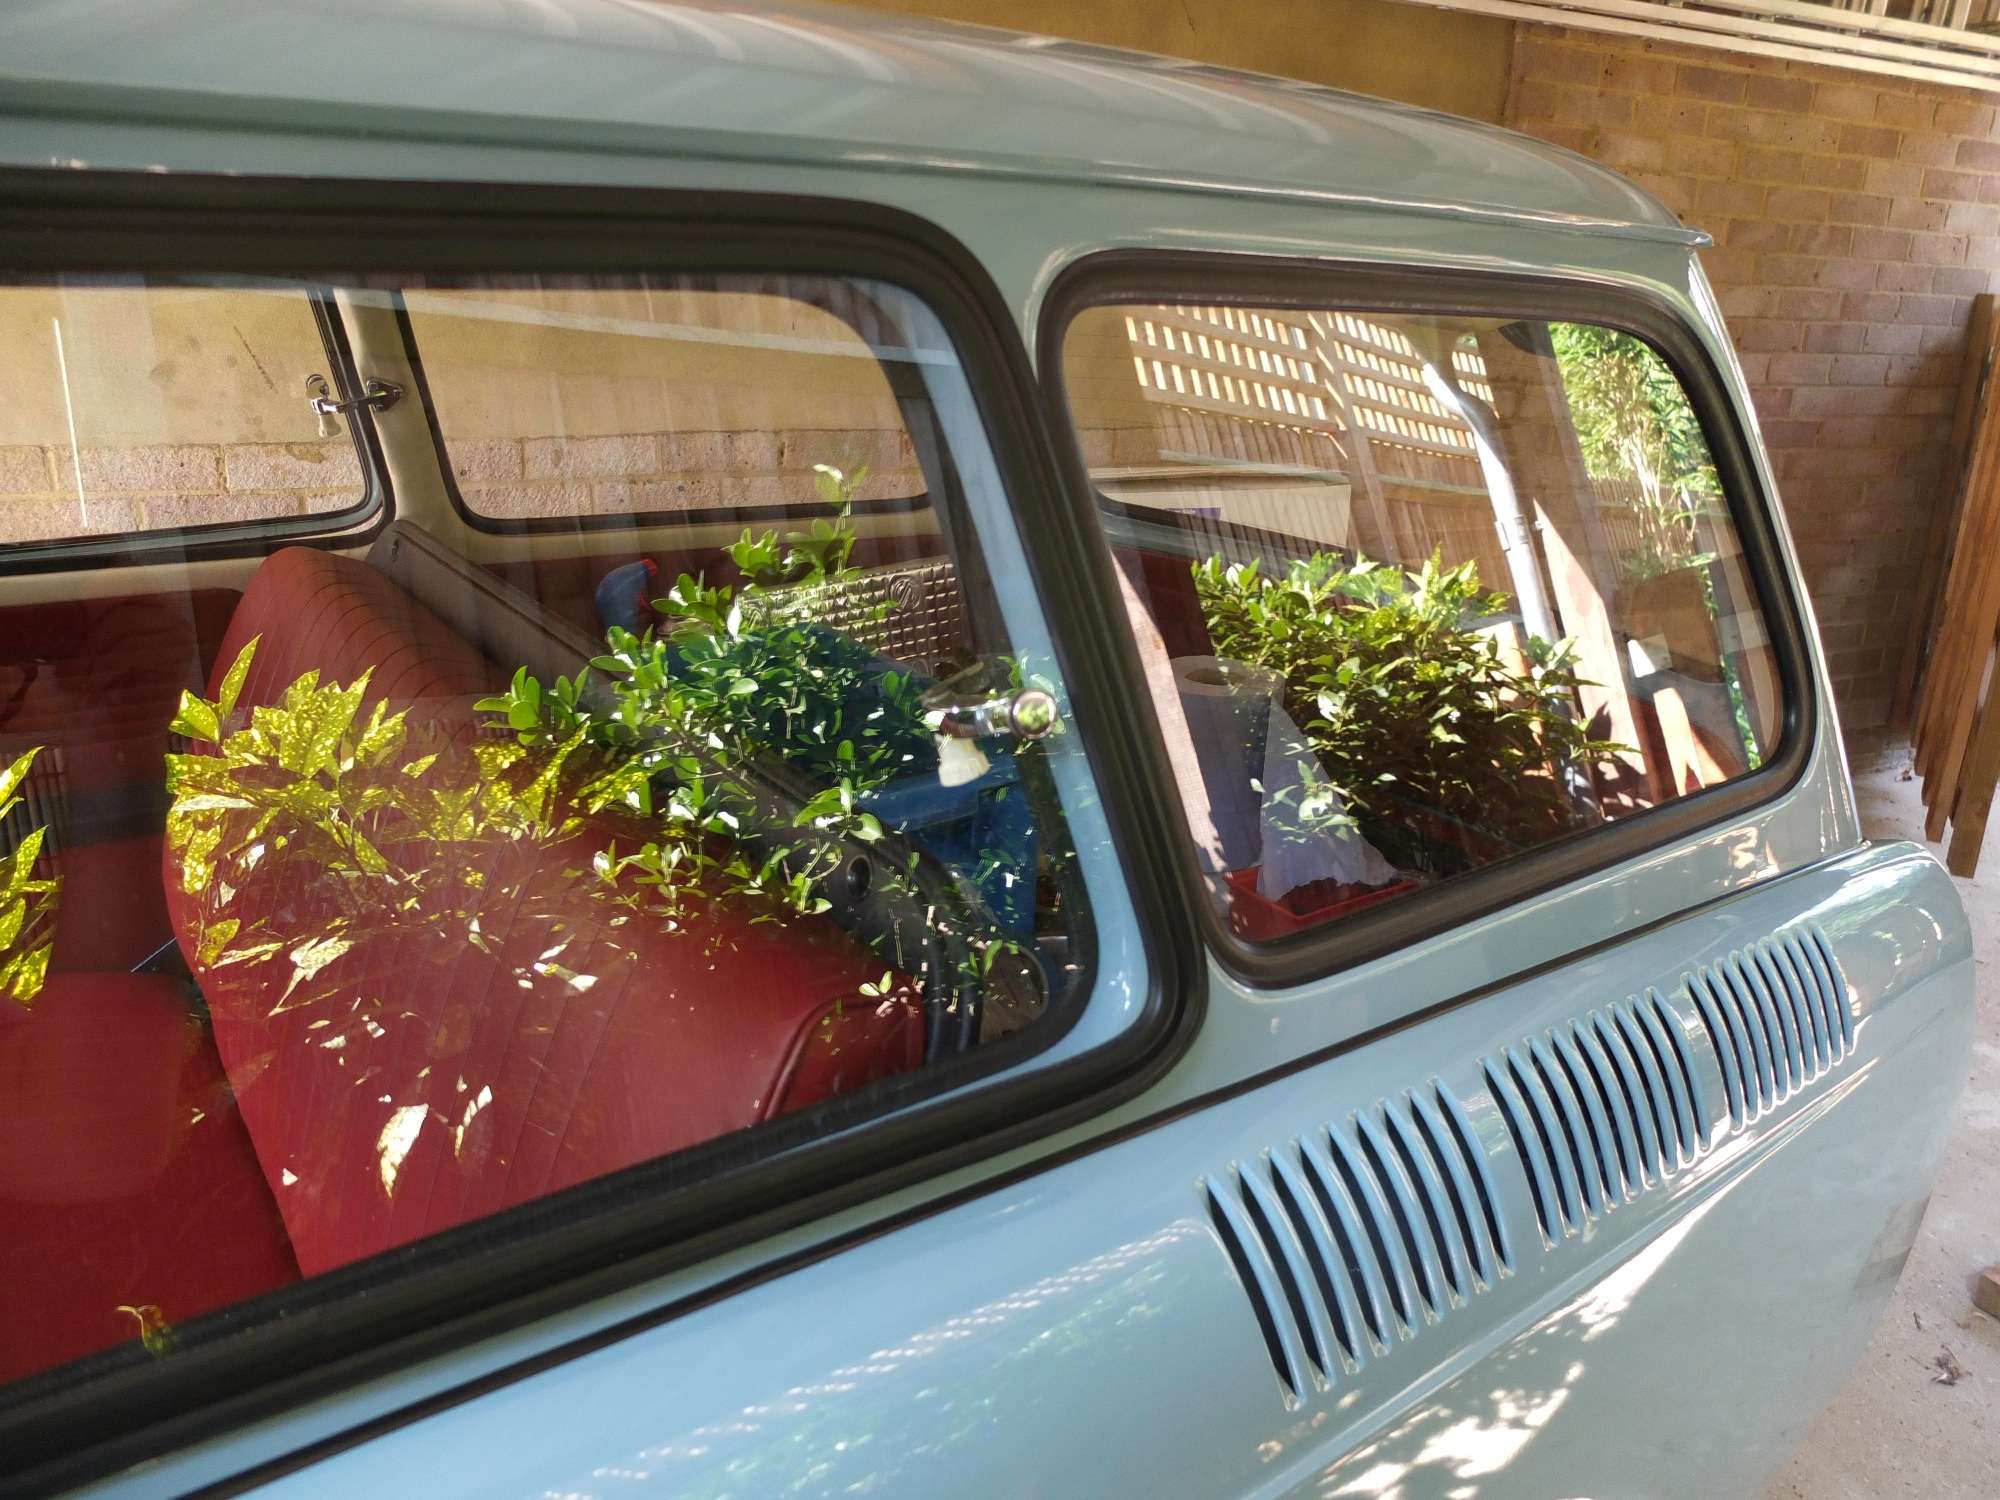
More work on the windows and final bits of headlining...
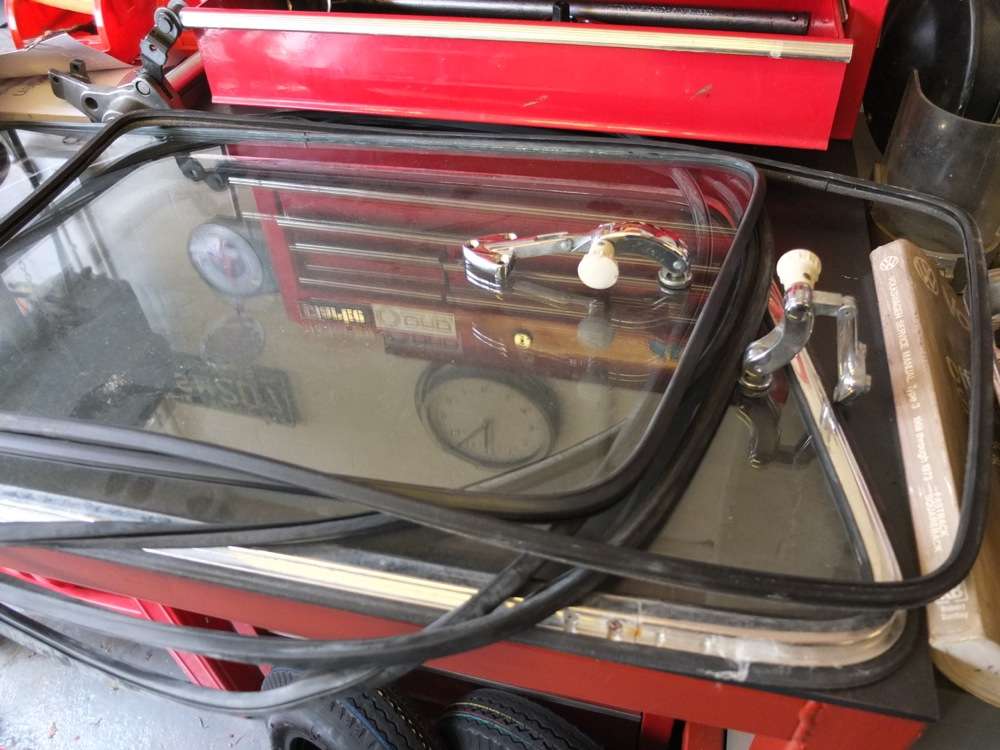
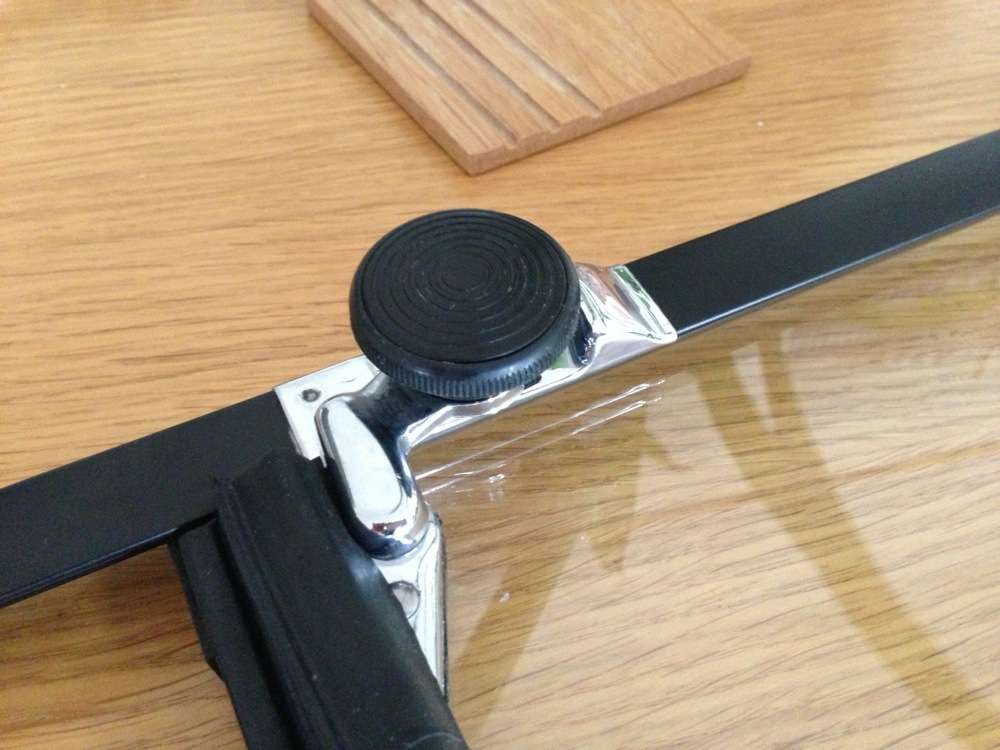
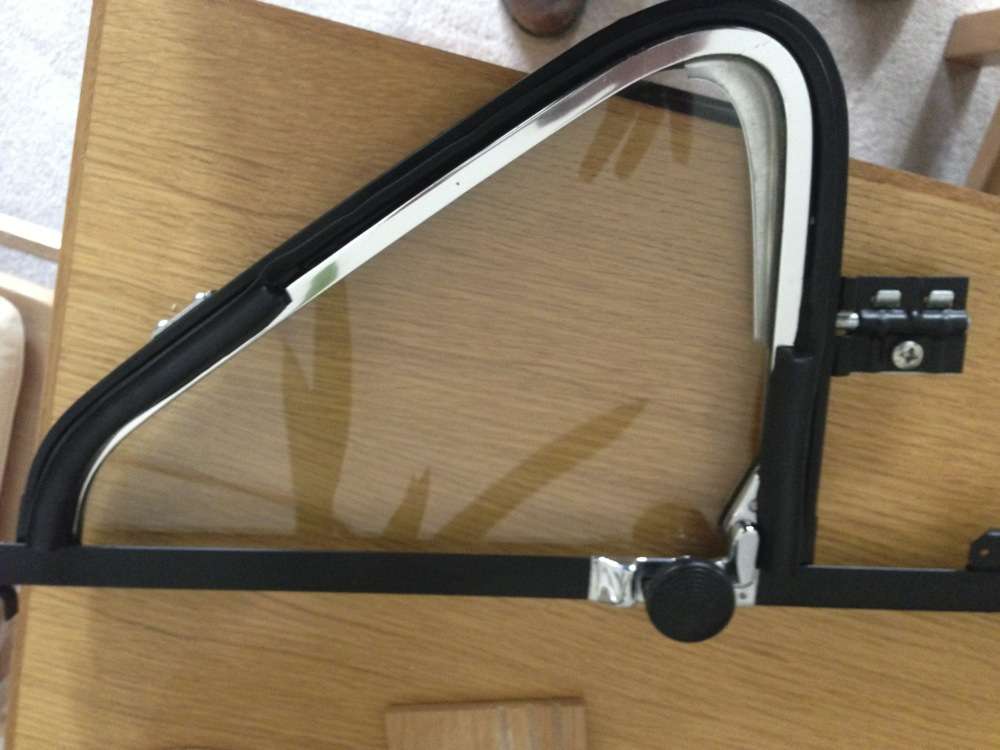
Quarter windows took a lot of time to dissemble, rub down, paint 4 coats of satin black - using SEM Trim Black - great stuff.
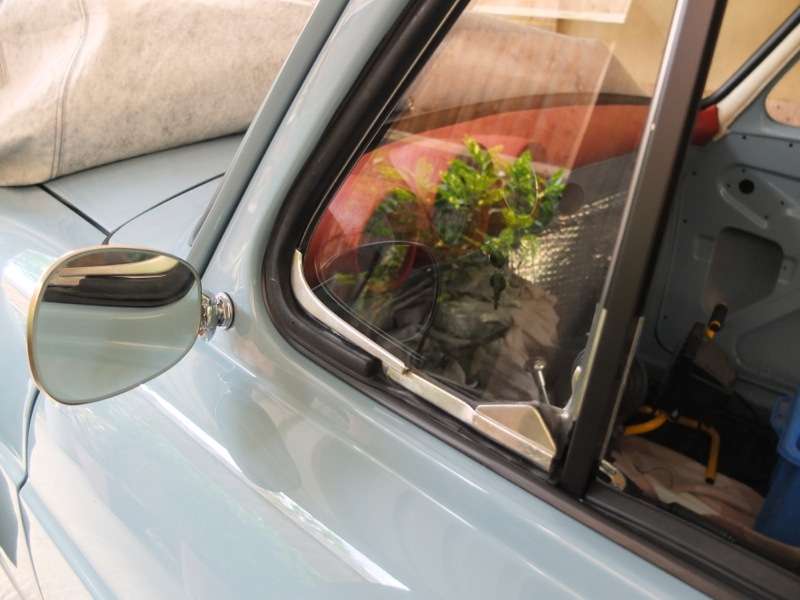
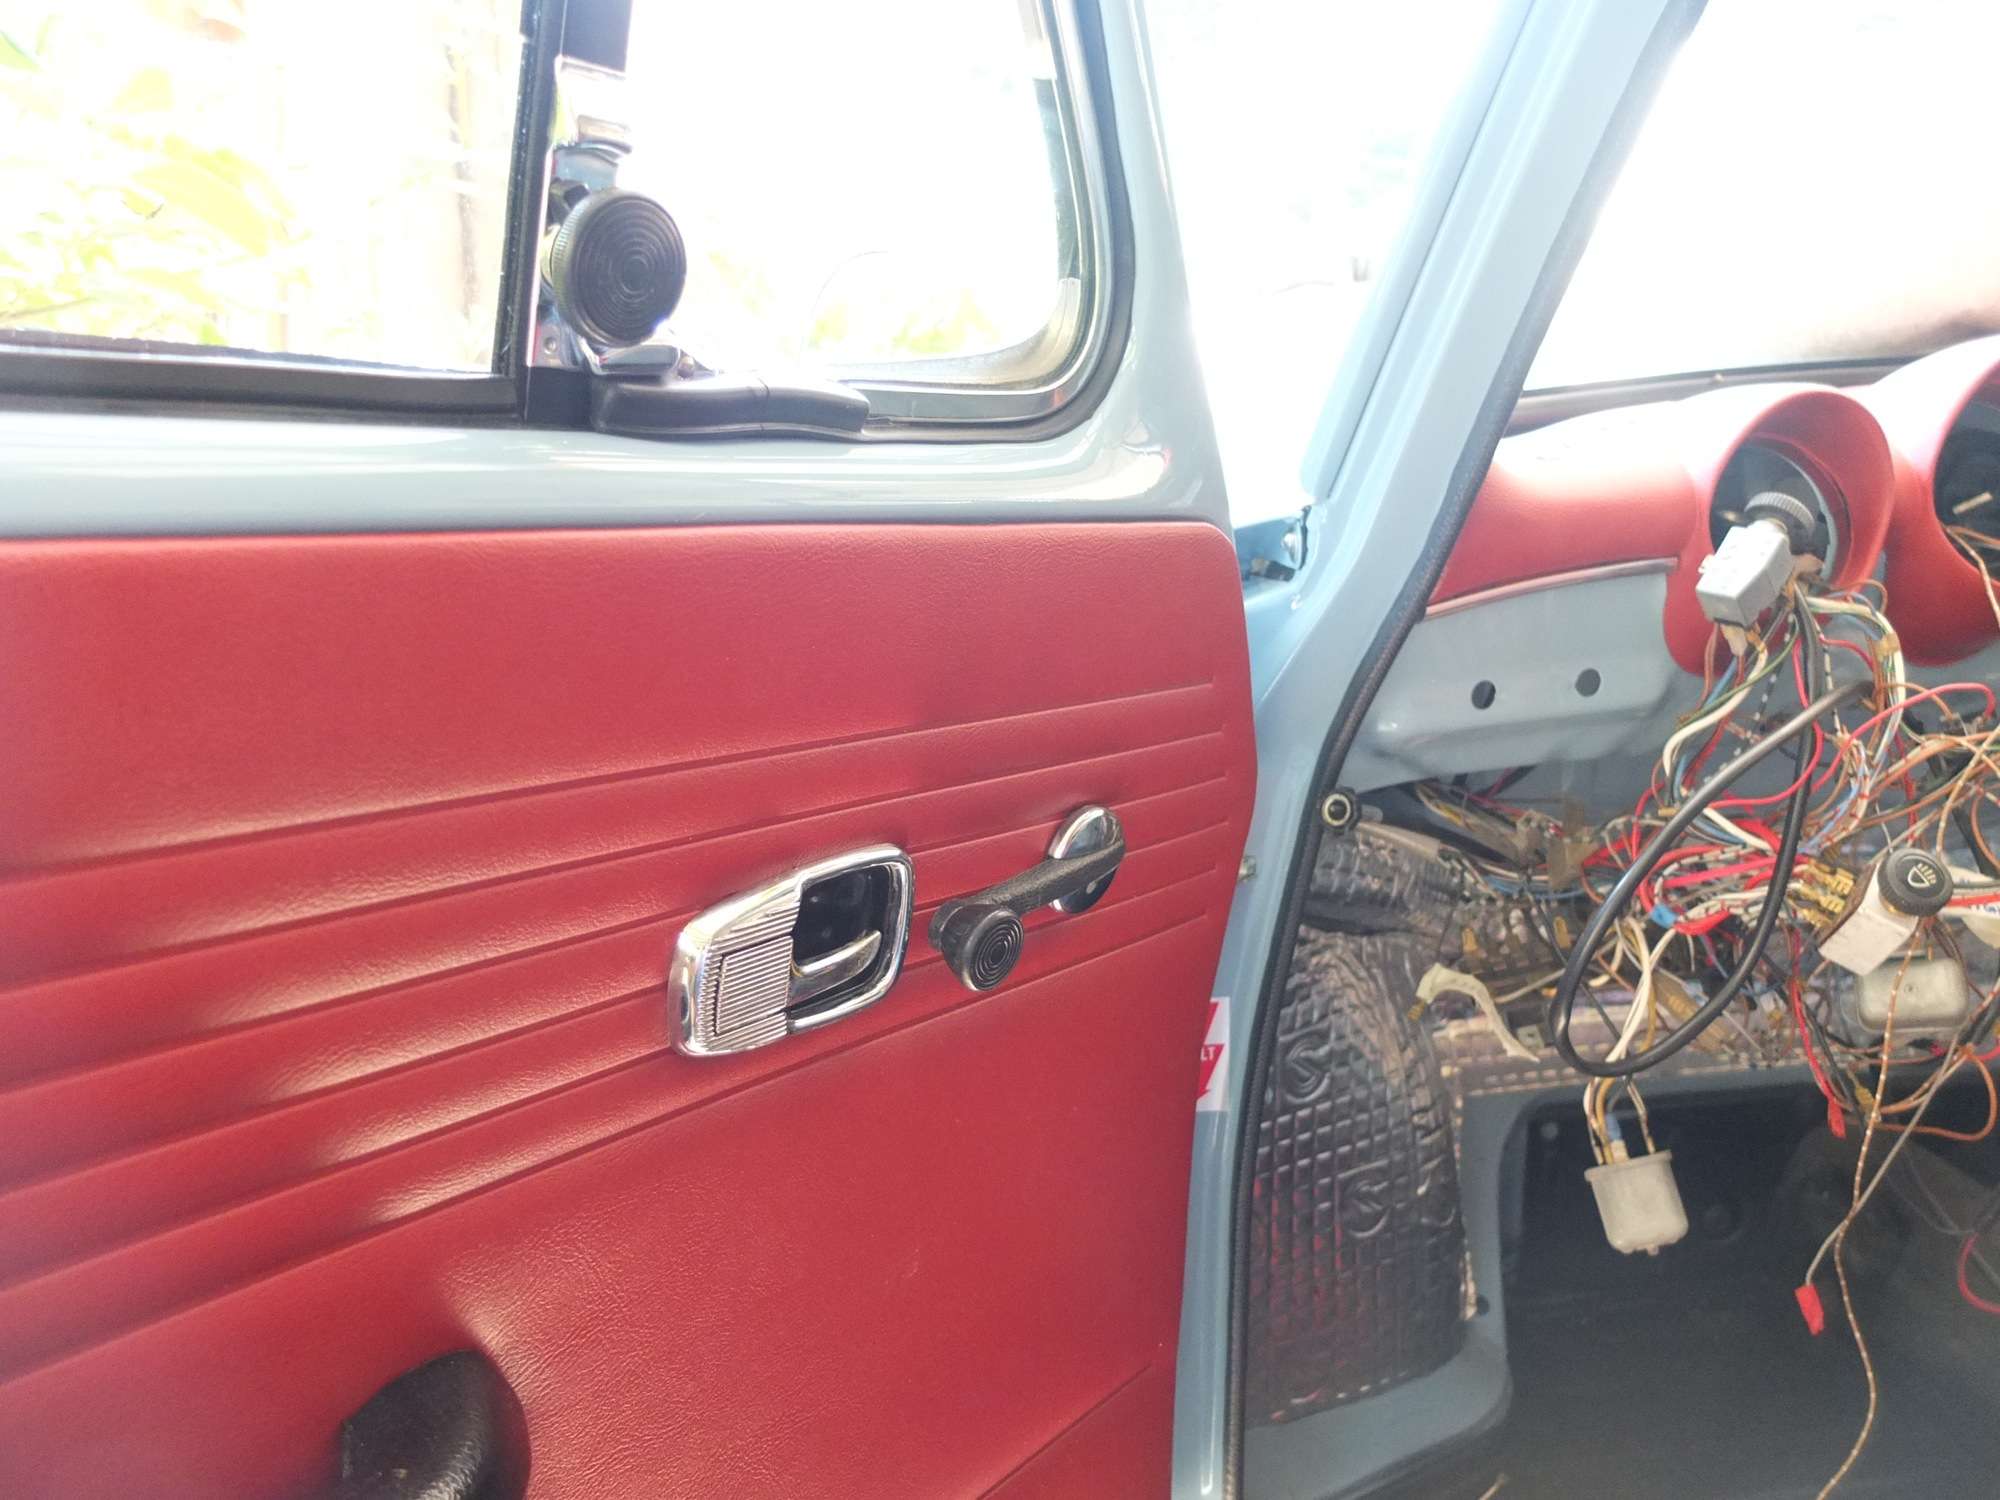
Fitted a flat4 early mirror to the door.
The alloy trim was busted up - took it apart from the scraper and straightened it up and then also painted with Trim Black.
New type 1 bug scraper trimmed down to size and fitted with E6000 industrial glue - I was going to also rivet on using the original plate but the glue is SO strong.

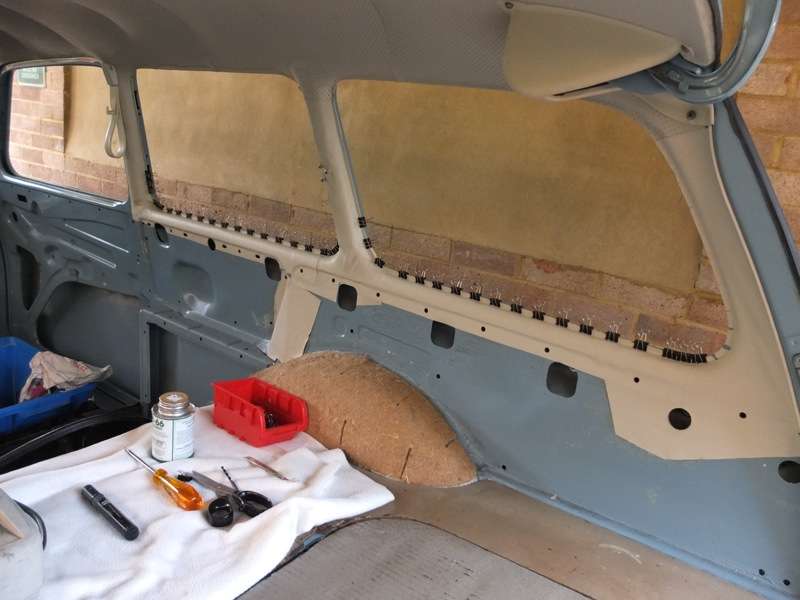
final bits of headlining now done - fussy bits around pillars - most of this will get covered up with the interior panels.

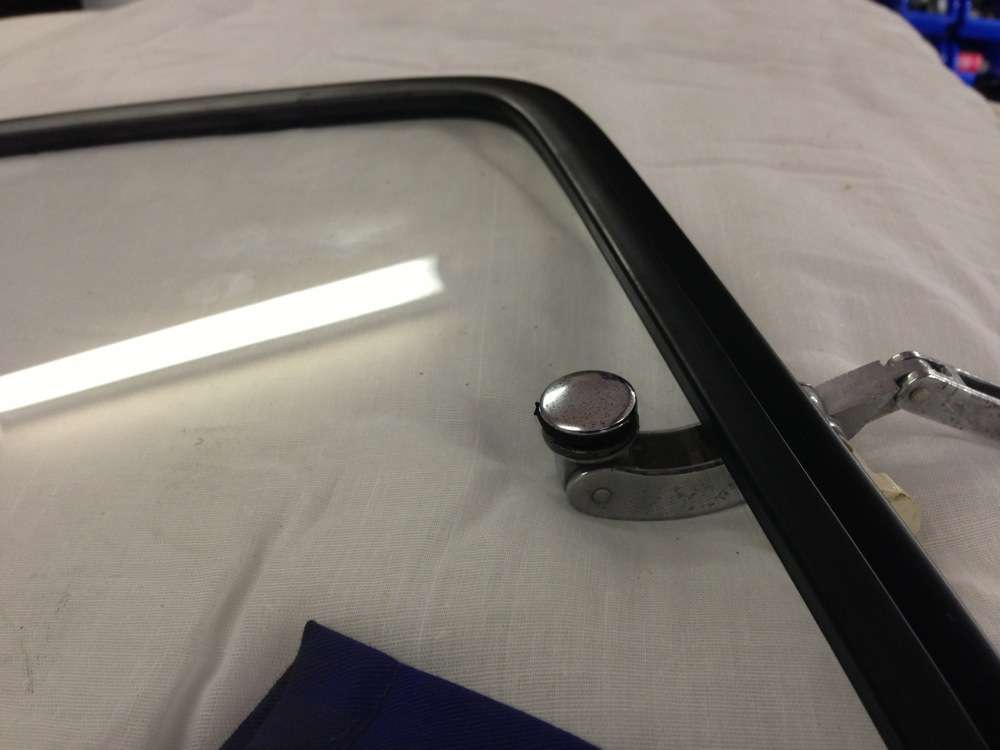
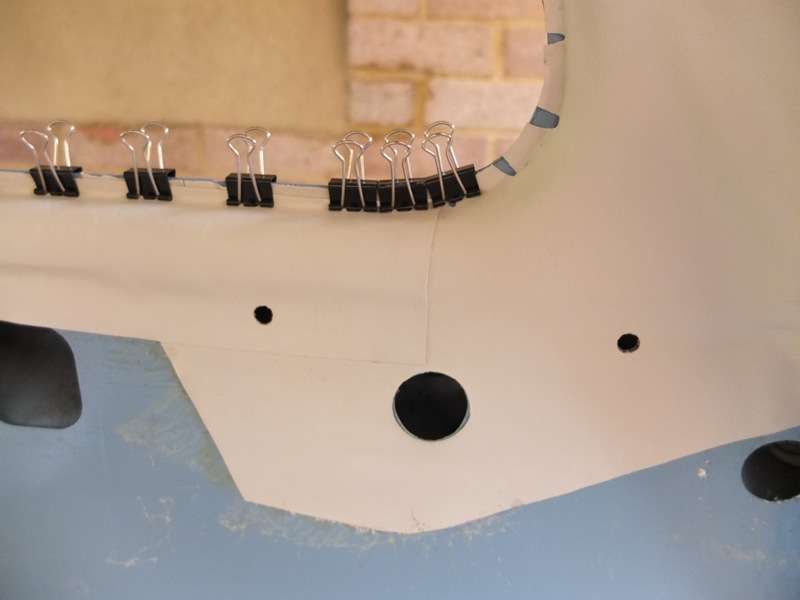
The popouts are now rebuilt with new inner and outer seals and now I have to figure out how to fit them - definitely not a one person job!
With new rubbers, the hooks do not want to go into the pillar slots - ANY ADVICE GUYS?
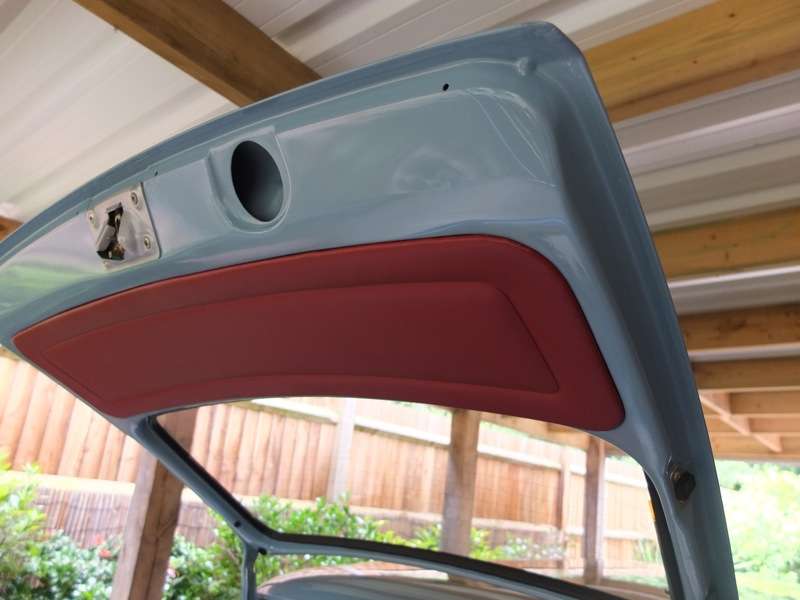
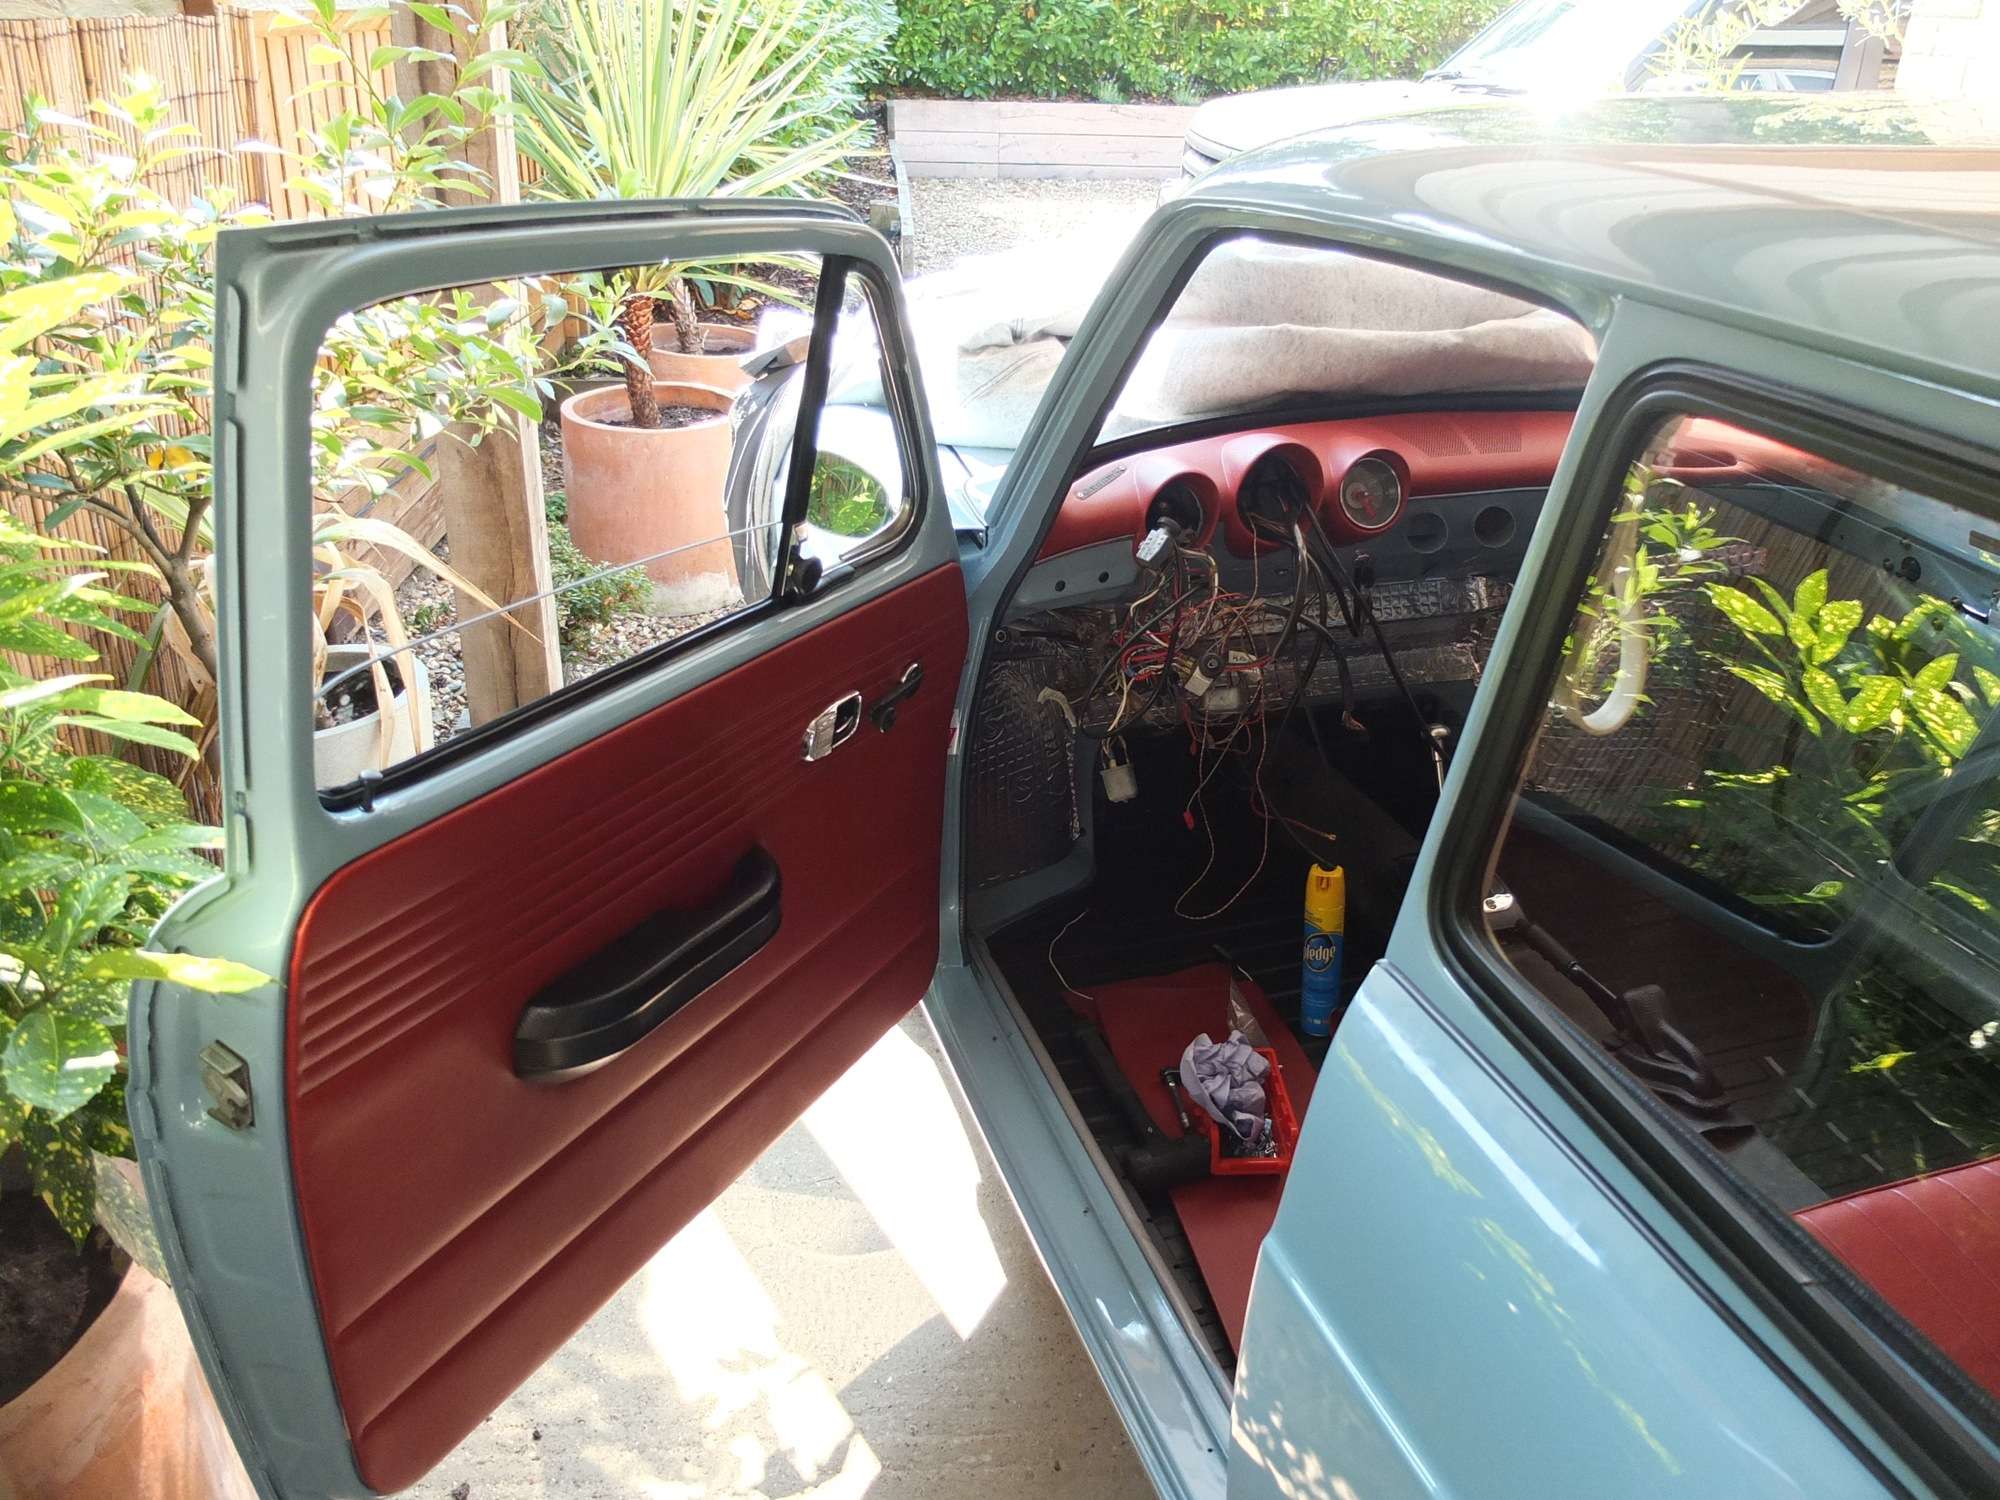
The red dash comes out brighter in photos - but definitely brightens up the car inside.
I painted this with SEM colourcoat and used 'Firethorn Red' - this is a really good match to TMI dark red - "17' - I have always liked the look of red interiors like the rare Pigalle Type 3s which came in red or black only for early cars.
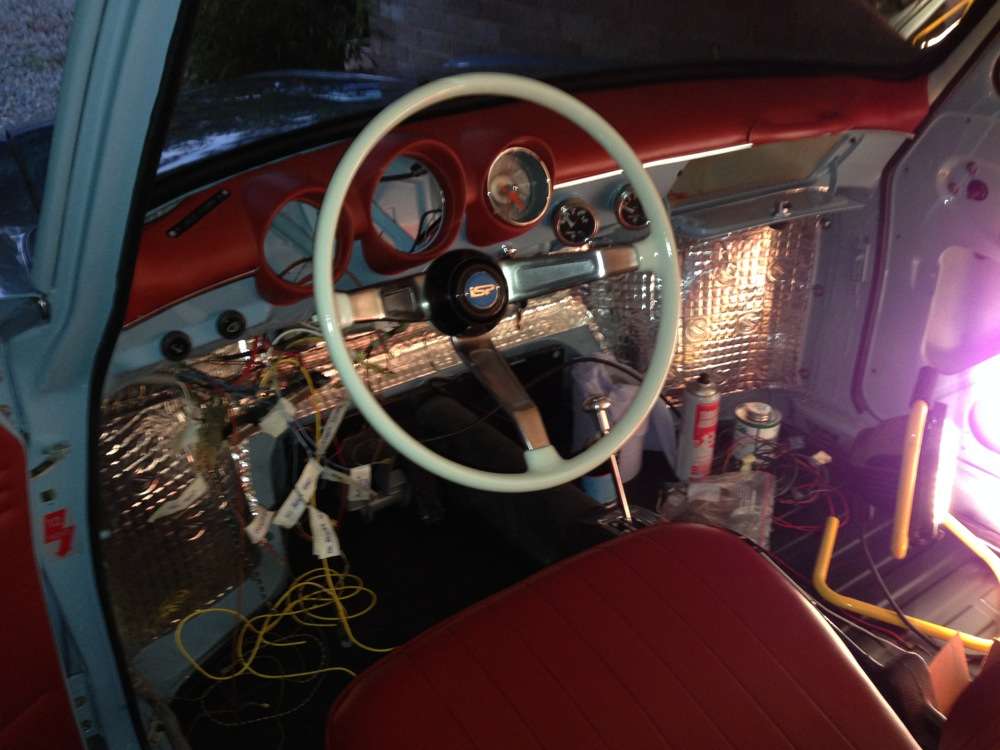
The gauge holders were welded into the dashboard where the ashtray used to be.
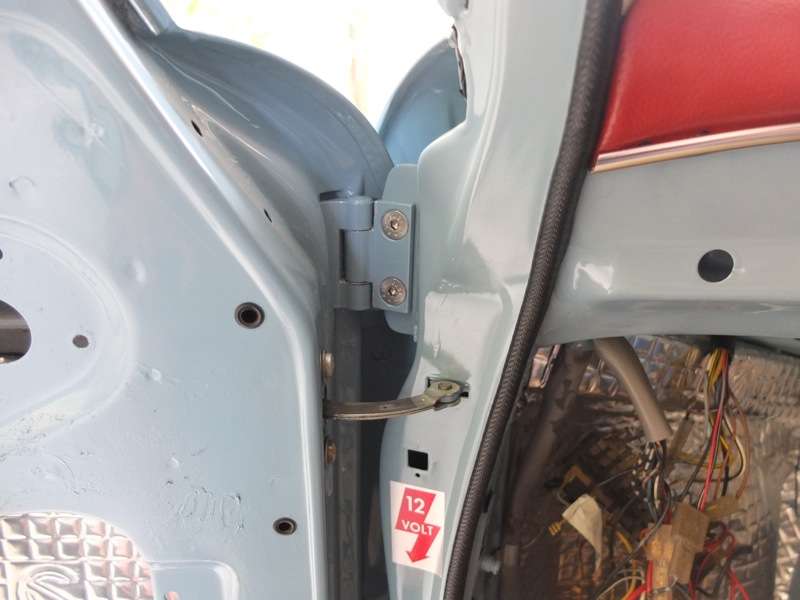
The ignition was moved to the dashboard - I am using an early bug column and switchgear to clean up the interior.

Quarter windows took a lot of time to dissemble, rub down, paint 4 coats of satin black - using SEM Trim Black - great stuff.
Fitted a flat4 early mirror to the door.
The alloy trim was busted up - took it apart from the scraper and straightened it up and then also painted with Trim Black.
New type 1 bug scraper trimmed down to size and fitted with E6000 industrial glue - I was going to also rivet on using the original plate but the glue is SO strong.
final bits of headlining now done - fussy bits around pillars - most of this will get covered up with the interior panels.
The popouts are now rebuilt with new inner and outer seals and now I have to figure out how to fit them - definitely not a one person job!
With new rubbers, the hooks do not want to go into the pillar slots - ANY ADVICE GUYS?
The red dash comes out brighter in photos - but definitely brightens up the car inside.
I painted this with SEM colourcoat and used 'Firethorn Red' - this is a really good match to TMI dark red - "17' - I have always liked the look of red interiors like the rare Pigalle Type 3s which came in red or black only for early cars.
The gauge holders were welded into the dashboard where the ashtray used to be.
The ignition was moved to the dashboard - I am using an early bug column and switchgear to clean up the interior.
The variant Project
Re: 1970 Squareback Project
great attention to detail as ever! I used some of that Silent Coat in my car, it's great stuff and reasonably cheap compared to Dynamat.
Mark.
Mark.
my 1968 Fastback Automatic build thread
viewtopic.php?f=4&t=6896
viewtopic.php?f=4&t=6896
Re: 1970 Squareback Project
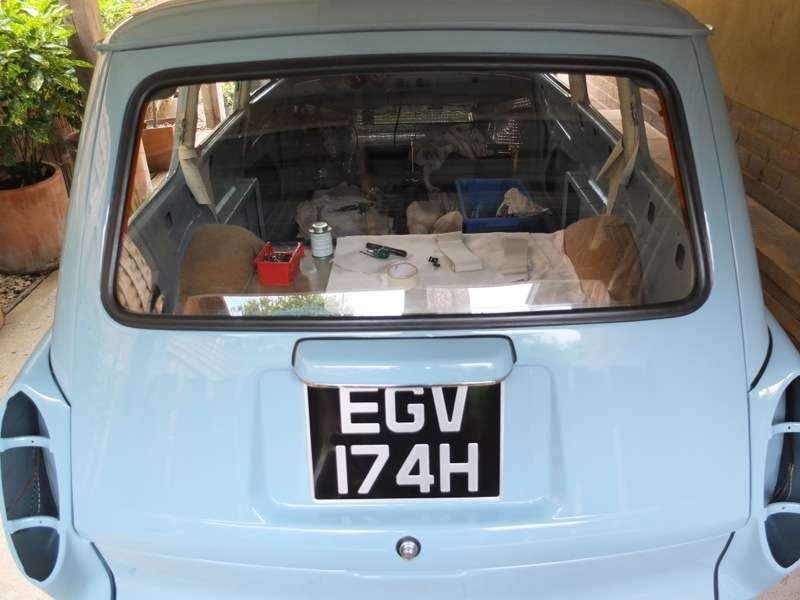
Been busy working on the square.
Fitted up and gapped the panels and finally started to put the interior together - starting to look like a car now...
Bit warm working on the car inside though...
 Uploaded with ImageShack.com
 Uploaded with ImageShack.com
 Uploaded with ImageShack.com
 Uploaded with ImageShack.com
 Uploaded with ImageShack.com
carpet next - not looking forward to that...
Fitted up and gapped the panels and finally started to put the interior together - starting to look like a car now...
Bit warm working on the car inside though...
Uploaded with ImageShack.comUploaded with ImageShack.comUploaded with ImageShack.comUploaded with ImageShack.comUploaded with ImageShack.comcarpet next - not looking forward to that...
The variant Project
Re: 1970 Squareback Project
looking good.. are you getting a carpet kit or going to make up a set yourself..
did you put some silent coat on the floor pan aswell or going to lay some underfelt before carpets..
keep it going looking very well..
did you put some silent coat on the floor pan aswell or going to lay some underfelt before carpets..
keep it going looking very well..
You Love It.!!!
Re: 1970 Squareback Project
I have a TMI grey carpet kit which I am using with some mods.
Am going with a few sheets of silentcoat, plus multi-strand cotton underlay then carpet kit only glued to edges and tunnel.
I have a full set of rubber backed coco mats in black and red that pretty much cover everything up!
Ideally I would like original base model rubber over tunnel mats but still not found any...
The variant Project
-
type3willy
- Posts: 312
- Joined: 28th November 2004 - 10:02am
- Location: Santander (SPAIN)
Re: 1970 Squareback Project
Good job man!. One question: where did you get the inner and outer rubbers for the pop-out windows?
Where is the engine?
Re: 1970 Squareback Project
just noticed your windscreen looks extremely clean, is it a new one and if so where from? mine has lots of tiny stone chips in it and I'd like a better one for when I do my rubbers..
Mark.
Mark.
my 1968 Fastback Automatic build thread
viewtopic.php?f=4&t=6896
viewtopic.php?f=4&t=6896
Re: 1970 Squareback Project
I think the rubbers came from statusvw here in the UK. However I ended up buying 2 sets of inners so have a spare pair if you need some.
Changing the rubbers was not an easy job but not as hard as I thought.
I used a lot of silicone sprat which made assembly much easier.
Changing the rubbers was not an easy job but not as hard as I thought.
I used a lot of silicone sprat which made assembly much easier.
type3willy wrote:Good job man!. One question: where did you get the inner and outer rubbers for the pop-out windows?
The variant Project
Re: 1970 Squareback Project
I found a reasonably good used one MArko and then polished it with glass polish to remove most of the dull areas from the wipers.
Marko wrote:just noticed your windscreen looks extremely clean, is it a new one and if so where from? mine has lots of tiny stone chips in it and I'd like a better one for when I do my rubbers..
Mark.
The variant Project
-
bigbadbadge

- Posts: 172
- Joined: 20th June 2010 - 7:21pm
- Location: Greatstone, Kent, UK
Re: 1970 Squareback Project
Wow looks fantastic so far, keep up the good work.
All the best
Chris
All the best
Chris
Re: 1970 Squareback Project
Has been a while since I got to do anything on the square - lots of wiring and interior over the past couple of weekends.
Opened the front and relealised I had not sent diagrams of the Eberspacher brackets to you Marko - will get that to you.
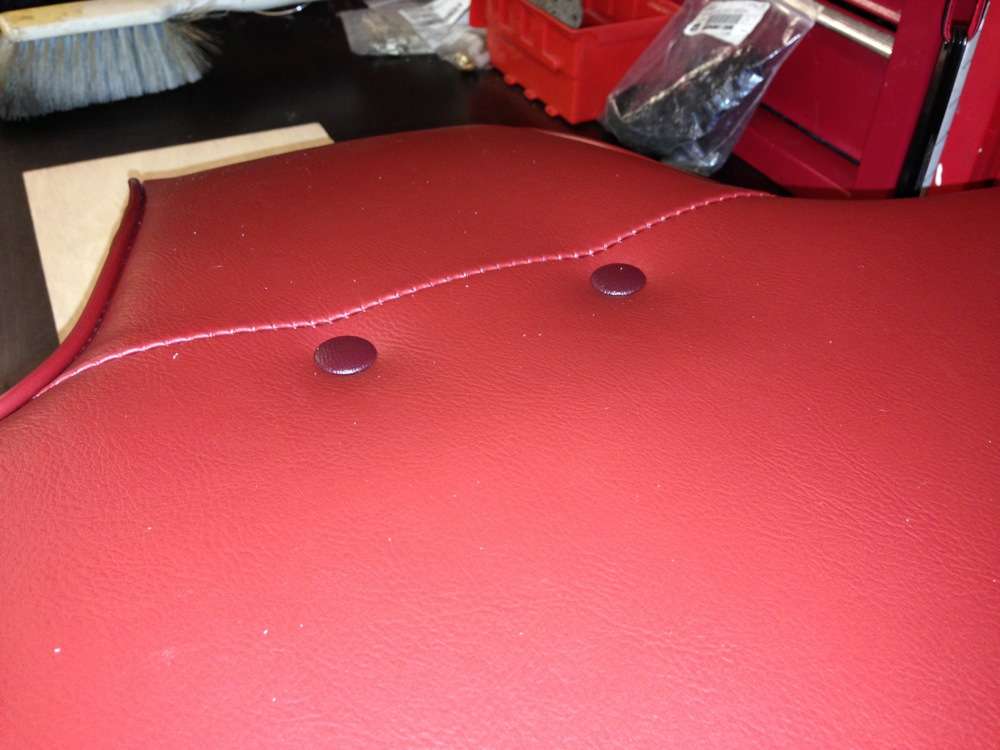
First up was the front seats - re-foamed, covered, painted, wired for heaters and TMI covers stitched on - the hardest bit being fitting the buttons to the front -
 Uploaded with ImageShack.com
 Uploaded with ImageShack.com
 Uploaded with ImageShack.com
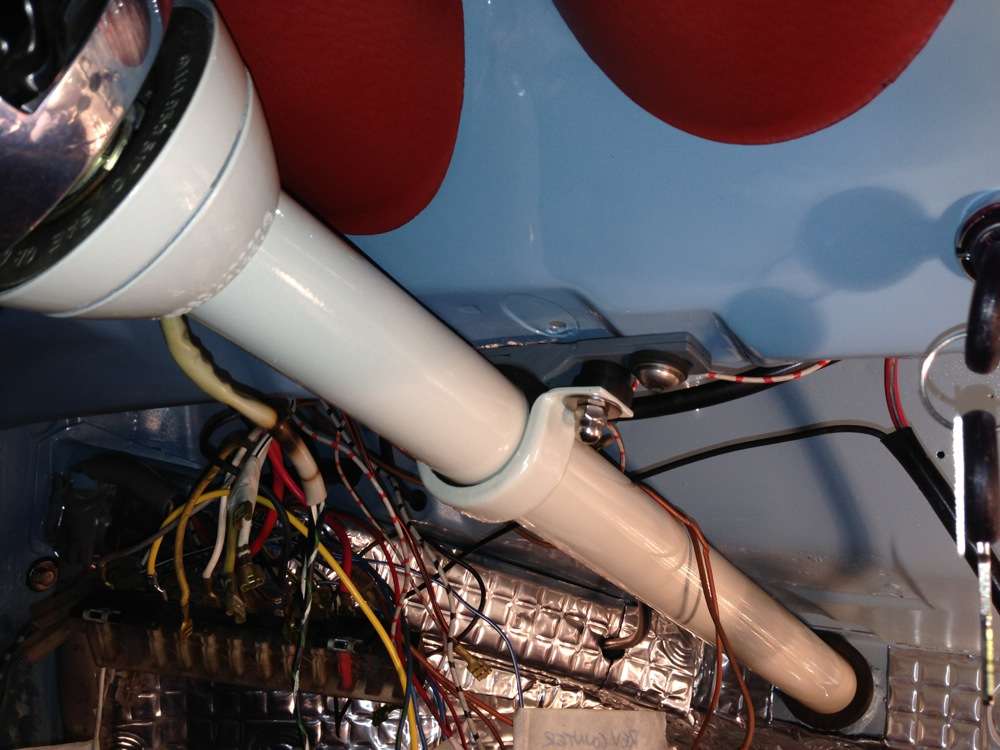
then the oval beetle column and mount - a lot of cutting to get it where I wanted - for a bit more leg room:
 Uploaded with ImageShack.com
 Uploaded with ImageShack.com
then time to fit the front lights:
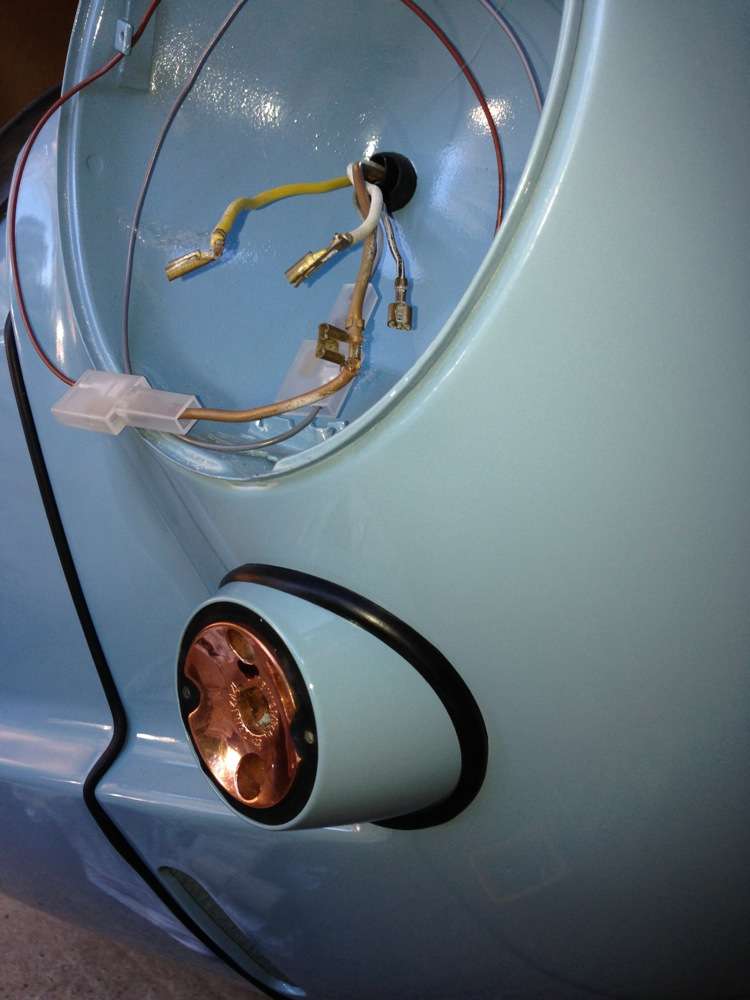 Uploaded with ImageShack.com
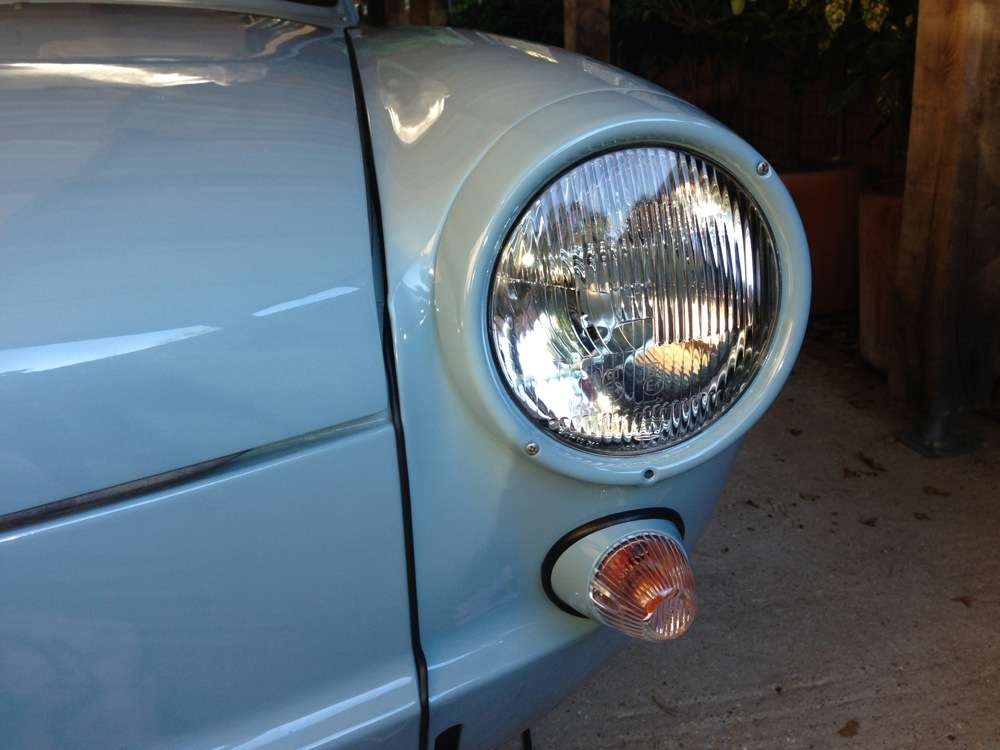 Uploaded with ImageShack.com
final few circuits and it can come to life...
Opened the front and relealised I had not sent diagrams of the Eberspacher brackets to you Marko - will get that to you.
First up was the front seats - re-foamed, covered, painted, wired for heaters and TMI covers stitched on - the hardest bit being fitting the buttons to the front -
Uploaded with ImageShack.comUploaded with ImageShack.comUploaded with ImageShack.comthen the oval beetle column and mount - a lot of cutting to get it where I wanted - for a bit more leg room:
Uploaded with ImageShack.comUploaded with ImageShack.comthen time to fit the front lights:
Uploaded with ImageShack.comUploaded with ImageShack.comfinal few circuits and it can come to life...
The variant Project