Thanks broady, im getting there "eventually"
that was a good while ago that i had a go at electrolysis, and im telling you .....that s@#t really works.
i found it really affective, what i did was youtube the arse out of it and gather up the info on the do's and donts.
there is a shed load of info on it, all pretty similar at the end of it.
what you will notice is, is that most people use a 12v car battery charger to connect up to the electrodes and the piece that there treating but i found this waaaaay to slow progress.the reaction was very slow and only small bubbles were seen. so i substituted the battery charger for a welder instead, this gave instant results, but the basic set up consists of a bucket or container (not metal!!) place lengths or metal rod/rebar in the corners of the container standing upright, secured with cable ties, connect all these bars together, i had a bit of 6mm cable around so used that, fill the container with water and throw in half a box of baking soda, lay a piece of bar/wood across the top of the container (if you use metal rod make sure it doesnt touch the other rods in the corners of the container, suspend a piece of wire from the bar/wood and attach the piece that you want to treat, submerge the piece in the water, now attach your leads from your charger/welder, positive goes to your corner rods that are all connected together and the negative goes to the piece suspended in the water, turn on your power and watch the process begin. the welder worked really well in fact it actually boiled the water, i couldnt wait 10 hours for a piece to complete so the welder route had the job done in half an hour. watch out tho it does give off a gas, hydrogen i think, so no smoking!!. hope this helps a little bit, as i say there is any amount of info on the interweb but give it a go, it works...
the workshop is a bonus, im lucky ill admit, i used to do this sort of think when i was in the uk and all i had was a single garage with an up an over door but i managed some how. space is a something were not short of over here so no point in building a rabbit hutch.
orange fastback
Re: orange fastback
You Love It.!!!
Re: orange fastback
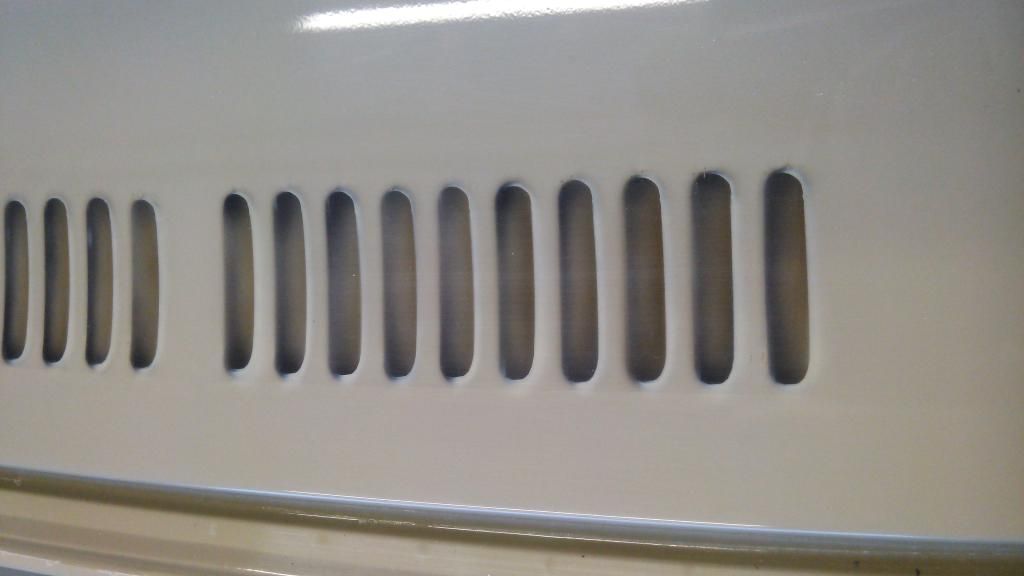
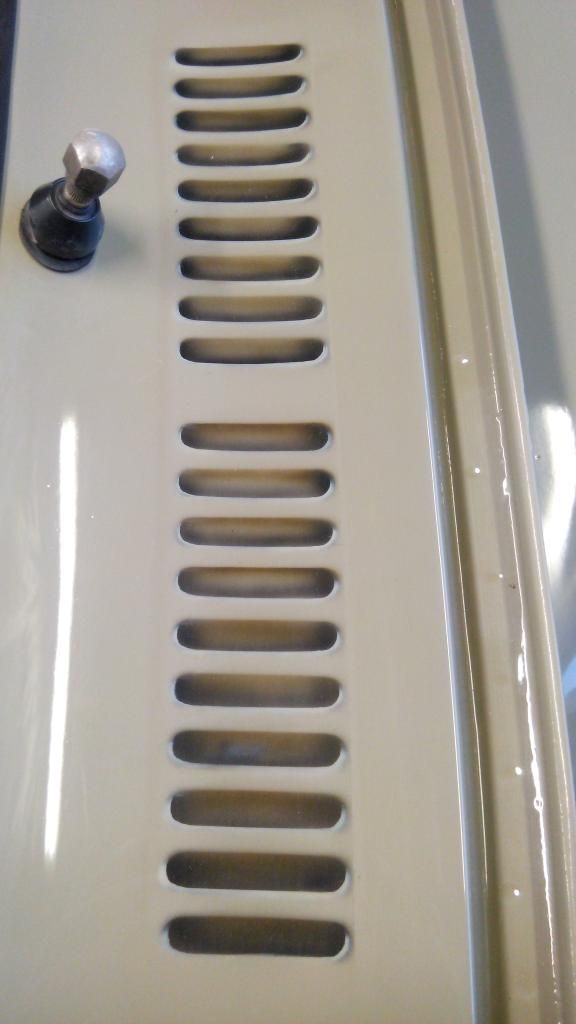
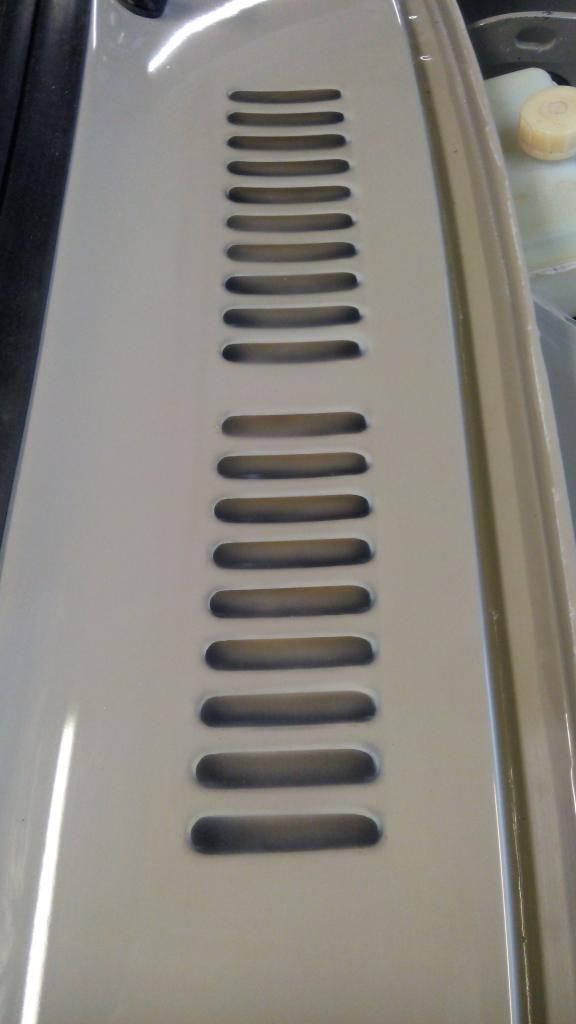
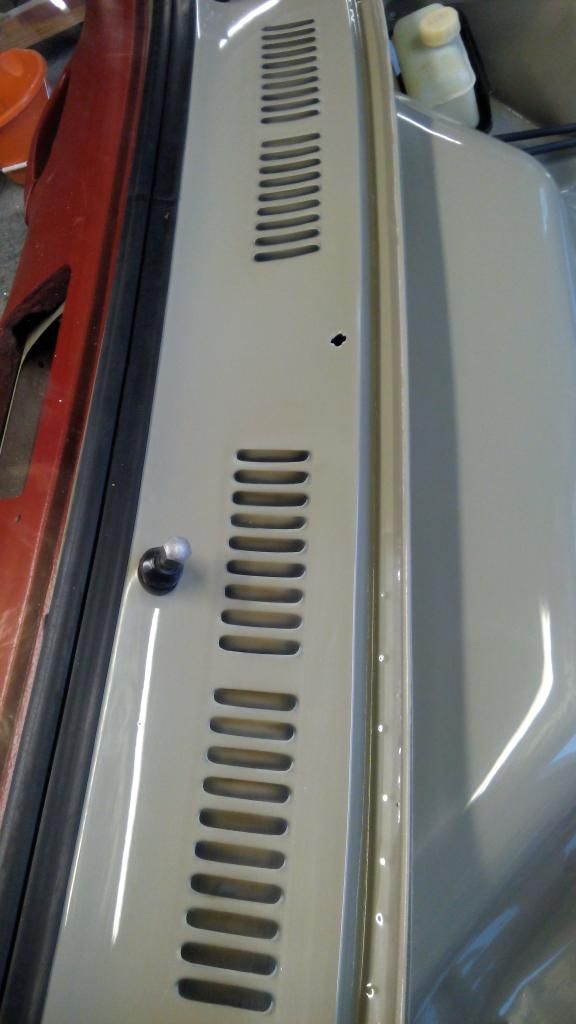
ok so i know i offended some people way back when i cut out the fresh air vents in the front panel
so i hope this goes some way to keeping them people happy..
so i hope this goes some way to keeping them people happy..
You Love It.!!!
Re: orange fastback
well did anyone rumble me on the "new" air vents!!
i thought id have to come to a compromise when i cut them out as i didnt wont anymore water problems, so instead i airbrushed imitation vents back on the panel to give the illusion..
i thought id have to come to a compromise when i cut them out as i didnt wont anymore water problems, so instead i airbrushed imitation vents back on the panel to give the illusion..
You Love It.!!!
Re: orange fastback
that's very clever and had me fooled for sure!
my 1968 Fastback Automatic build thread
viewtopic.php?f=4&t=6896
viewtopic.php?f=4&t=6896
Re: orange fastback
cheers mark....thought it might be a novel idea, havent seen it done before so thought....why not.
You Love It.!!!
Re: orange fastback
Loving that idea, nicely done 
Re: orange fastback
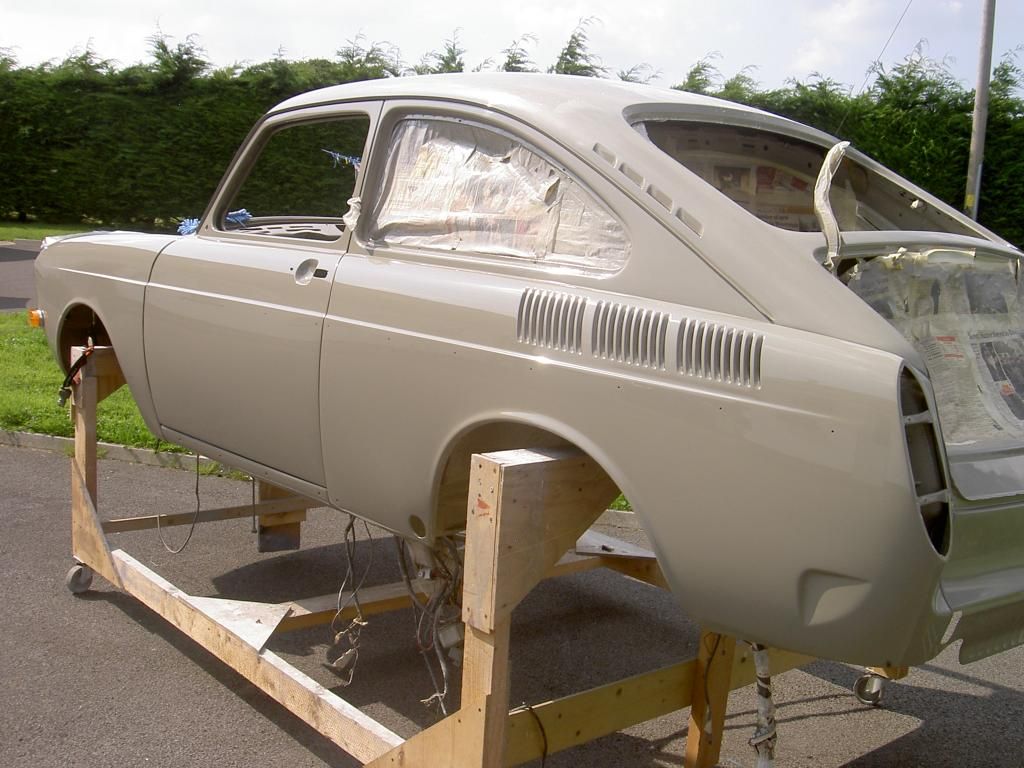
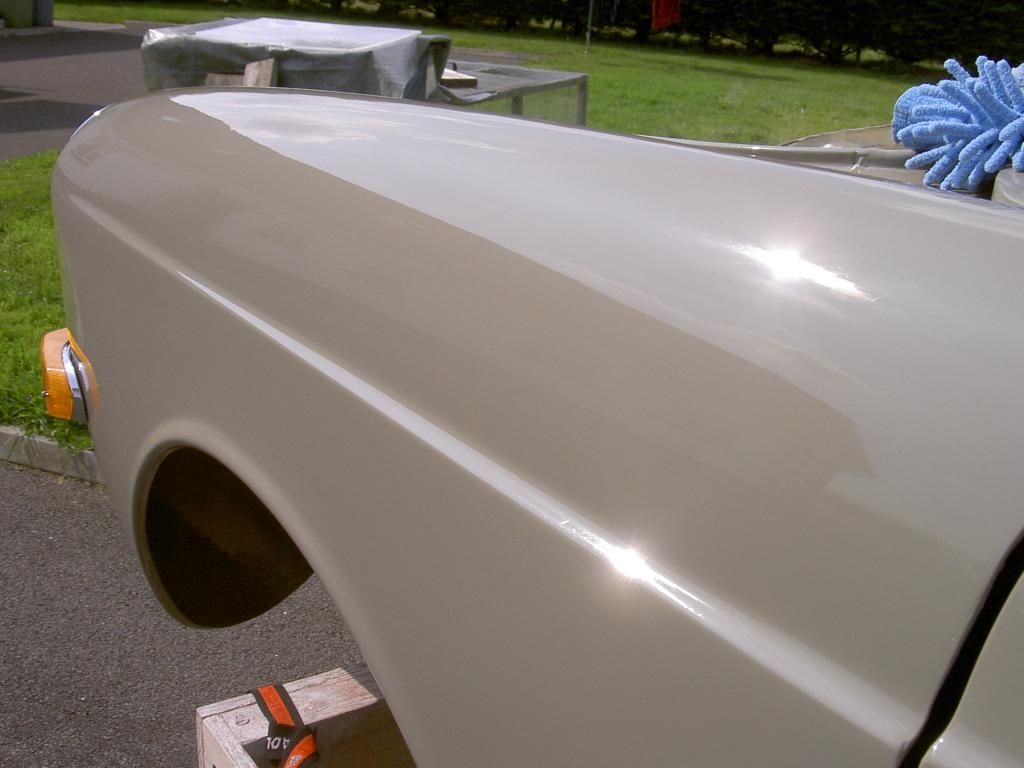
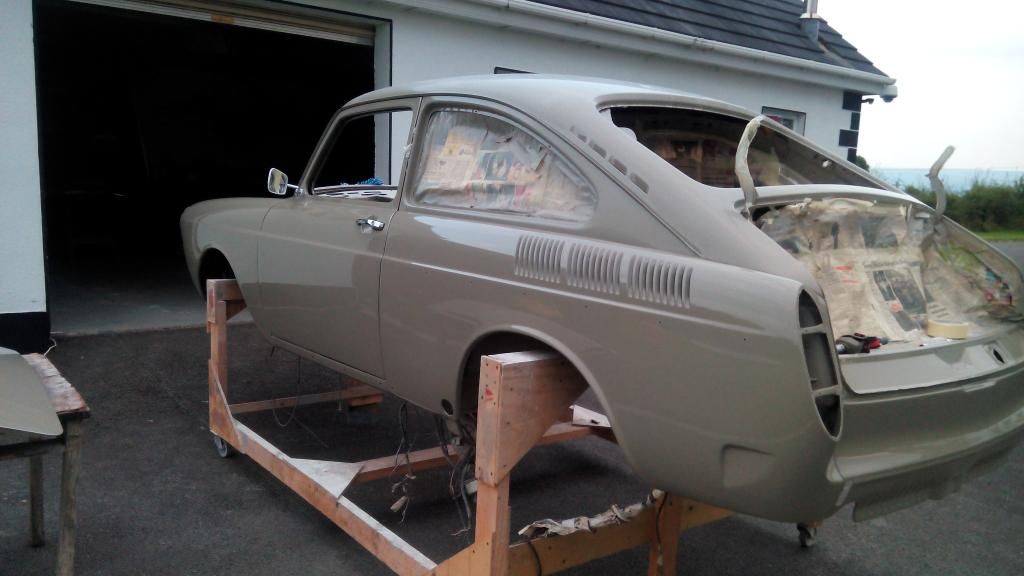
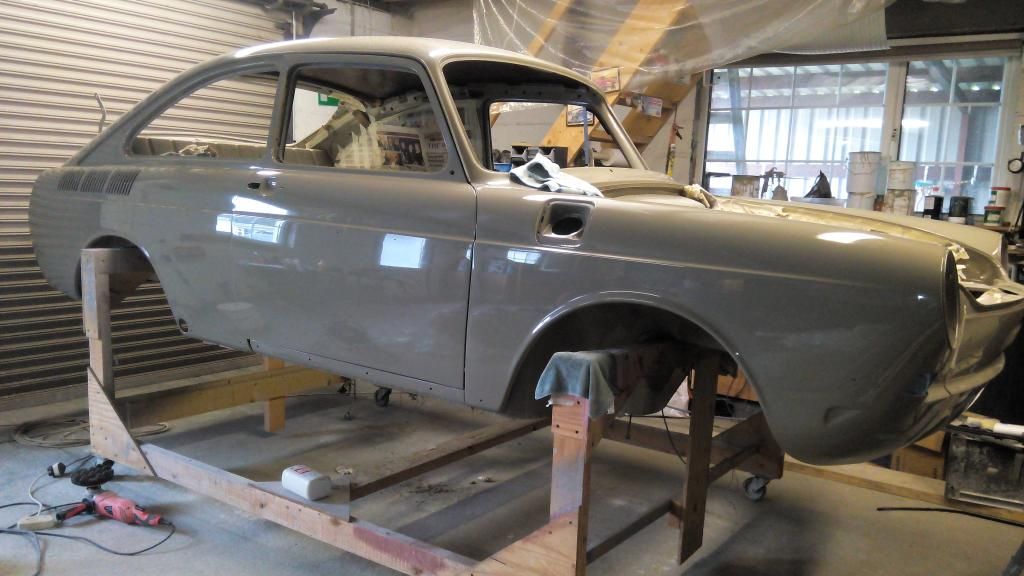
here are a few more pictures with the body off
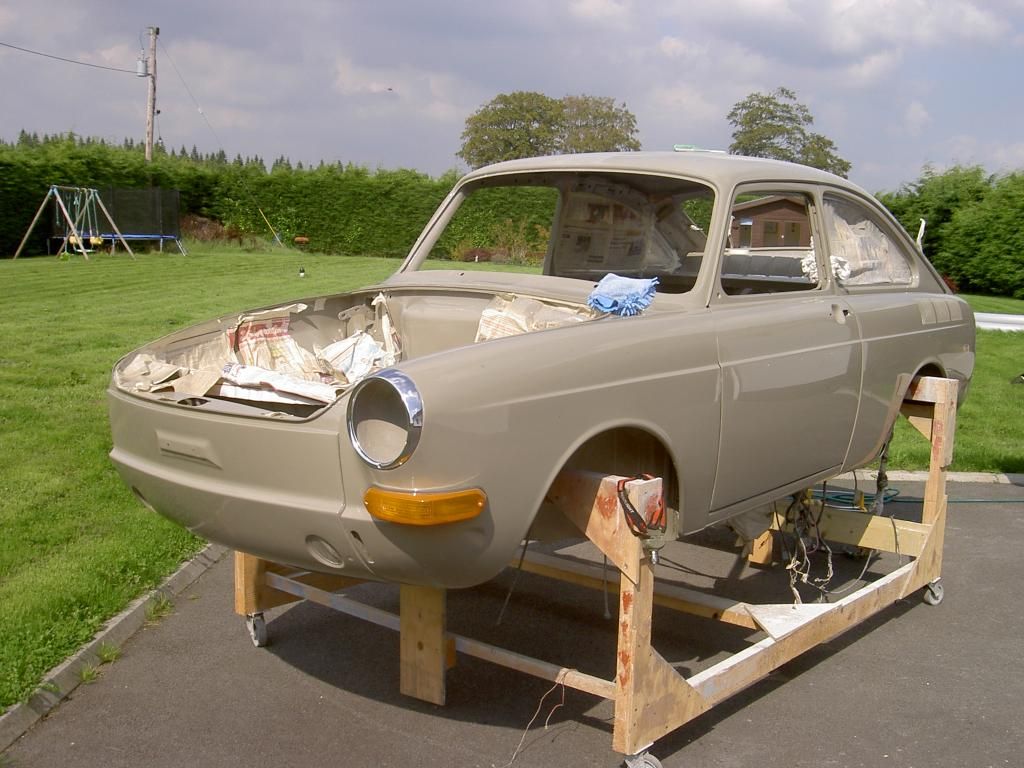

its always a good day when the body is put back on. thanks to a few mates a bit of muscle and an overseer it went straight back on with out a hitch....
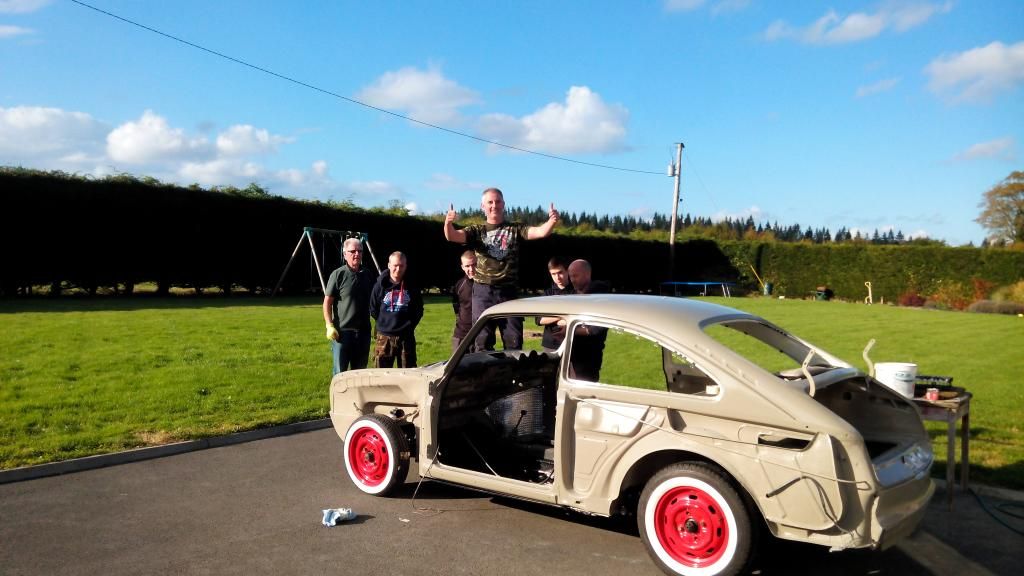
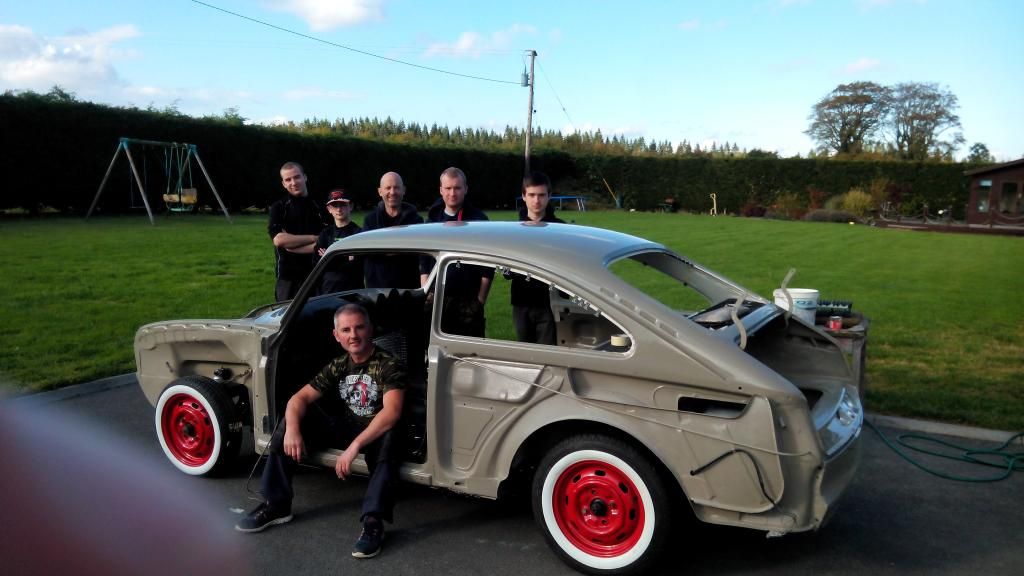
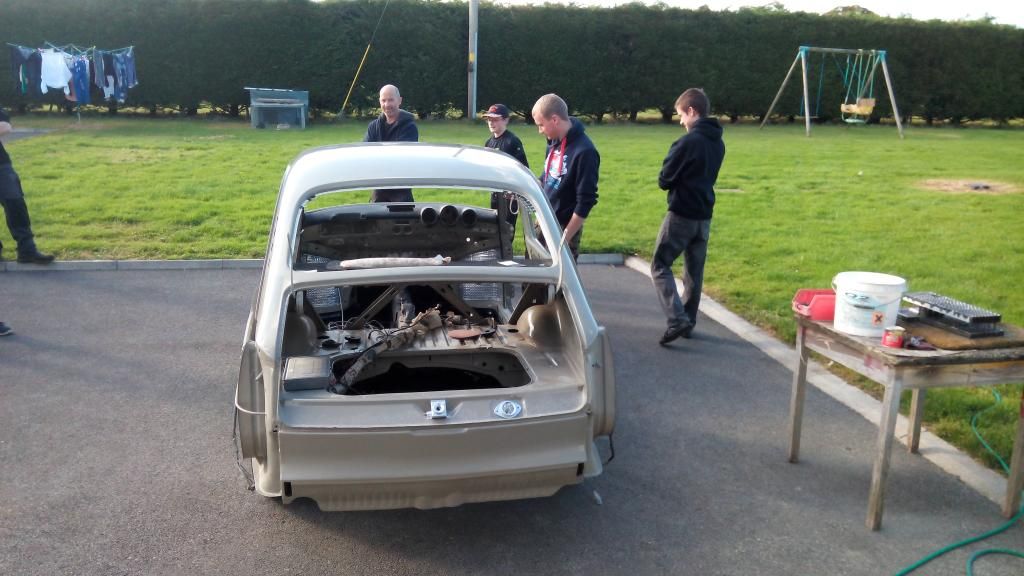

its always a good day when the body is put back on. thanks to a few mates a bit of muscle and an overseer it went straight back on with out a hitch....
You Love It.!!!
Re: orange fastback
looking great and a real milestone getting it back on the pan - keep going...
The variant Project
Re: orange fastback
I'm going to have to see those airbrushed vents for myself before I believe you - maybe the whole car is airbrushed, it looks so perfect. 
Cracking job, Gromit!
Cracking job, Gromit!
Dave.
Re: orange fastback
cheers for comments chaps. dave its turning out nicely not perfect by any means. i guess its all down to budget.
ive seen equally good type 3's last year at bugjam (beige notchback). a lovely unwelded example with brand new stainless bumpers allround , now thats my idea of getting pretty close to perfect.
ive seen equally good type 3's last year at bugjam (beige notchback). a lovely unwelded example with brand new stainless bumpers allround , now thats my idea of getting pretty close to perfect.
You Love It.!!!
Re: orange fastback
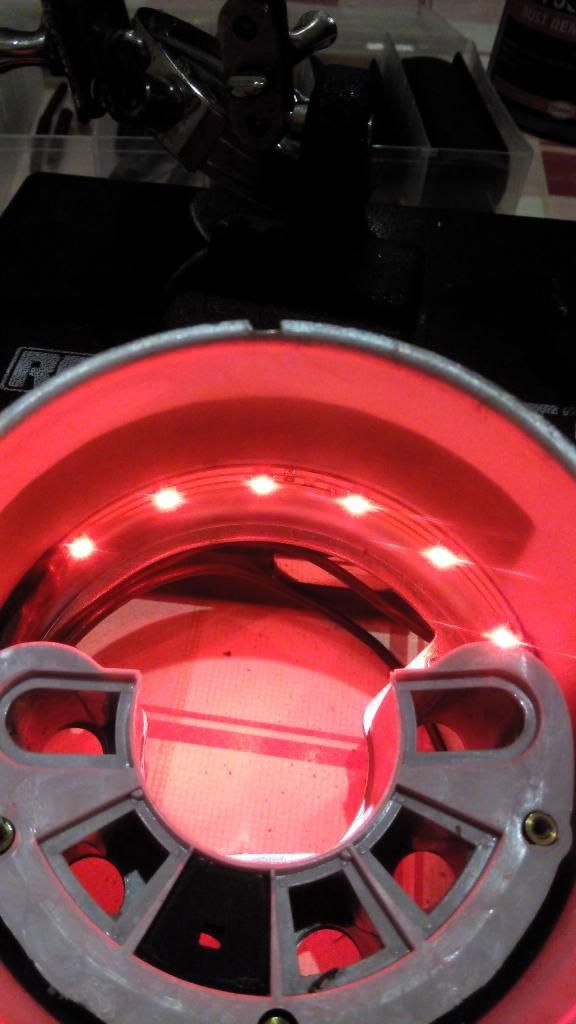
some work i done on the clocks and dash.
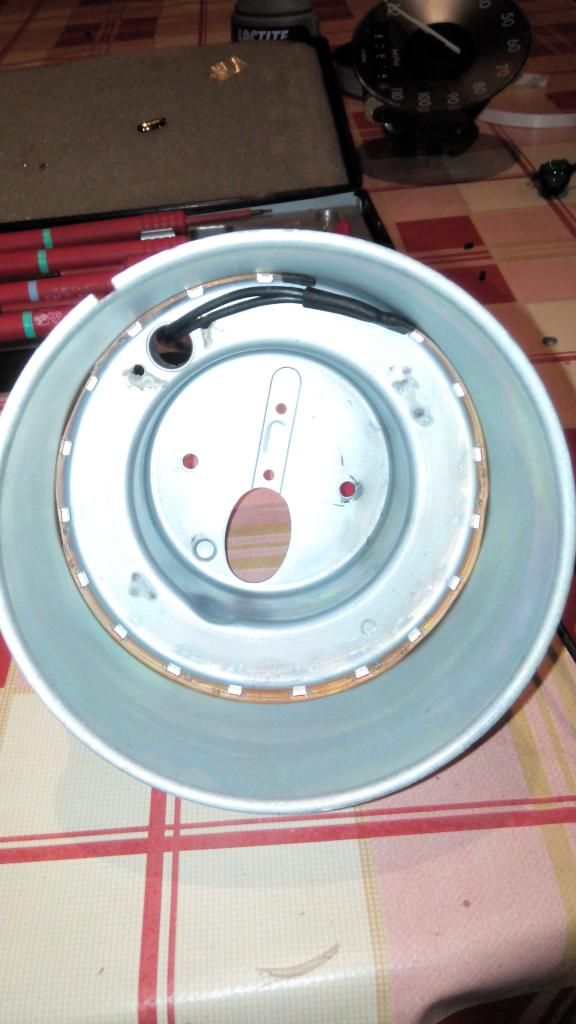
so we all know that your not likely to get arc eye from the lights in the dashboard cluster, so i upgraded them using low wattage L.E.D's
the sort that come on a roll have a self adhesive backing and operate on 12v.
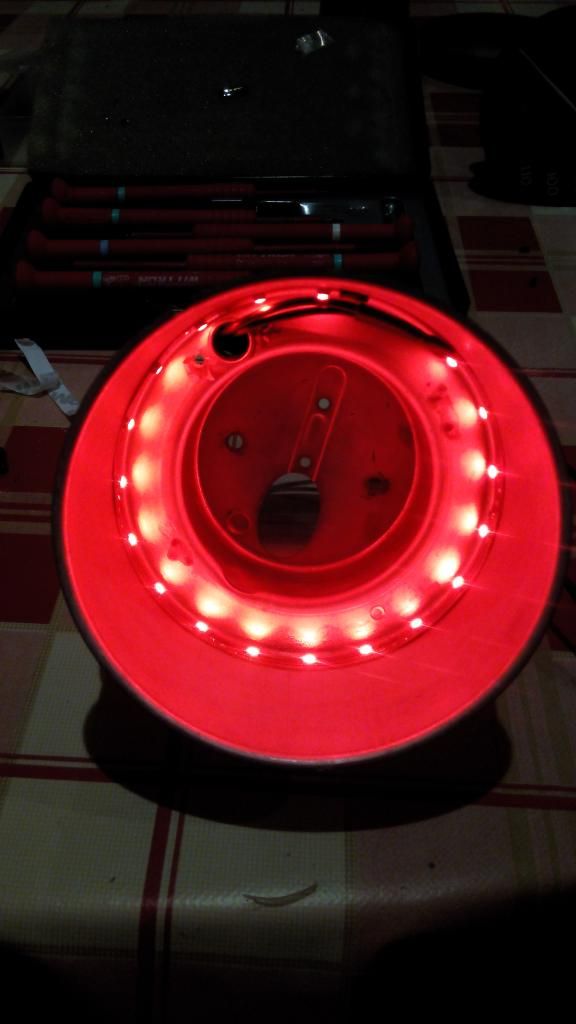
i striped all the clocks down and ran a ring of led's around the inside of each clock, sprayed up the bezels in silver and of course painted the needles in red..seeings as theres a red theme going on..
heres what it looks like lit up.
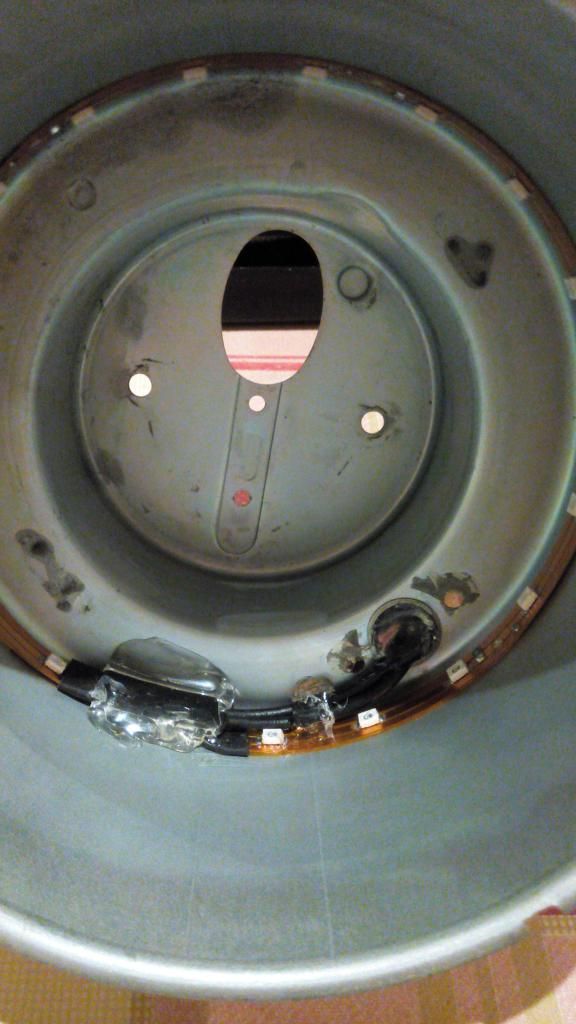
after the wiring was routed through the original lamp entry hole
i hot glued the hole and and the end of the led row just to make it extra secure, aswell as that the wires can not be pulled from inside the clock
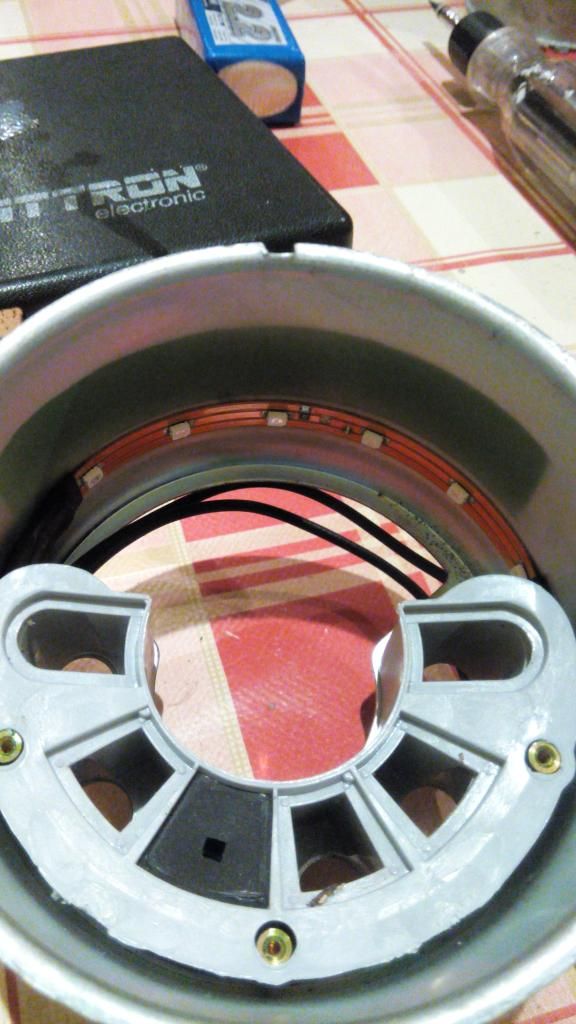
this is them wired up on the kitchen table using a 12v lipo battery

the dash had some bad splits in it, it was really showing its age
i grooved out the cracks enough to allow for a good adhesion when i put the 2 part plastic filler in.

i have used a load of different fillers and glues but NONE come close to this stuff when it comes to smell
this stuff is nasty!!!

after i let it set i wasnt happy with the finish, a small flex of the dash showed a hair line crack in the repair so i was pretty sure it would show up in the paint..
the only way i could see fit to cure this was to cover the complete affected area with fibreglass and fill it.
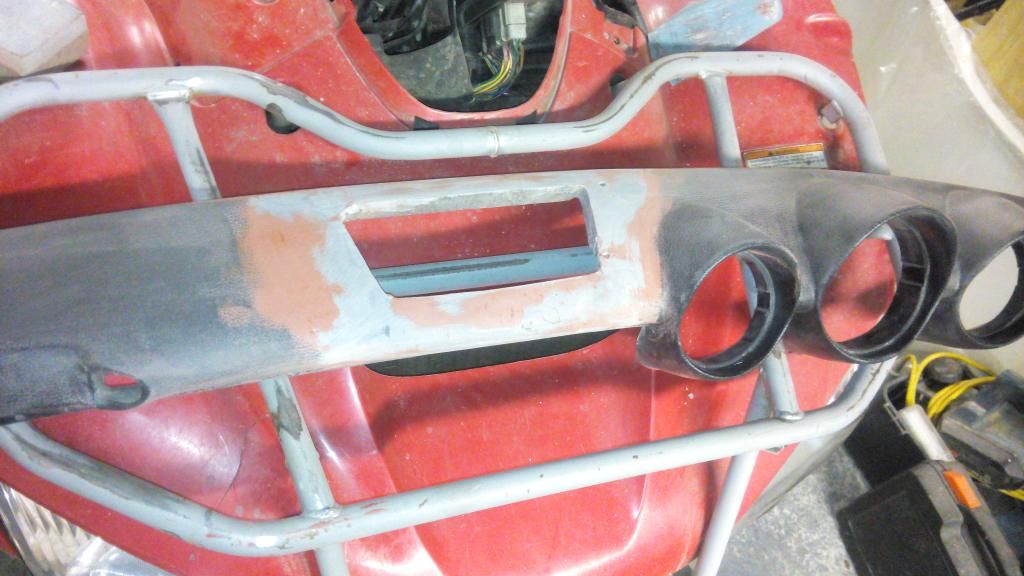
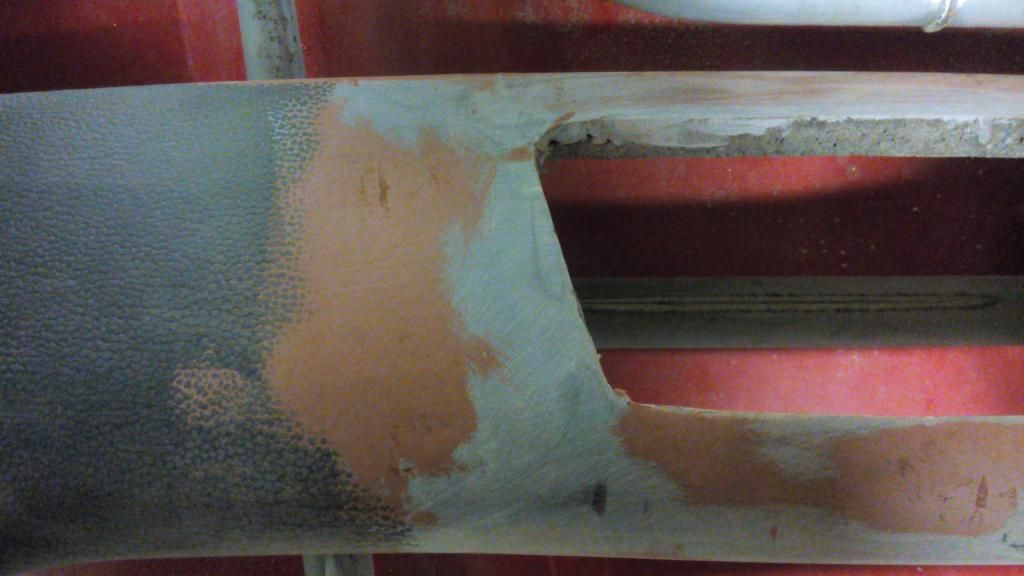
but this took the original ripple effect away and left it with a flat surface.
so to put it back (and this is very untested and unorthodox but had to try it)
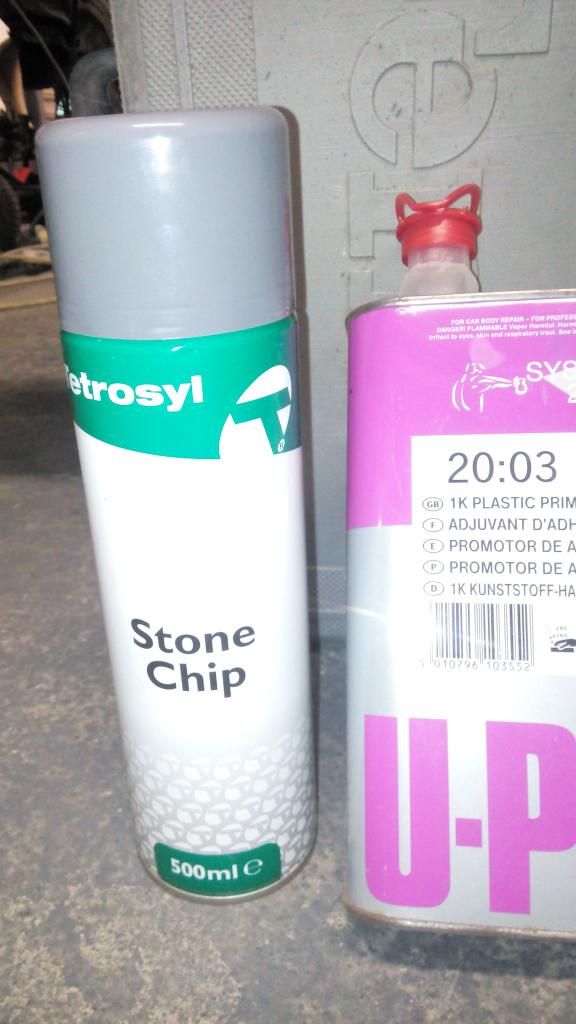
i sprayed the dash with a plastic 1k clear primer, then layed a light coat of aerosol stonechip over it..
i got to say the effect is very convincing,

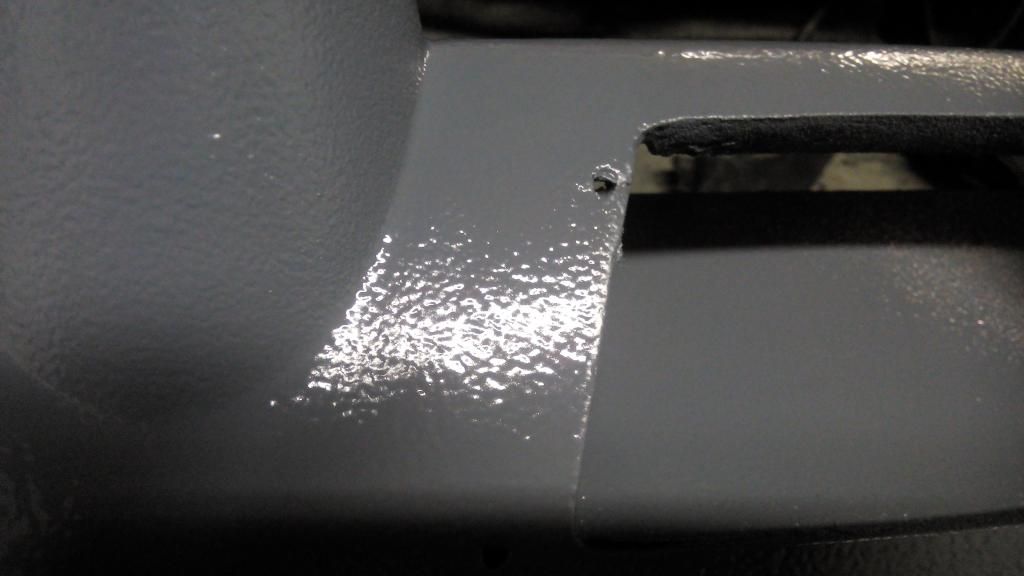
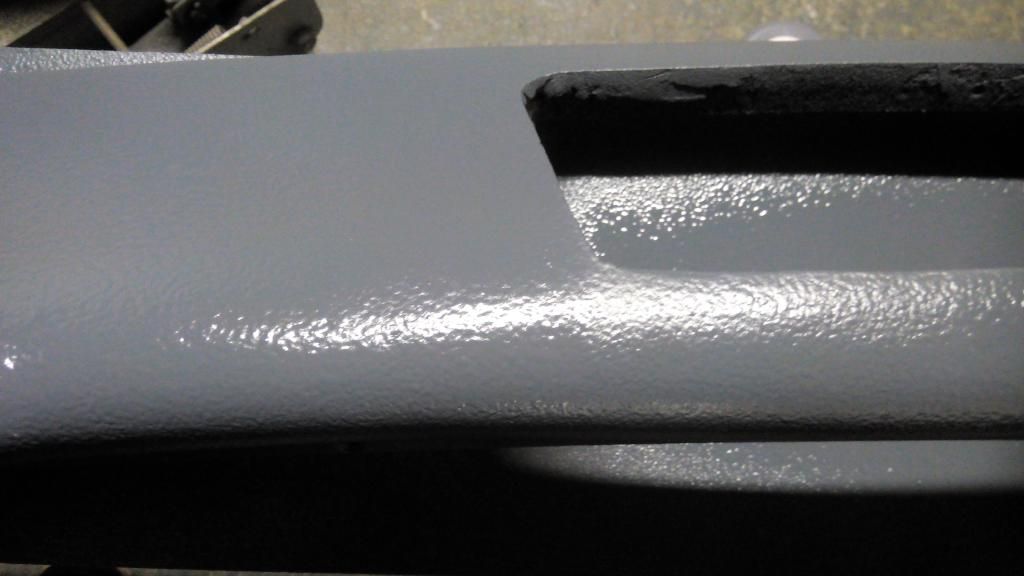
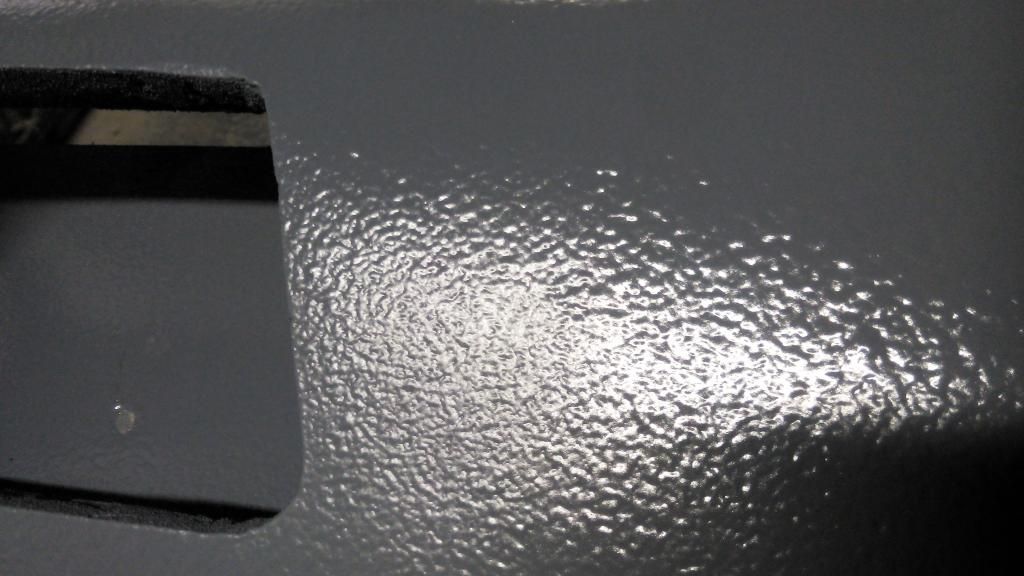
time will tell how well this fairs out
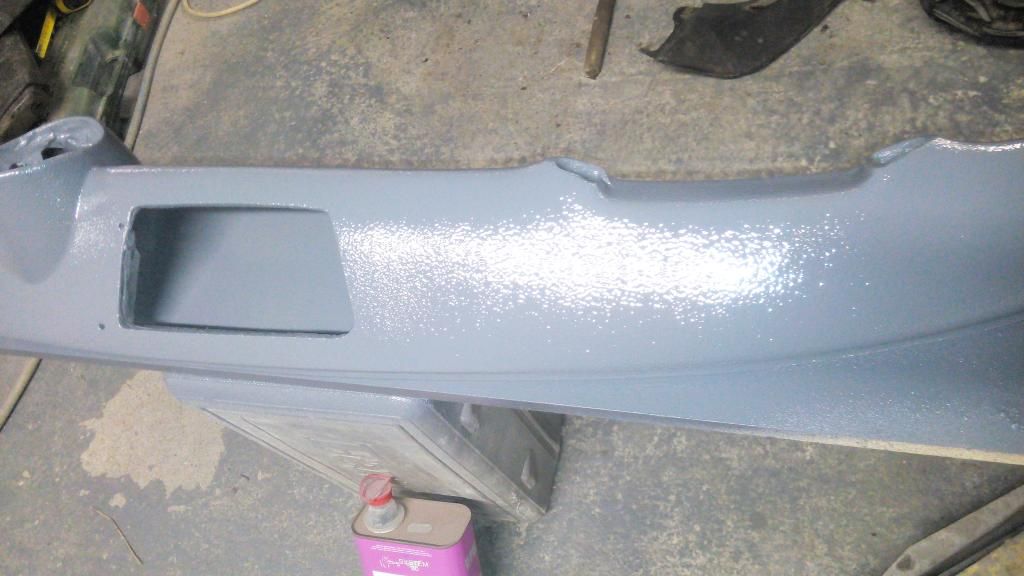
heres the dash painted up (thanks again for the paint link mark)


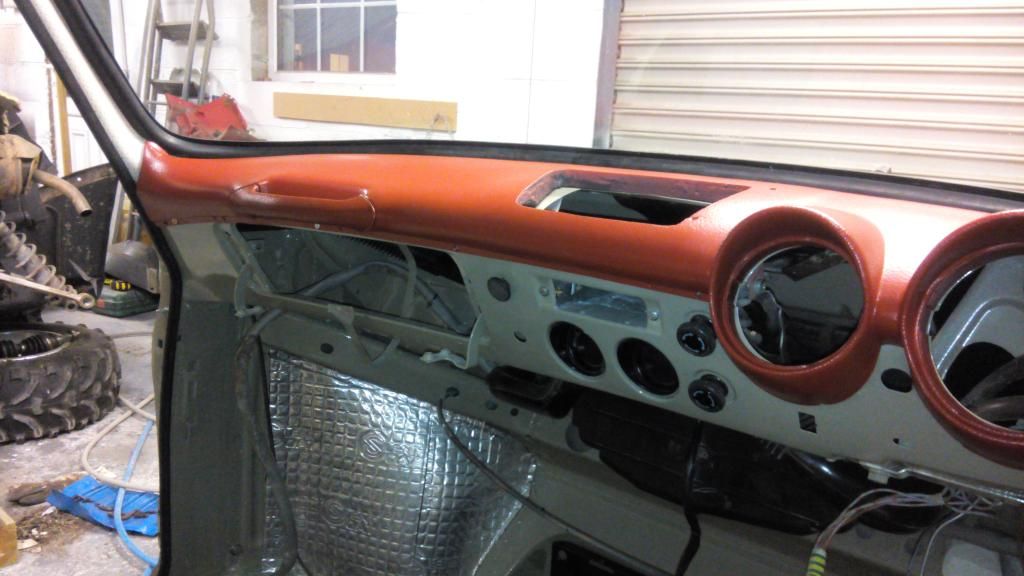
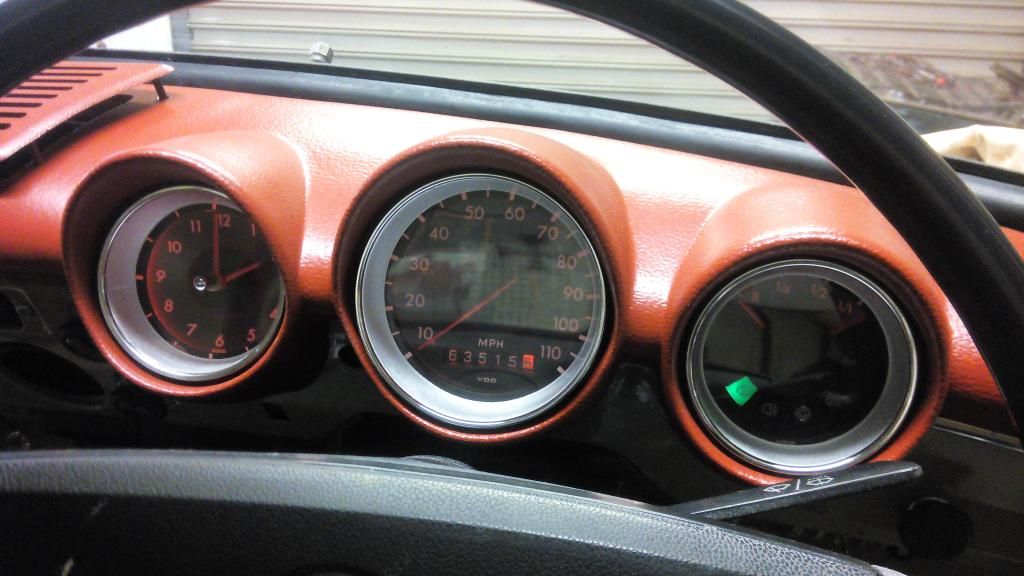
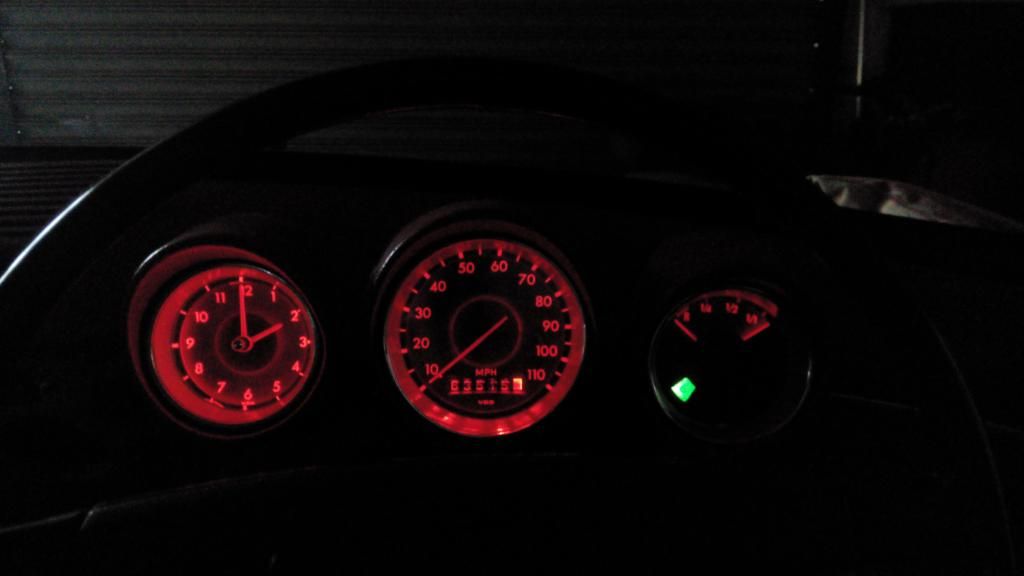
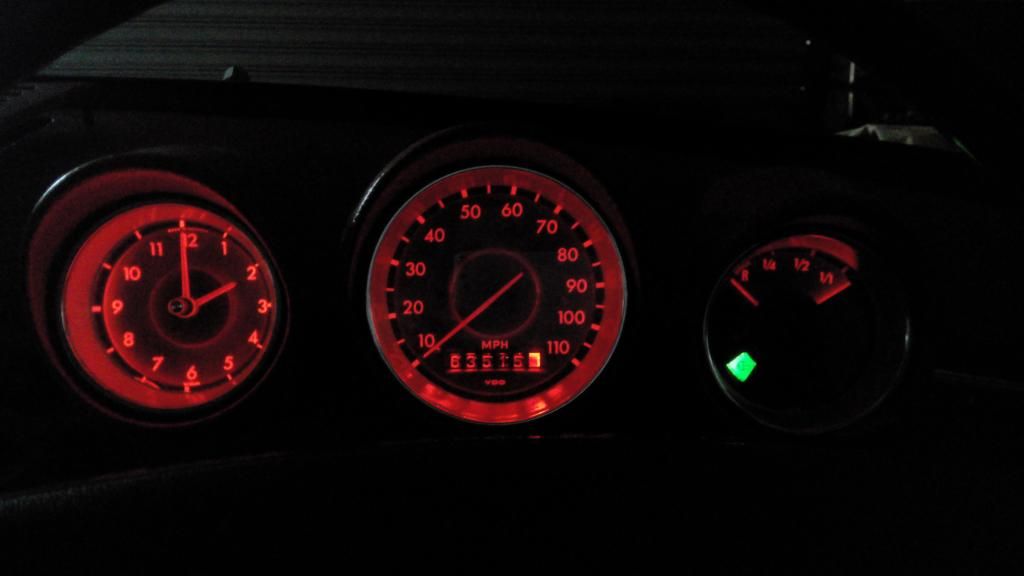
the clocks light up nice.
its very subtle and they still dim with the light switch variable pot..
so we all know that your not likely to get arc eye from the lights in the dashboard cluster, so i upgraded them using low wattage L.E.D's
the sort that come on a roll have a self adhesive backing and operate on 12v.
i striped all the clocks down and ran a ring of led's around the inside of each clock, sprayed up the bezels in silver and of course painted the needles in red..seeings as theres a red theme going on..
heres what it looks like lit up.
after the wiring was routed through the original lamp entry hole
i hot glued the hole and and the end of the led row just to make it extra secure, aswell as that the wires can not be pulled from inside the clock
this is them wired up on the kitchen table using a 12v lipo battery
the dash had some bad splits in it, it was really showing its age
i grooved out the cracks enough to allow for a good adhesion when i put the 2 part plastic filler in.
i have used a load of different fillers and glues but NONE come close to this stuff when it comes to smell
this stuff is nasty!!!
after i let it set i wasnt happy with the finish, a small flex of the dash showed a hair line crack in the repair so i was pretty sure it would show up in the paint..
the only way i could see fit to cure this was to cover the complete affected area with fibreglass and fill it.
but this took the original ripple effect away and left it with a flat surface.
so to put it back (and this is very untested and unorthodox but had to try it)
i sprayed the dash with a plastic 1k clear primer, then layed a light coat of aerosol stonechip over it..
i got to say the effect is very convincing,
time will tell how well this fairs out
heres the dash painted up (thanks again for the paint link mark)
the clocks light up nice.
its very subtle and they still dim with the light switch variable pot..
You Love It.!!!
Re: orange fastback
Impressive! With the lower current, the dimmer switch should last even longer too (though it probably suffers more from friction-related wear than heat-related).
I remember my son Steve used to do a blue-light mod for Club-Polo members.
I remember my son Steve used to do a blue-light mod for Club-Polo members.
Dave.
Re: orange fastback
hi chaps
its been a while again since ive uploaded an update again, but ive been plugging away. As the deadline nears faster and faster!!
ive got a good bit done...
i started with some of the wiring, re-routing the harness back around the car, making off a lot of new connections, cutting back hardened wire ends, soldering and heat shrinking and new wire connections, and replaced most of the harness outer sleeving. i couldnt bend any of the harness around the engine bay or under the bonnet without the outer sleeving cracking on me even though most of the inner wiring was sound..
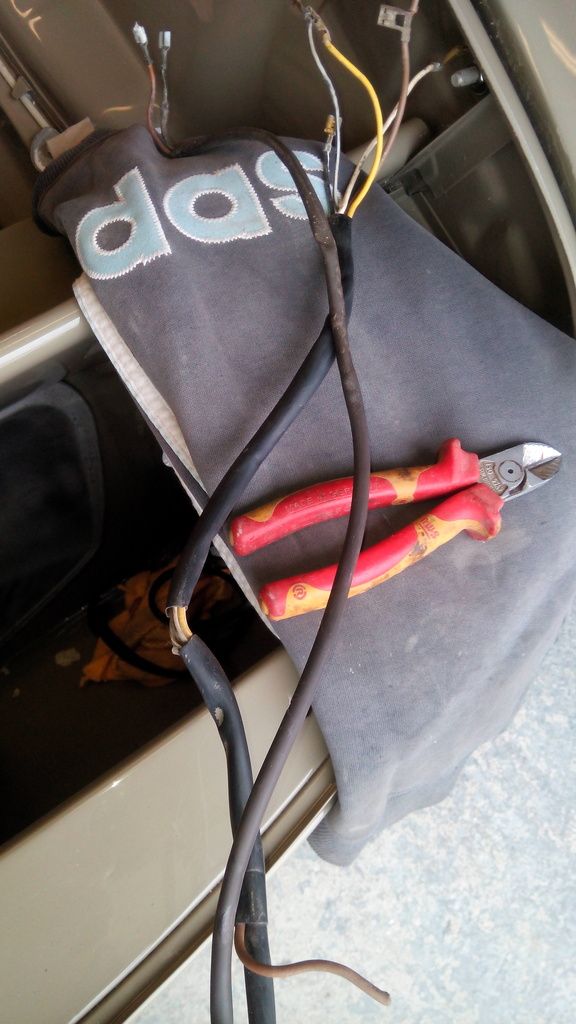
here you can see the outer sleeving cracking
this part was rigid and started to snap on me aswell
so stripped off the sleeving
new heatshrink
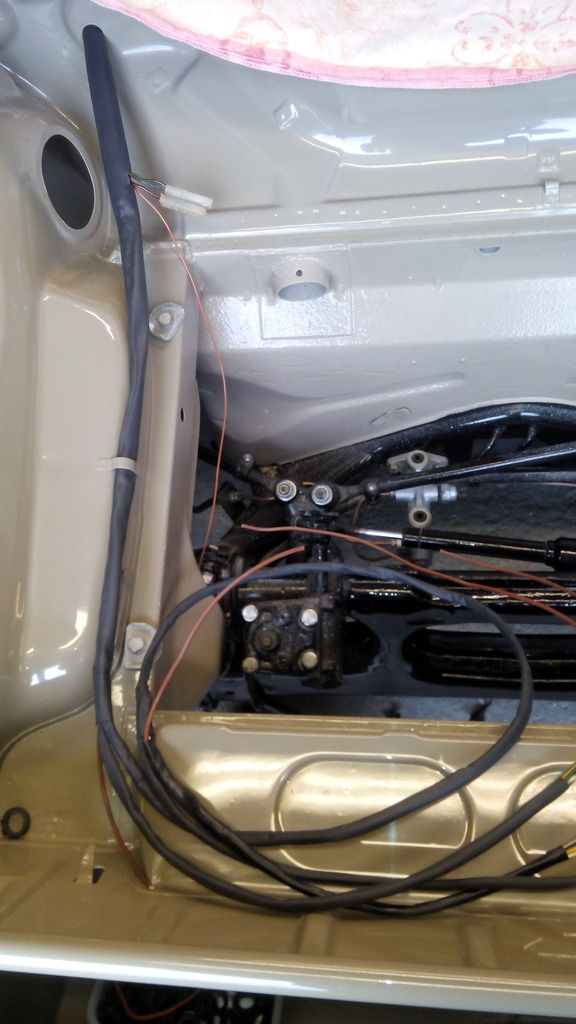
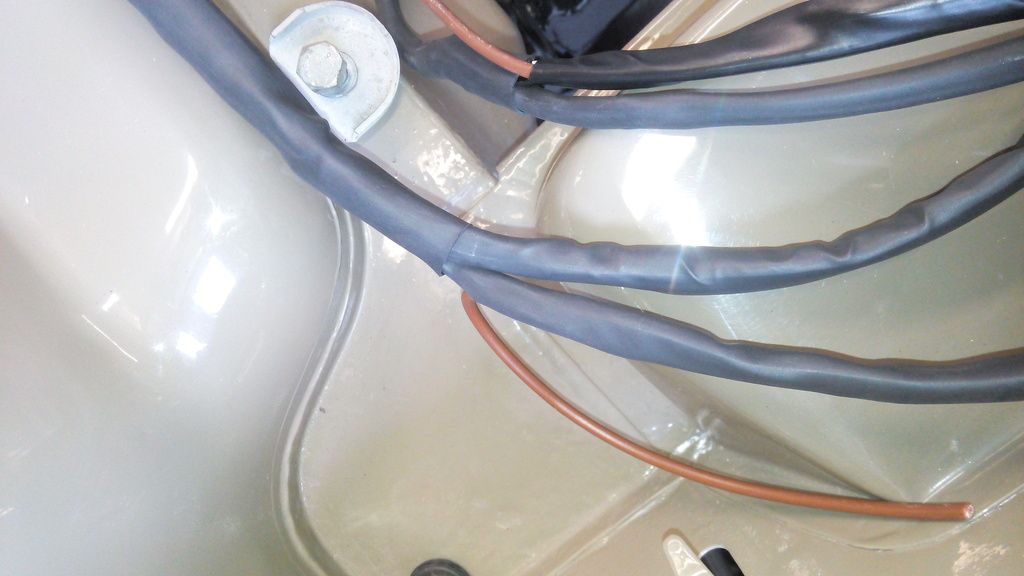
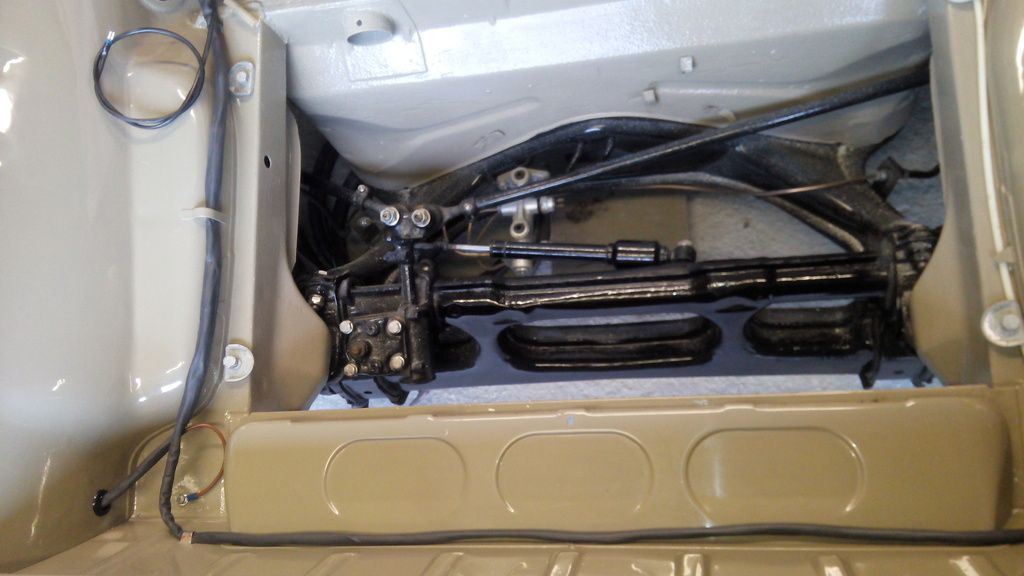
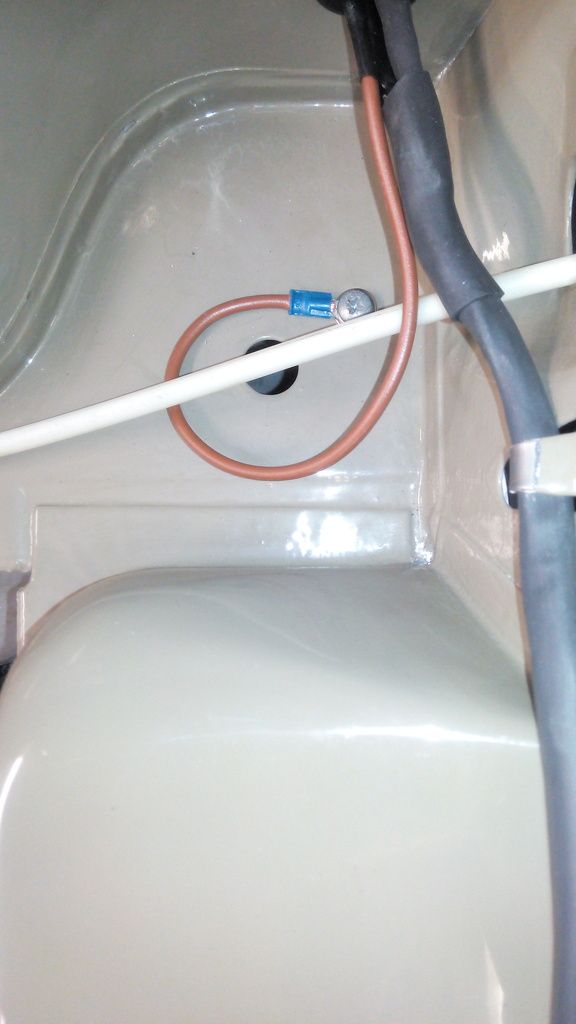
new heatshrink installed aswell as runnig in some new earths
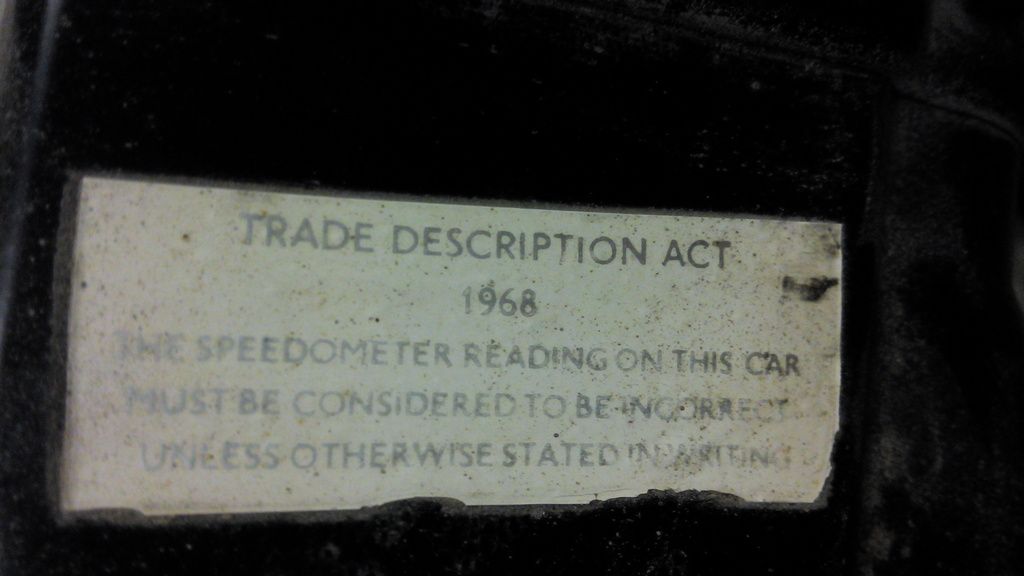
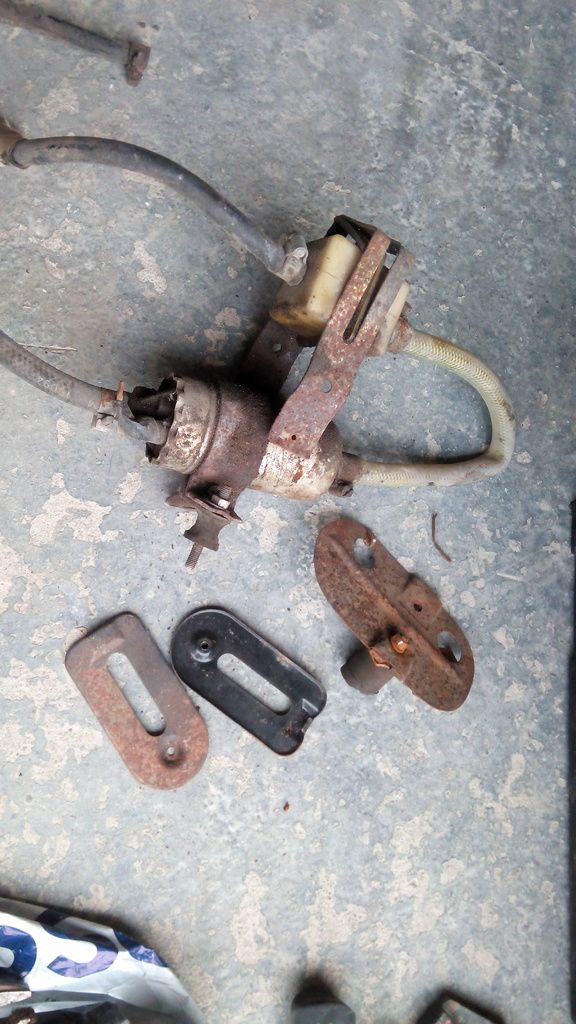
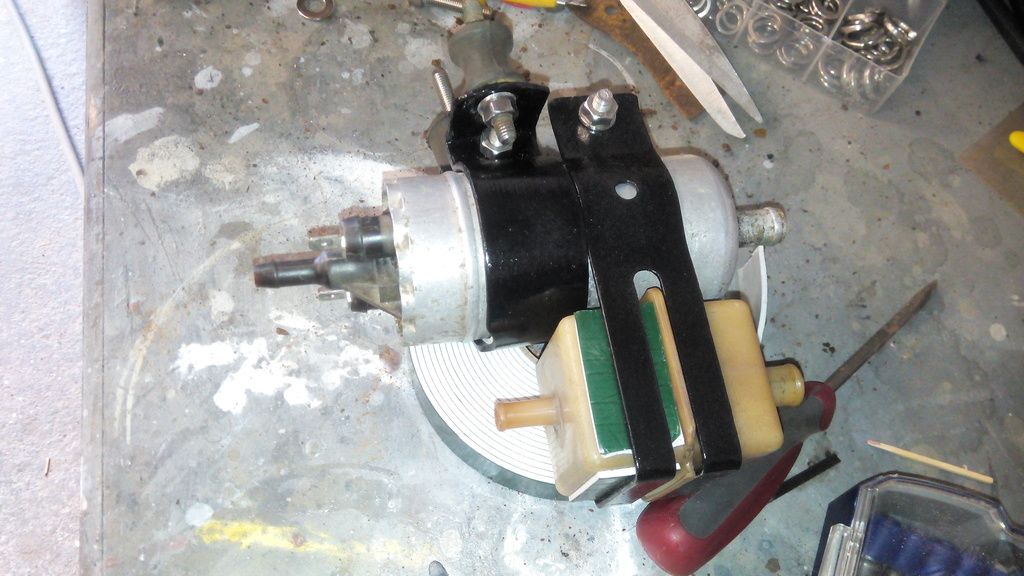
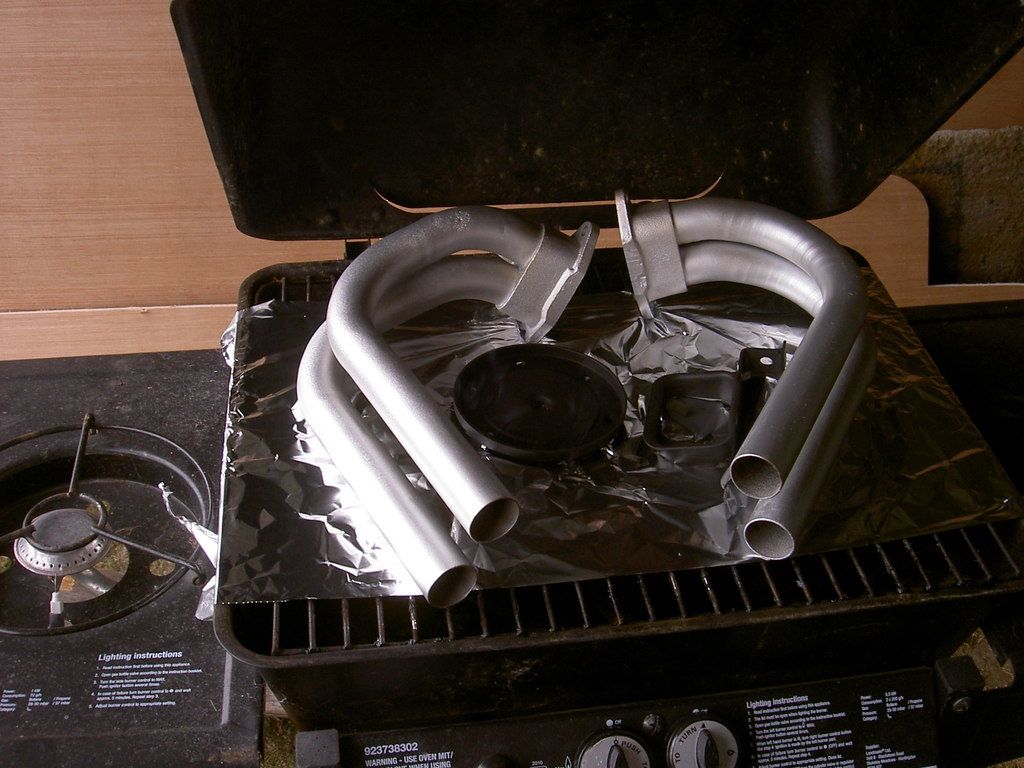
thought this was very interesting!!
found this on the top side of the steering column on the casing around the ignition barrel??
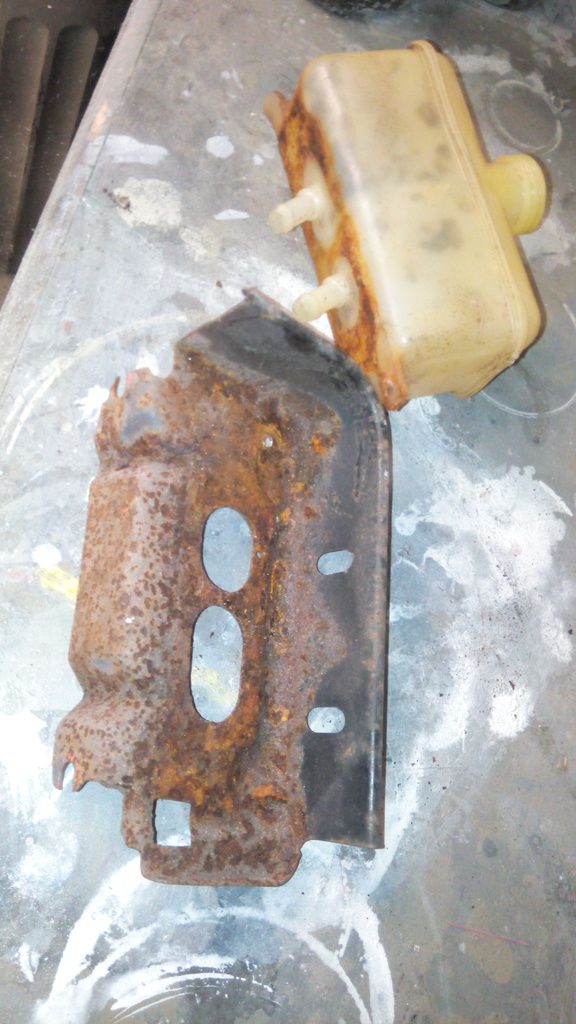
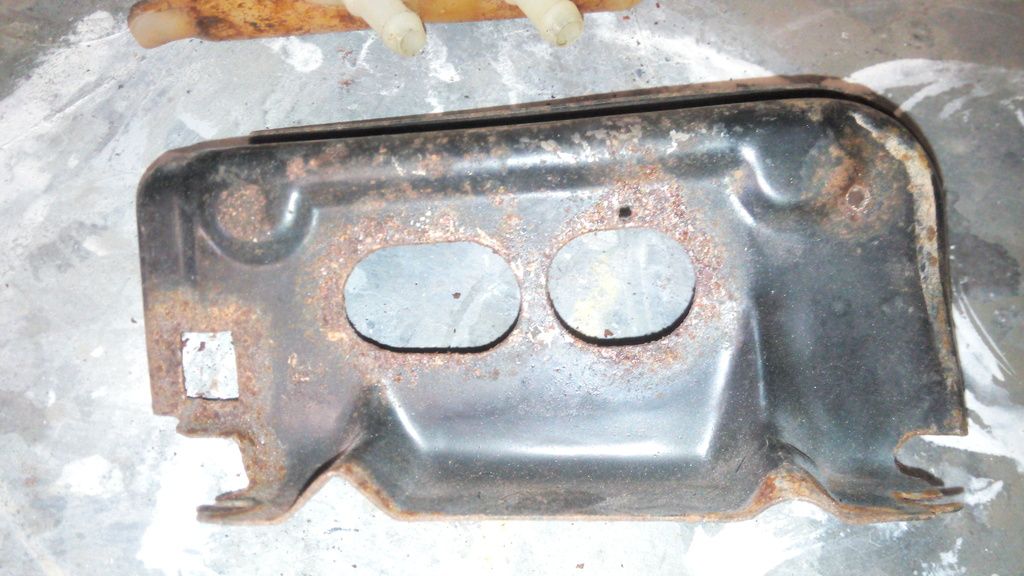
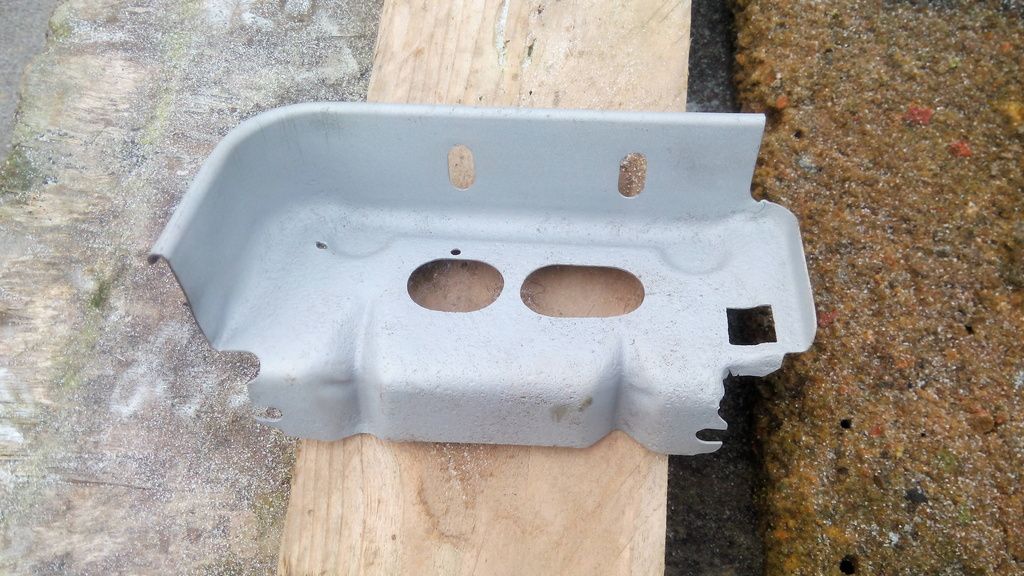
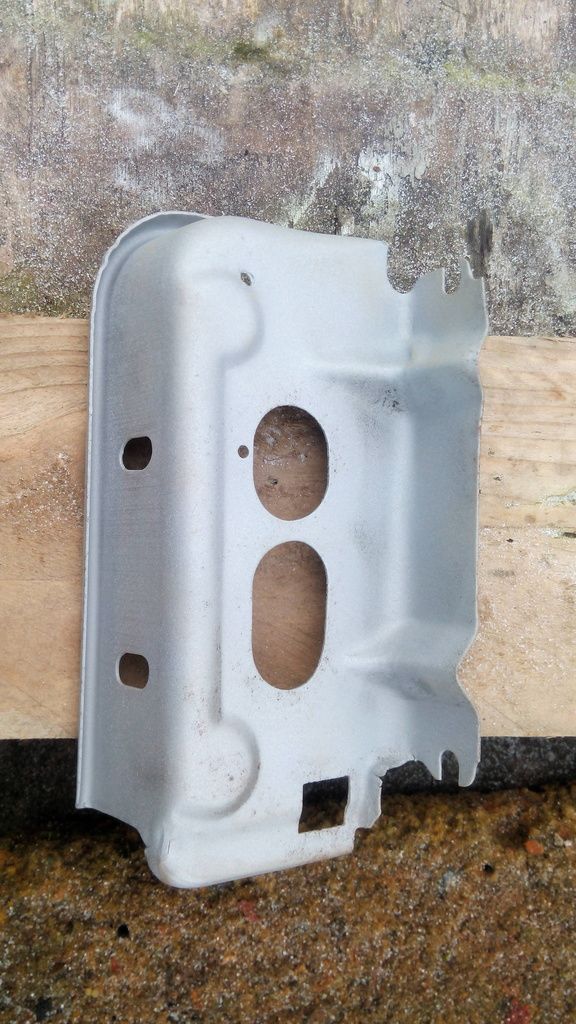
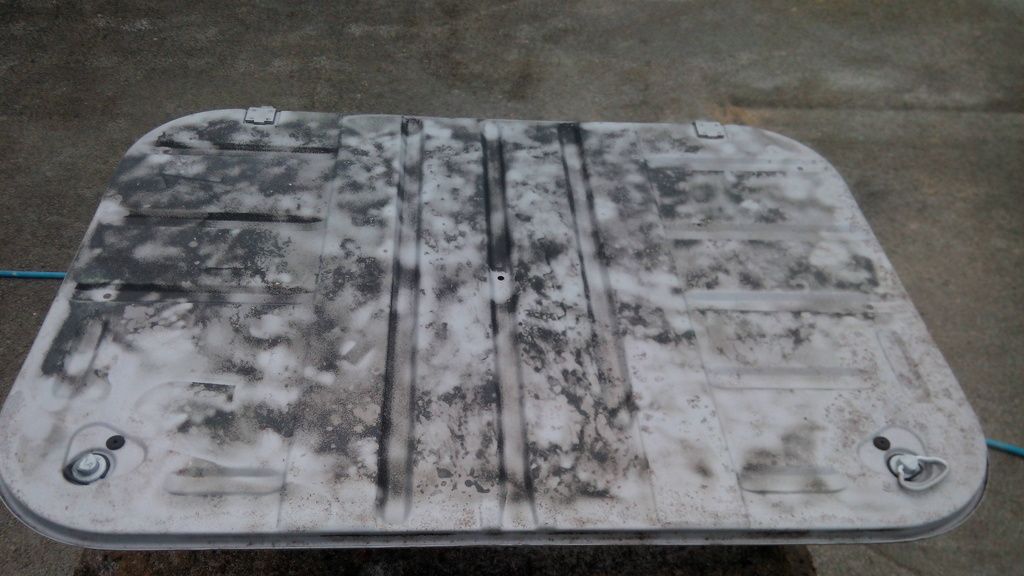
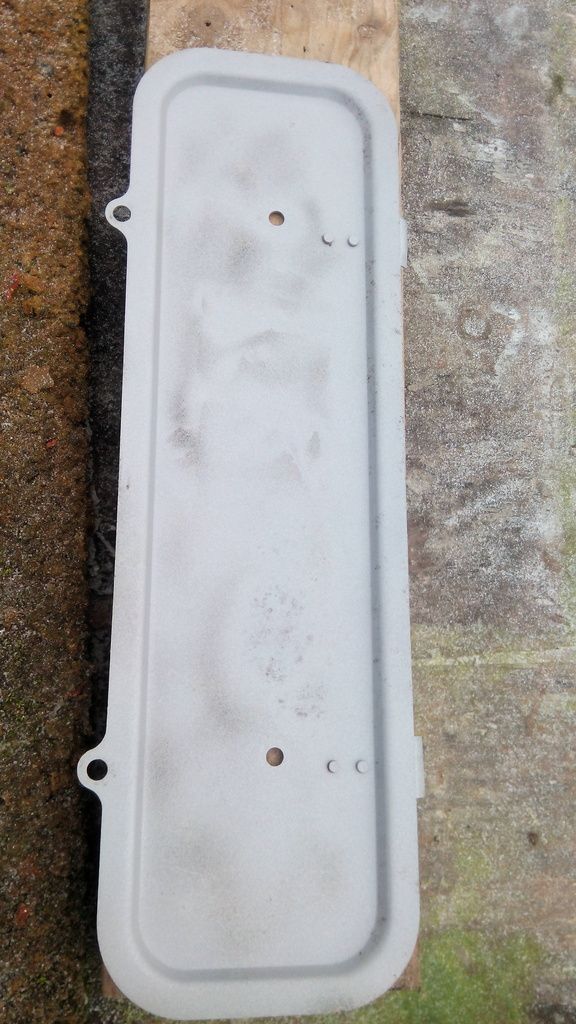
A Load of small item that needed some T.L.C
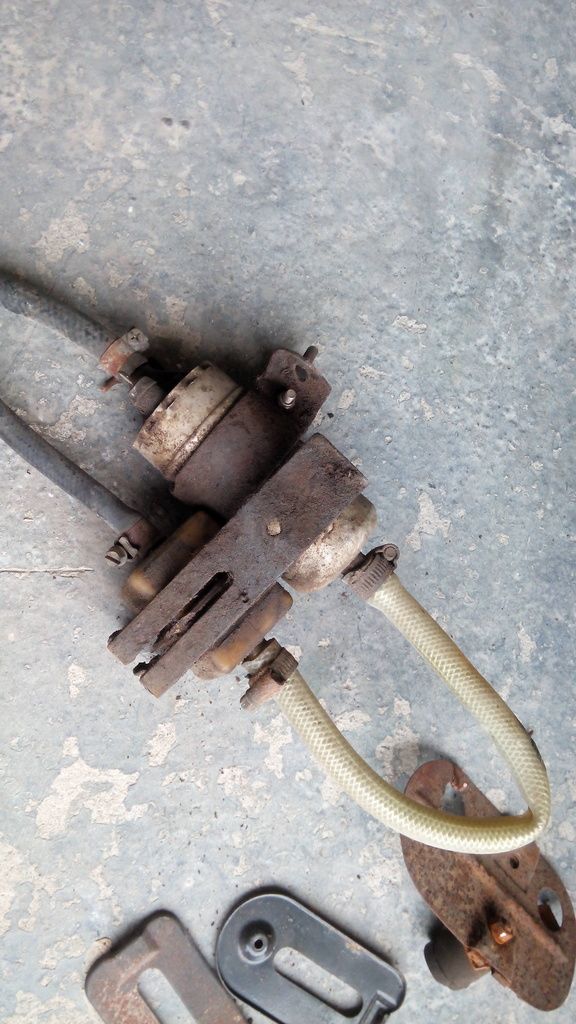
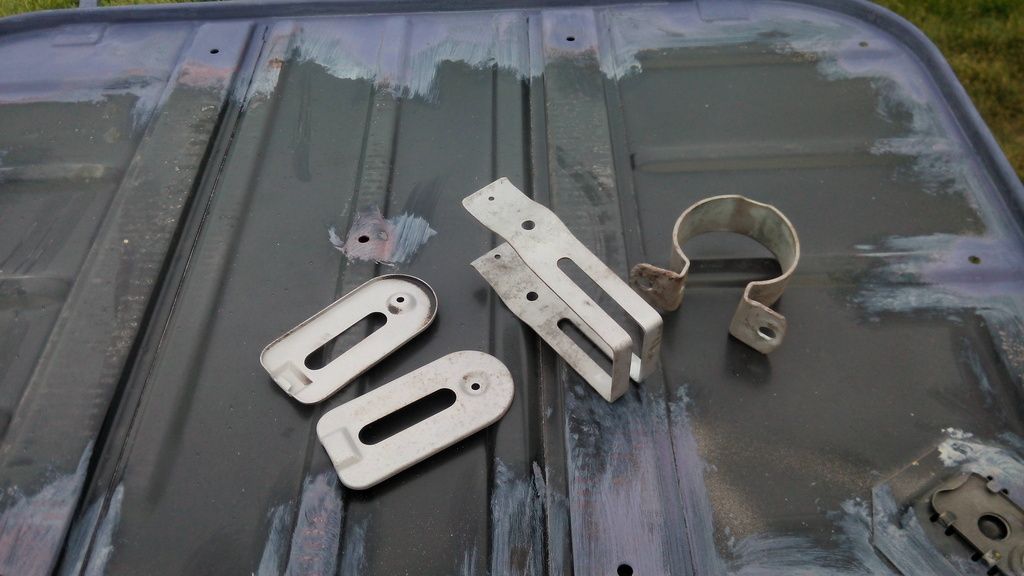
this will need sound proofing after laying on a top coat of paint..
its been a while again since ive uploaded an update again, but ive been plugging away. As the deadline nears faster and faster!!
ive got a good bit done...
i started with some of the wiring, re-routing the harness back around the car, making off a lot of new connections, cutting back hardened wire ends, soldering and heat shrinking and new wire connections, and replaced most of the harness outer sleeving. i couldnt bend any of the harness around the engine bay or under the bonnet without the outer sleeving cracking on me even though most of the inner wiring was sound..
here you can see the outer sleeving cracking
this part was rigid and started to snap on me aswell
so stripped off the sleeving
new heatshrink
new heatshrink installed aswell as runnig in some new earths
thought this was very interesting!!
found this on the top side of the steering column on the casing around the ignition barrel??
A Load of small item that needed some T.L.C
this will need sound proofing after laying on a top coat of paint..
You Love It.!!!
-
bigbadbadge

- Posts: 172
- Joined: 20th June 2010 - 7:21pm
- Location: Greatstone, Kent, UK
Re: orange fastback
Wow fantastic work, looking very nice. Like your dashtop and gauges too. I have had a go at mine dash to and used crinkle paint but not happy with it, like the idea of the stone chip, that has turned out really well.
Keep up the good work
All the best
Chris
Keep up the good work
All the best
Chris
Re: orange fastback
Great work as usual Col, look forward to seeing you at Bugjam
Re: orange fastback
thanks guys
ive got a lot more to show yet...
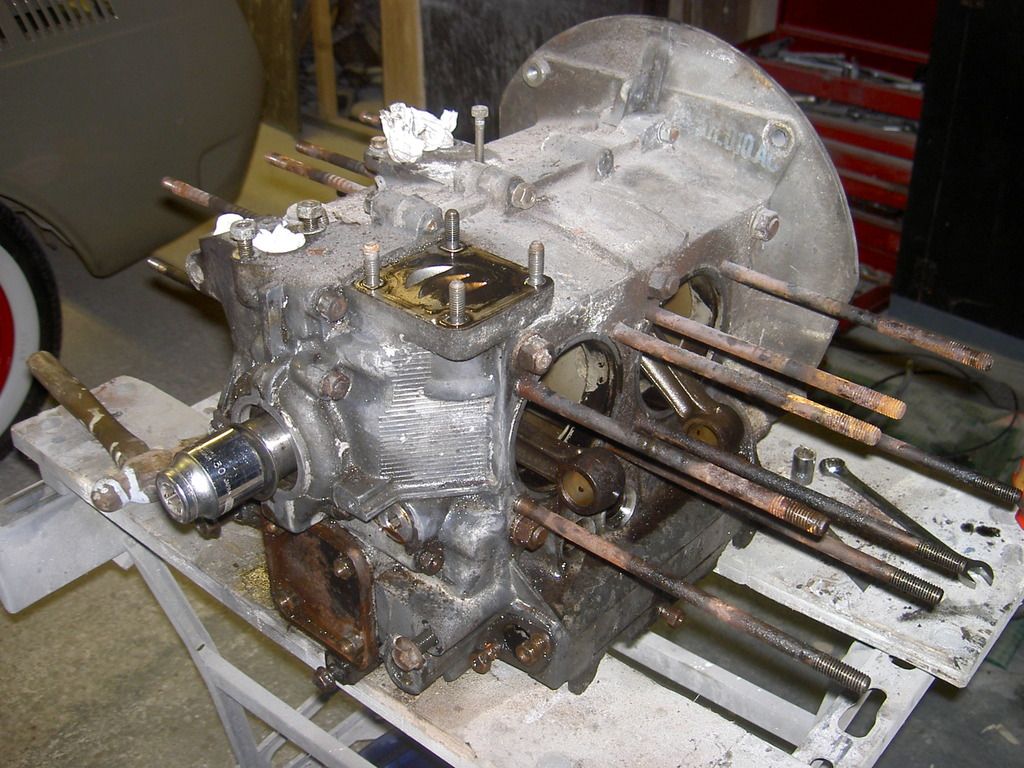
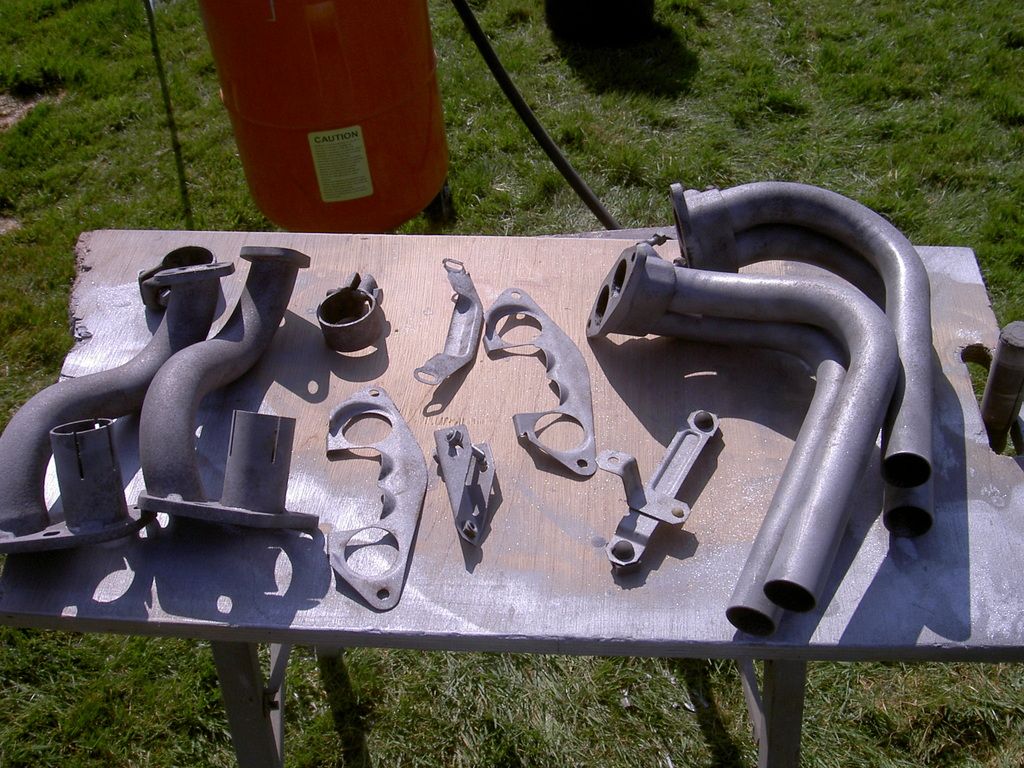
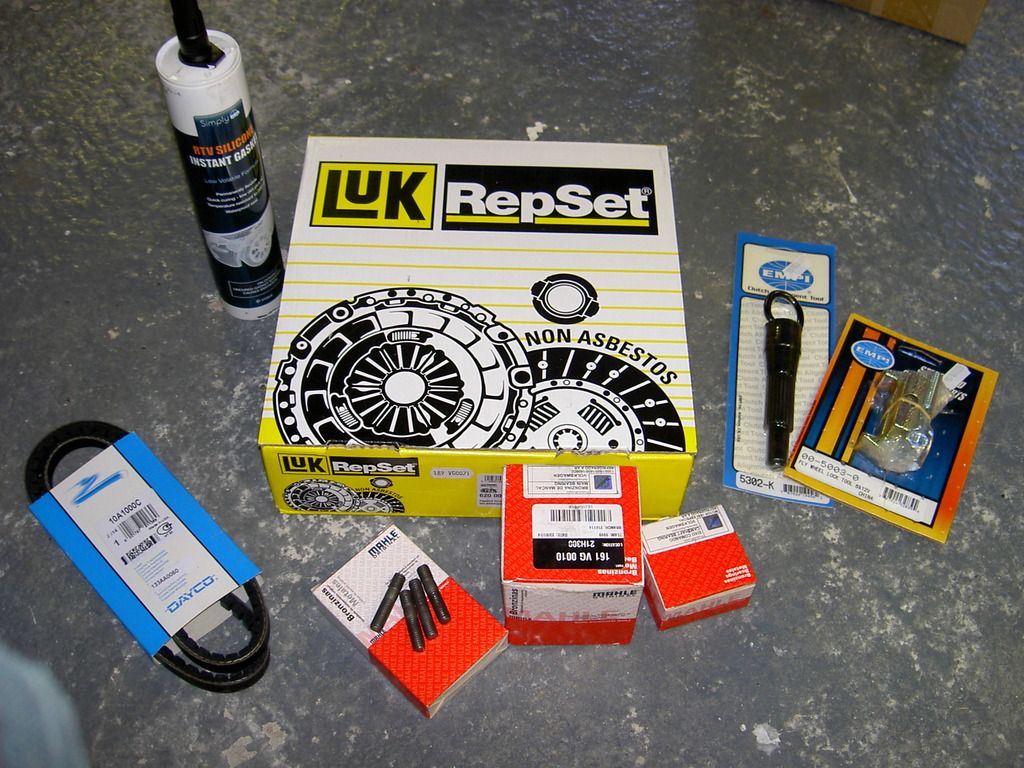
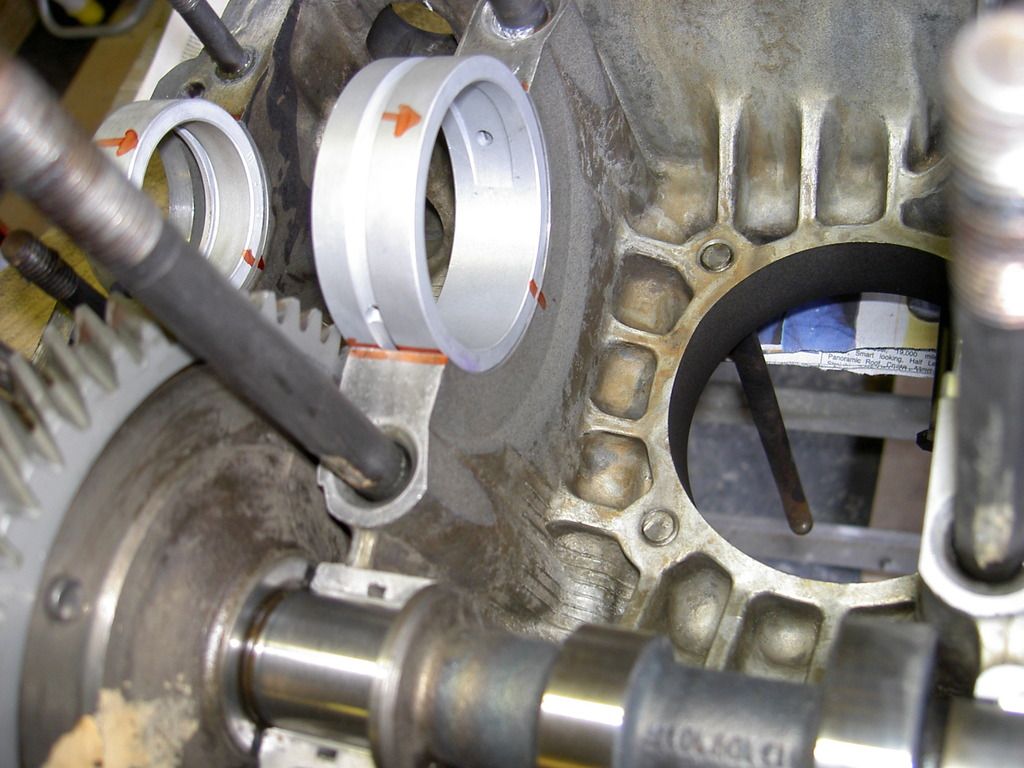
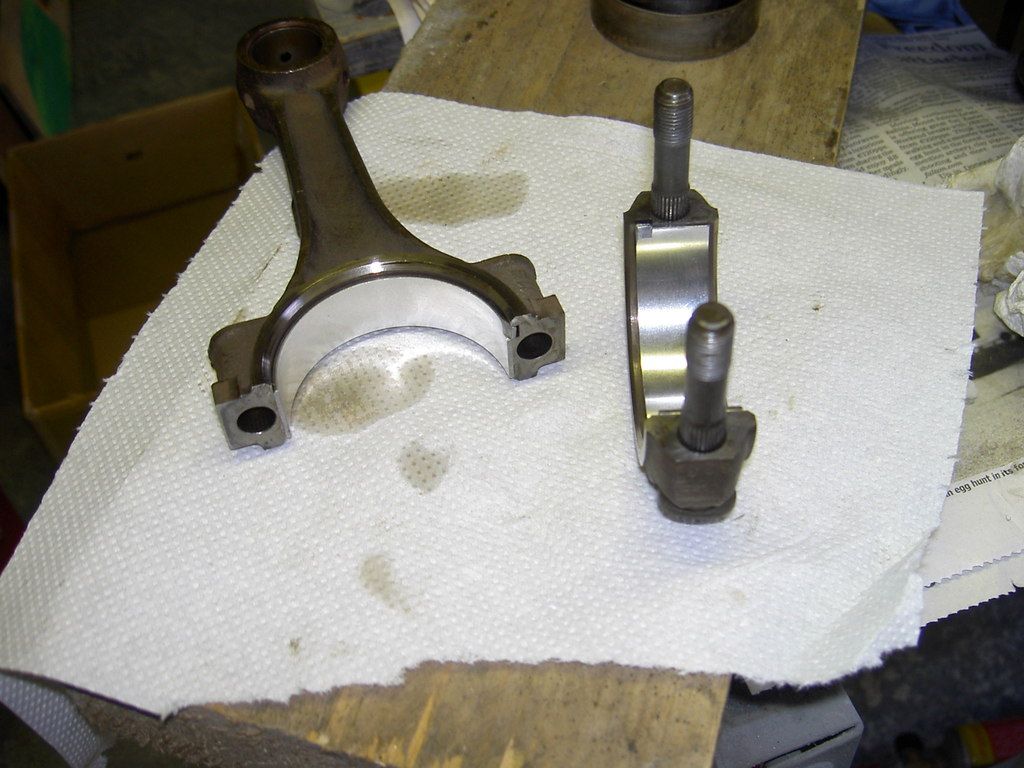
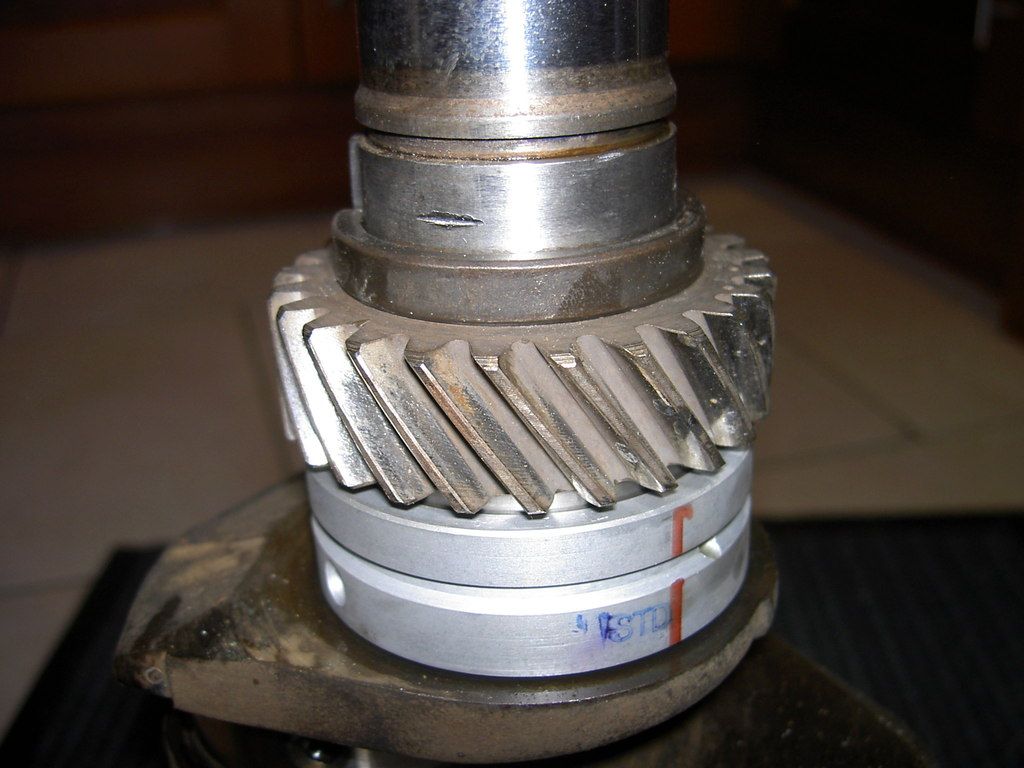
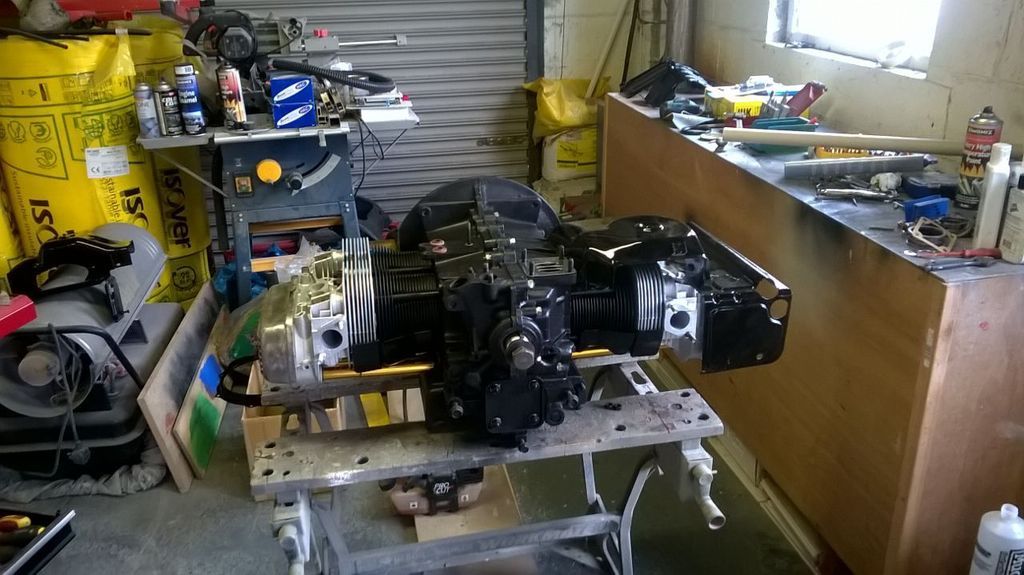
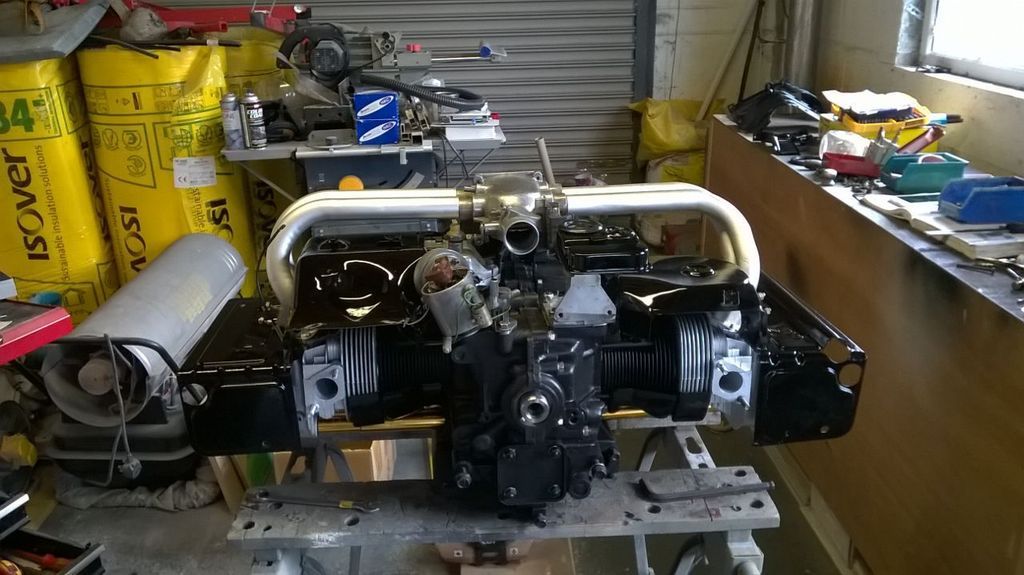
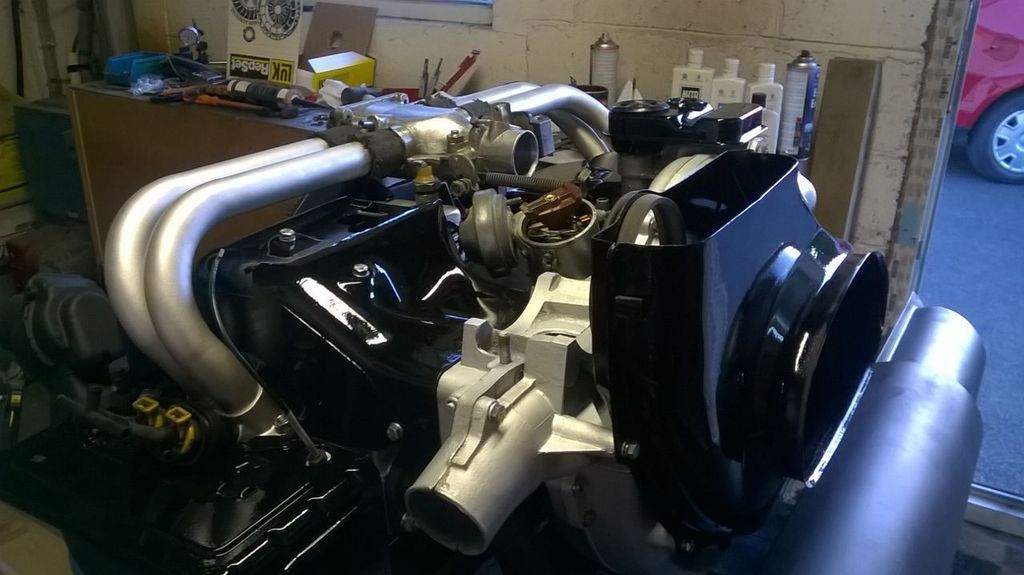
I started on the engine. its a job ive been waiting to tear into for a while put didn't want to make a start on it until I was ready to start and finish it, i hadn't made my mind up when i started the tear down as to how far I was going to go with it. it was never going to be a big cc engine just a stocker..
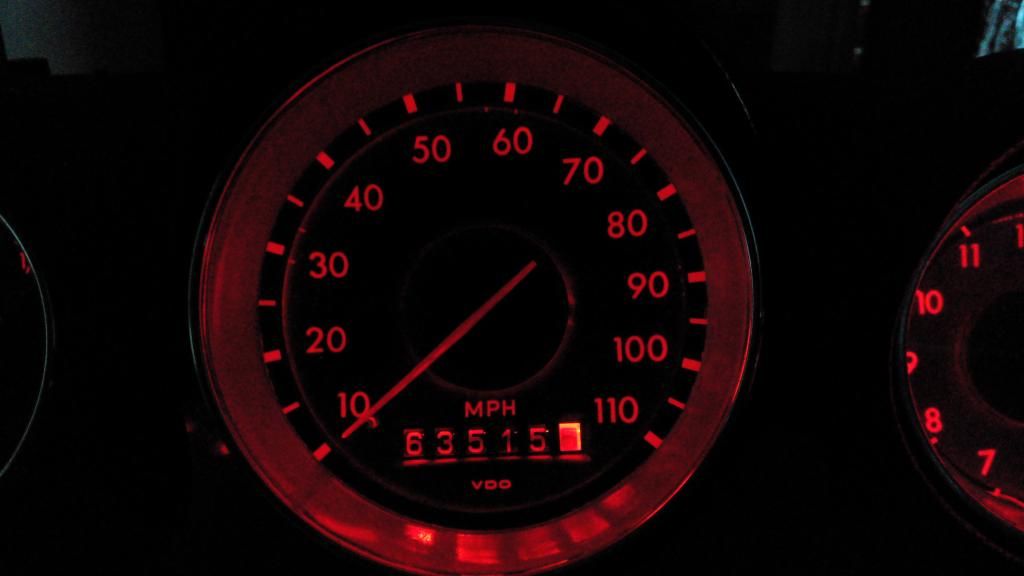
the engine seems to be in good shape, i only had it running for a very short time when i got the car, before i started the car tear down, but from that short time all seemed OK. the mileage reads 63 thou and all the mot papers seem to back this up. there was a small drip of oil over night but seemed to coming from the crankshaft oil seal, which was going to be replaced anyway, even though it doesn't come with the full engine gasket set!!
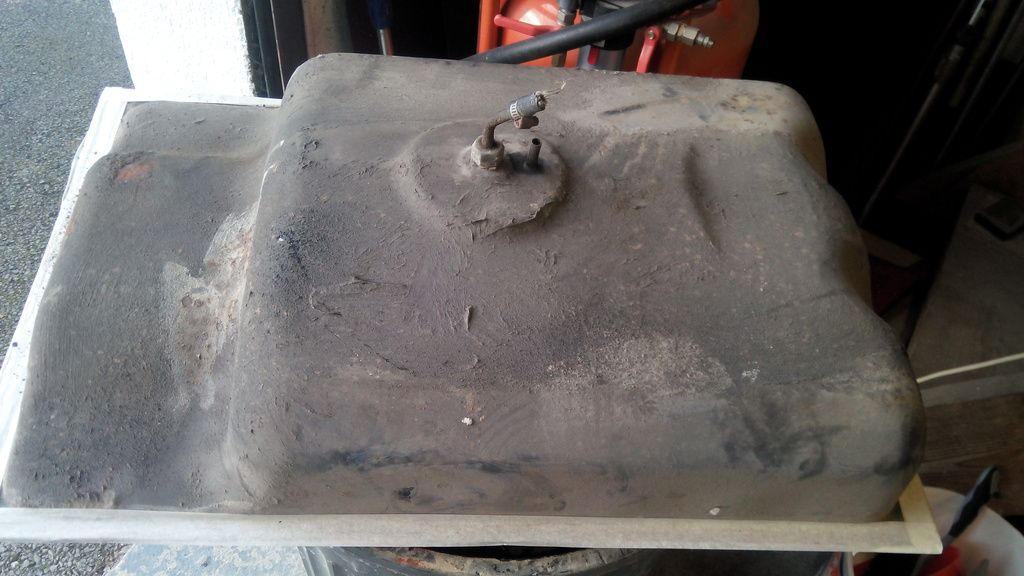
so the lump was the usual oilly rusty looking engine (cant find the pictures!! but you know what i mean)..
let the tear down begin..

ok sorry but photobucket is doing my head in it keeps freezing up so ill update later...
ive got a lot more to show yet...
I started on the engine. its a job ive been waiting to tear into for a while put didn't want to make a start on it until I was ready to start and finish it, i hadn't made my mind up when i started the tear down as to how far I was going to go with it. it was never going to be a big cc engine just a stocker..
the engine seems to be in good shape, i only had it running for a very short time when i got the car, before i started the car tear down, but from that short time all seemed OK. the mileage reads 63 thou and all the mot papers seem to back this up. there was a small drip of oil over night but seemed to coming from the crankshaft oil seal, which was going to be replaced anyway, even though it doesn't come with the full engine gasket set!!
so the lump was the usual oilly rusty looking engine (cant find the pictures!! but you know what i mean)..
let the tear down begin..
ok sorry but photobucket is doing my head in it keeps freezing up so ill update later...
You Love It.!!!
Re: orange fastback
im signed up to flickr now so ill try again..
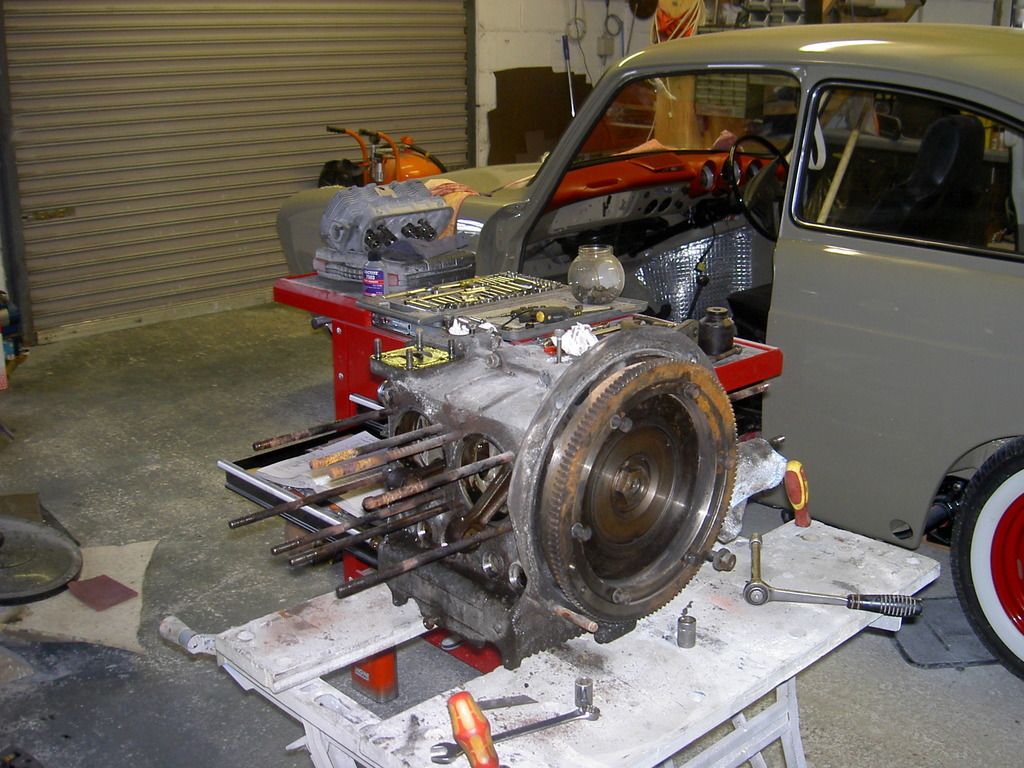
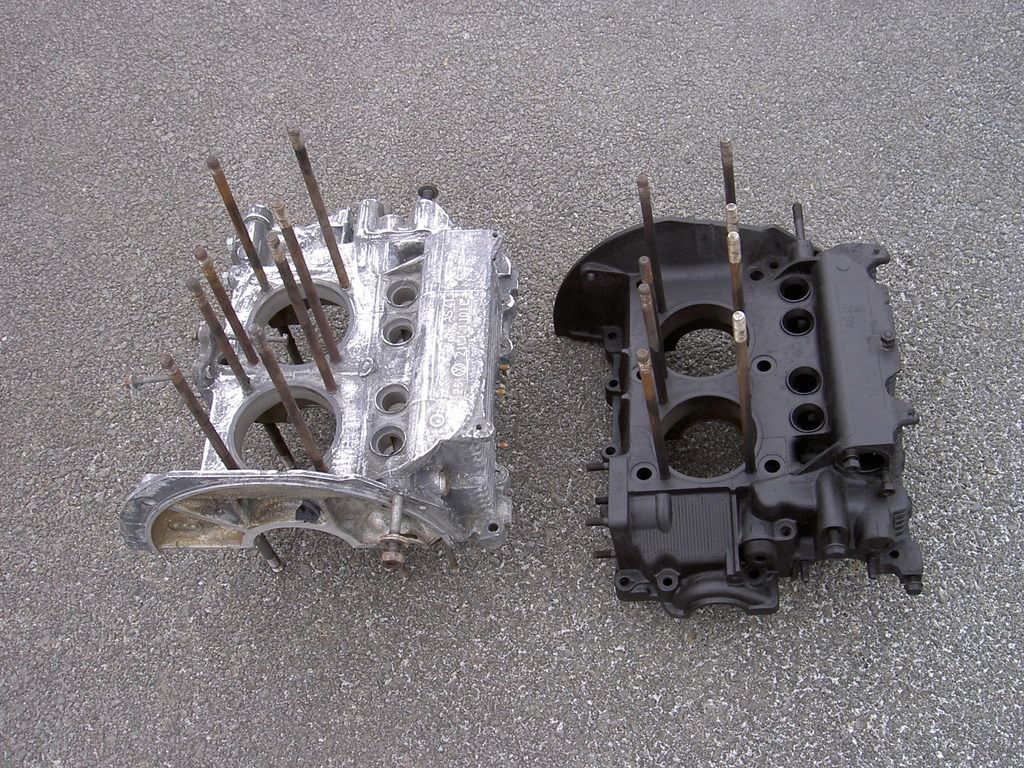
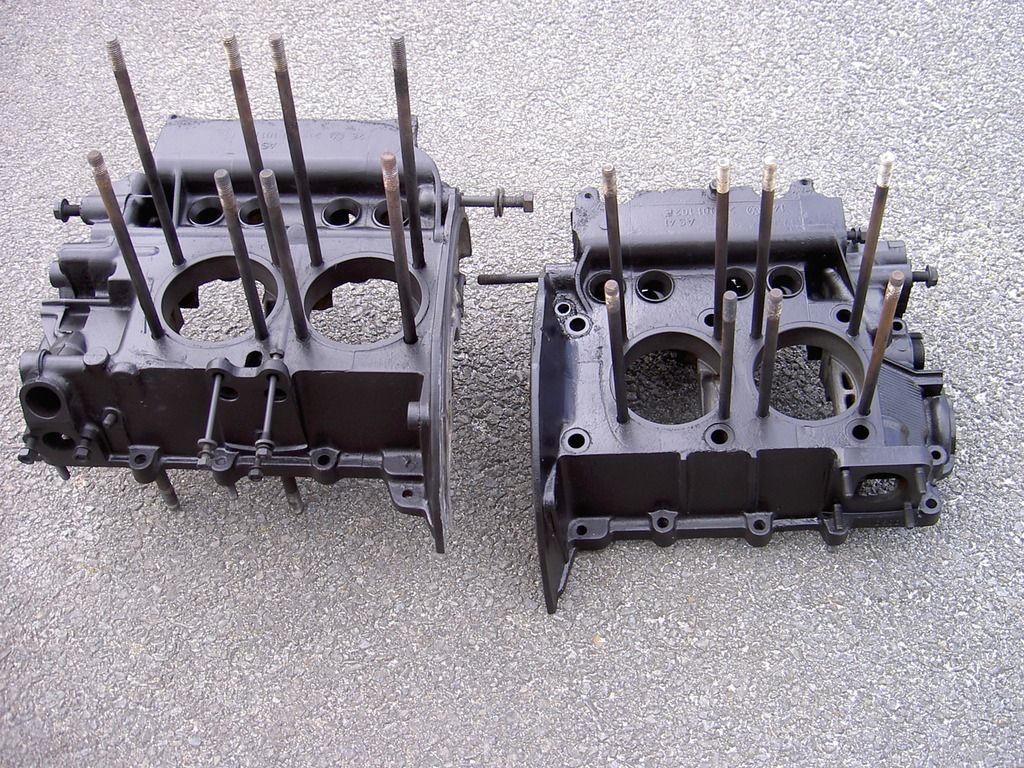
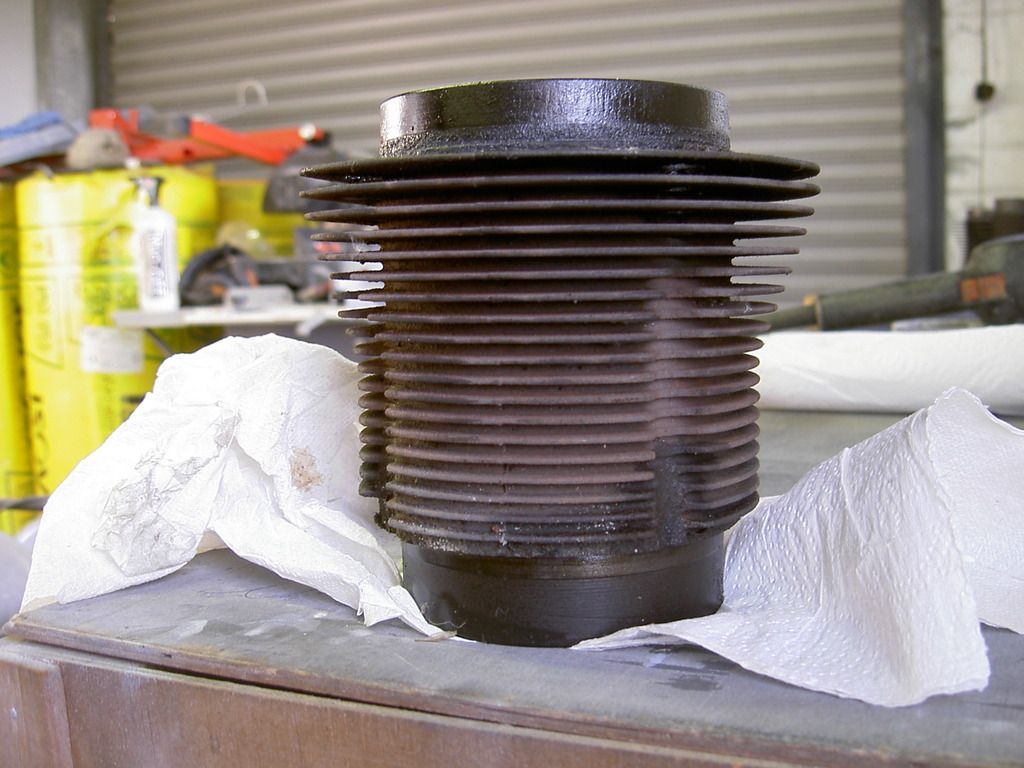
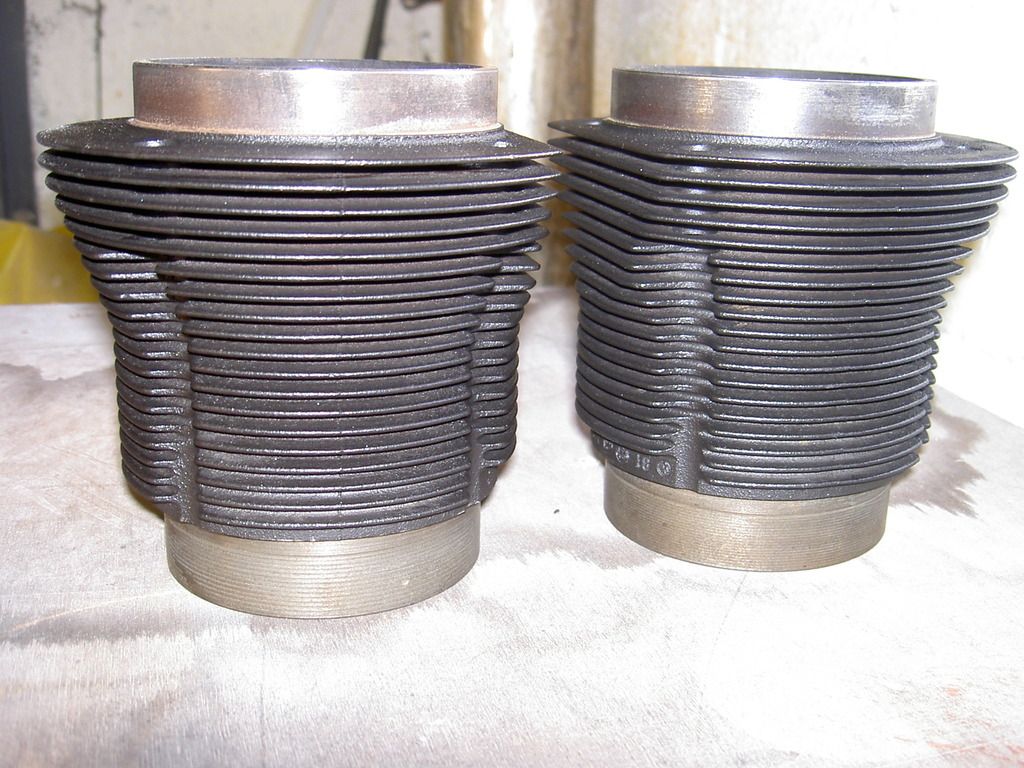
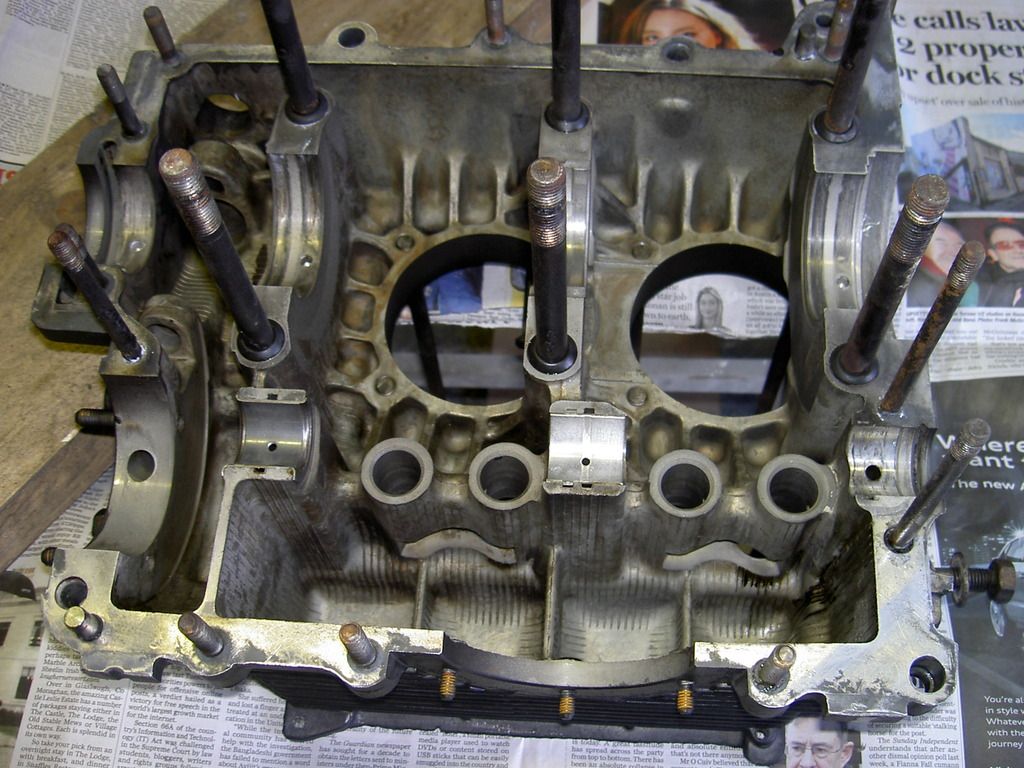
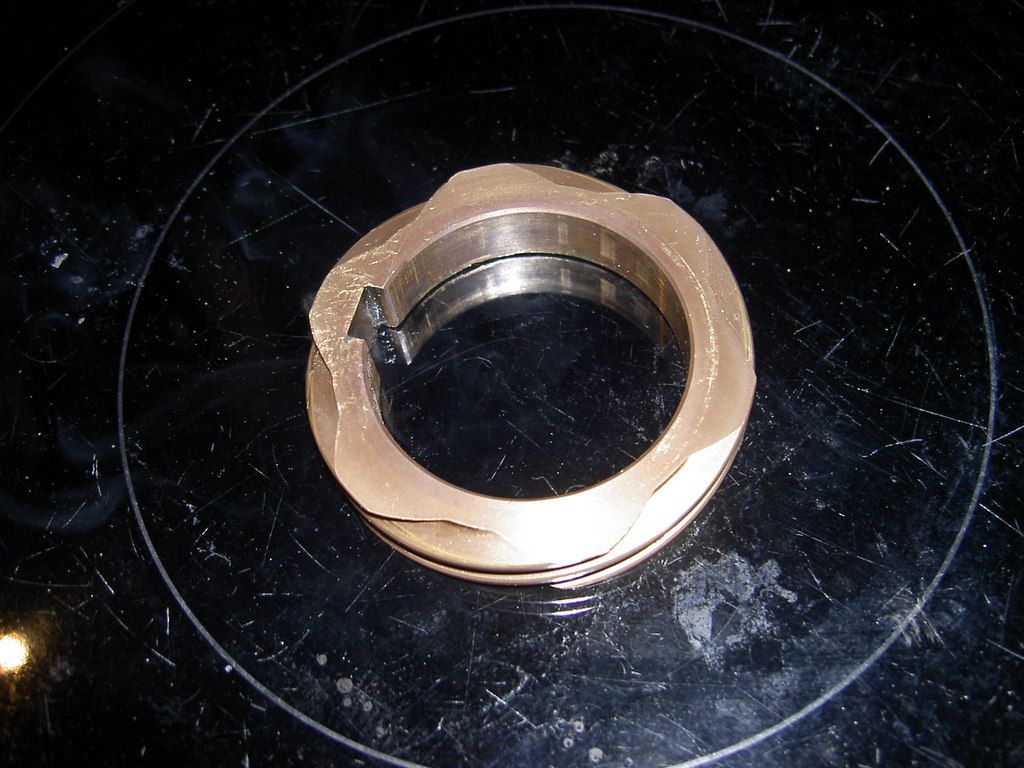
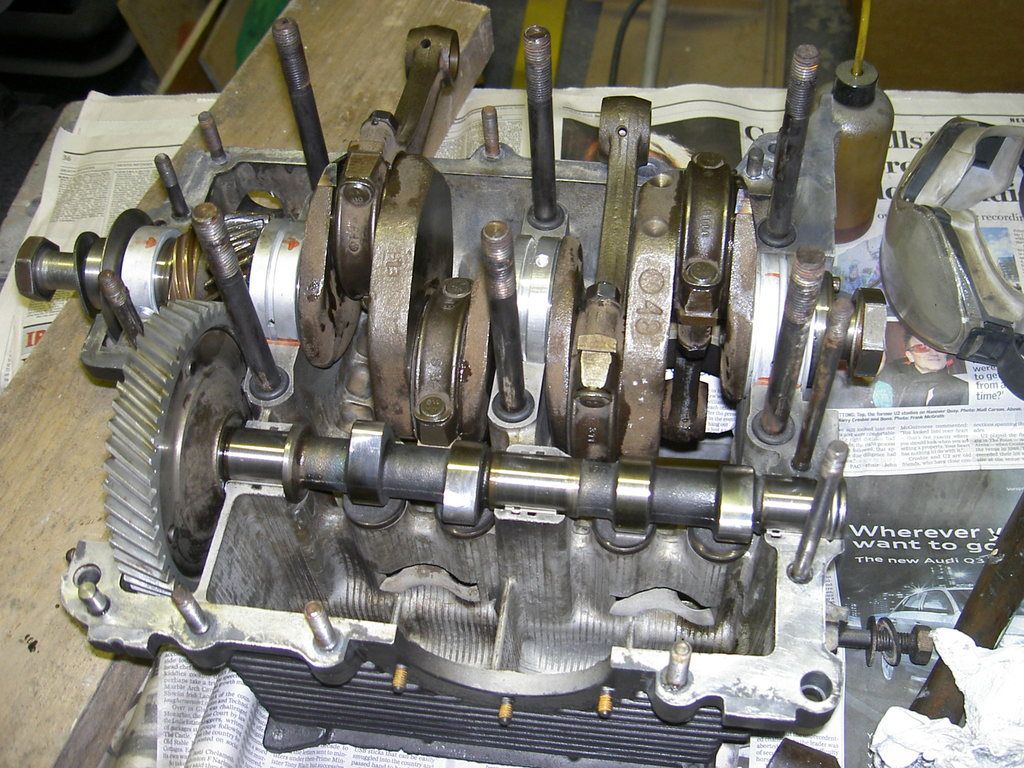
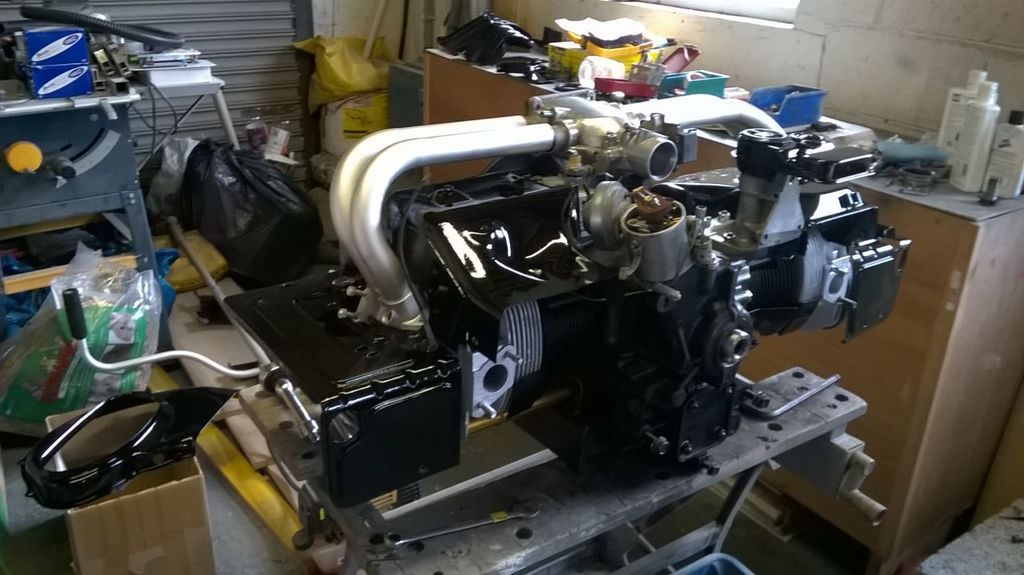
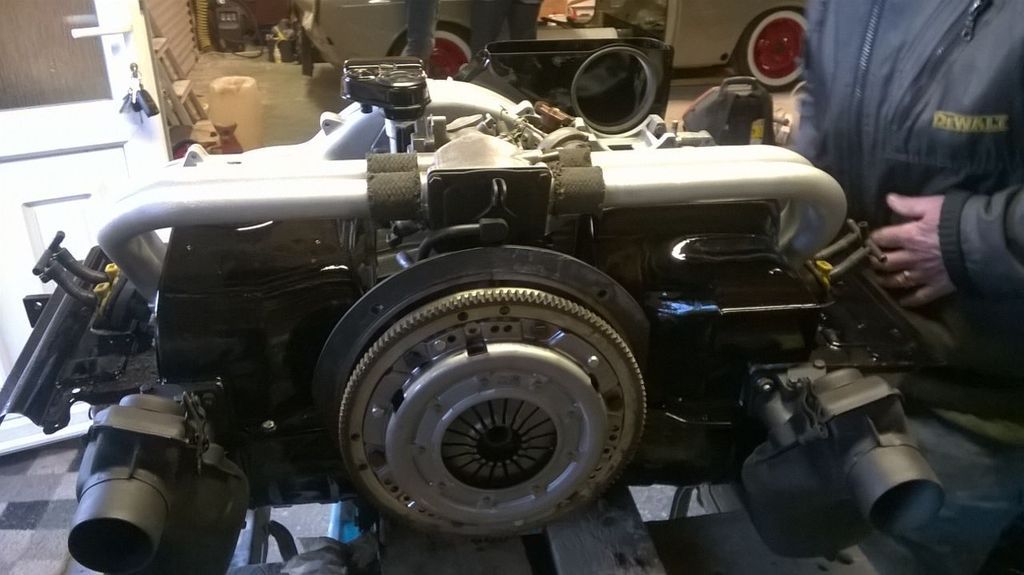
i ended up splitting the cases. then washed an degreased washed again degreased again....
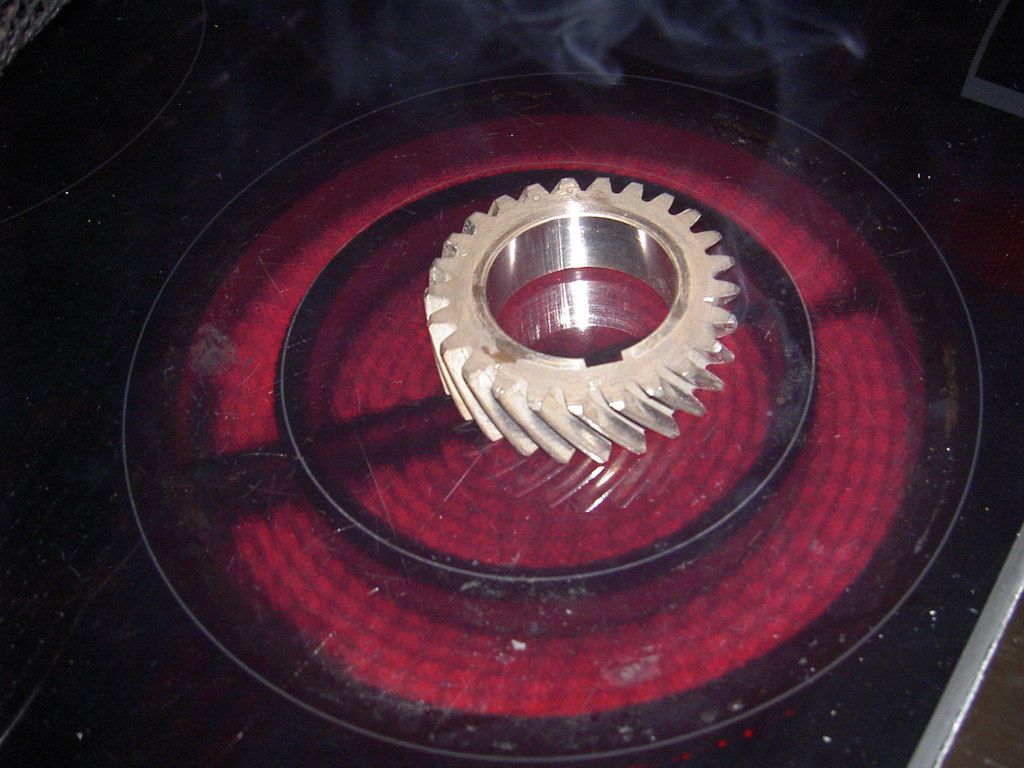
i grabbed a large garden bin (clean of course). filled it with hot soapy water, ran the compressor up and stuck the air line in to the water to agitate it all around the engine cases.
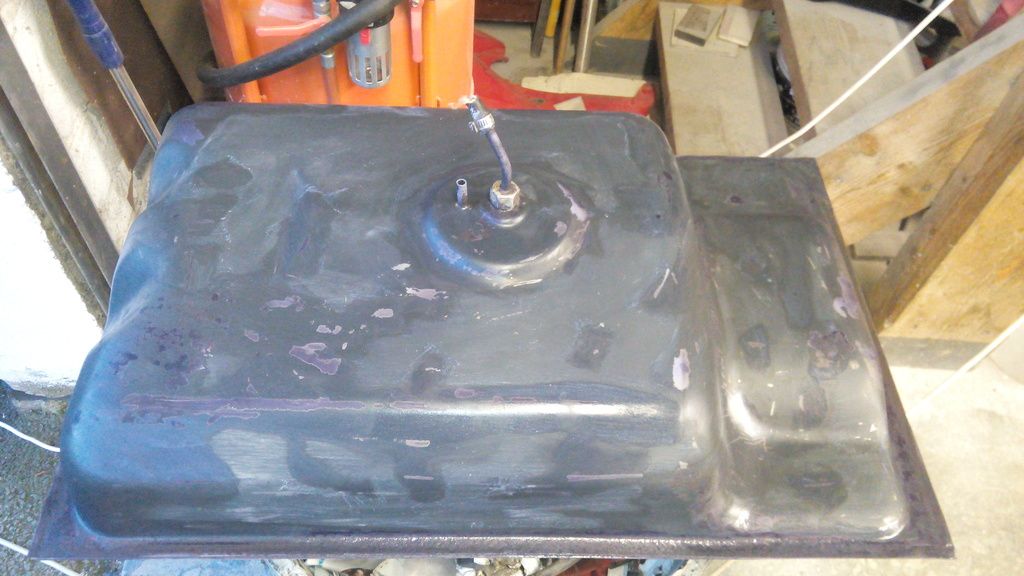
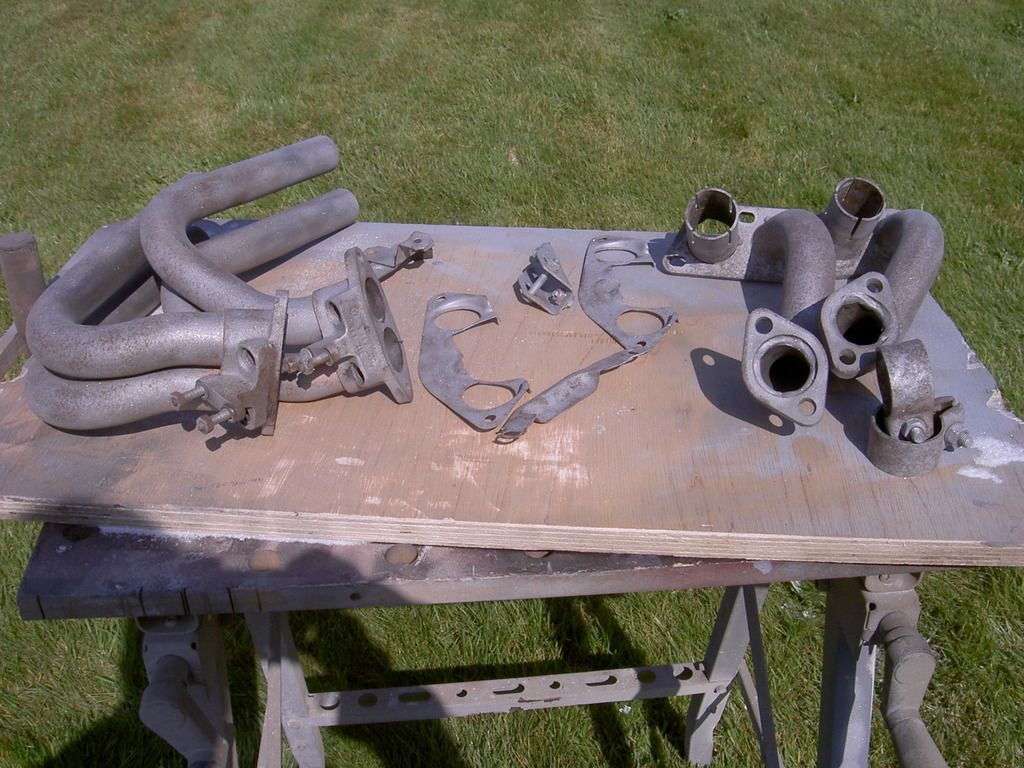
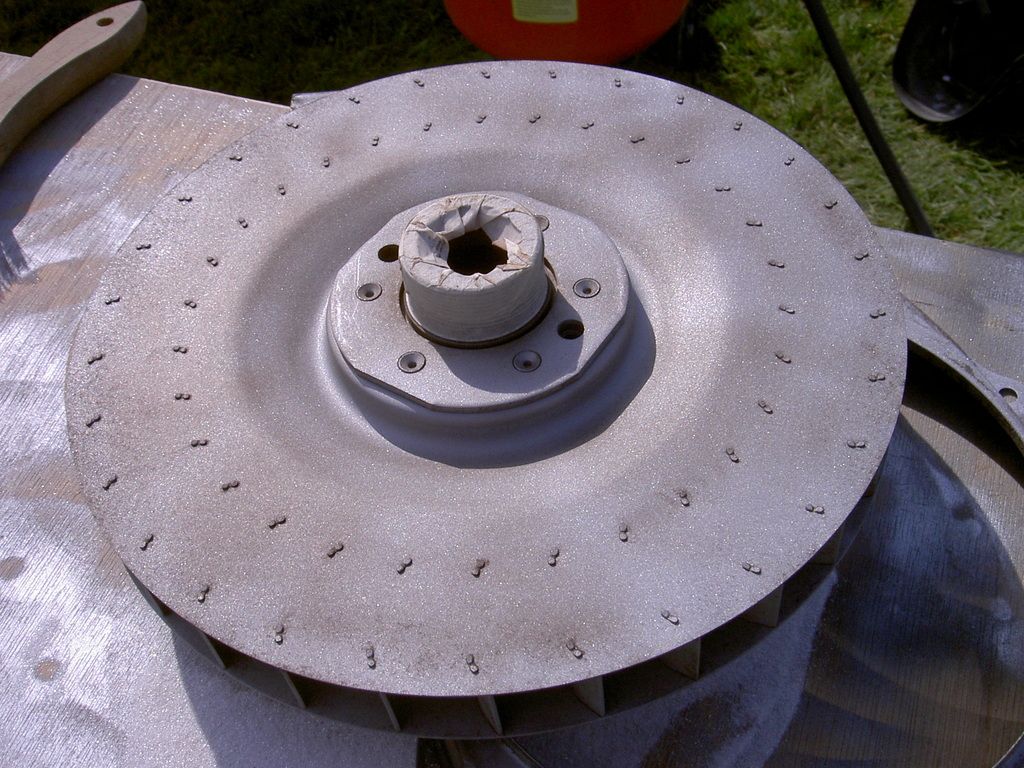
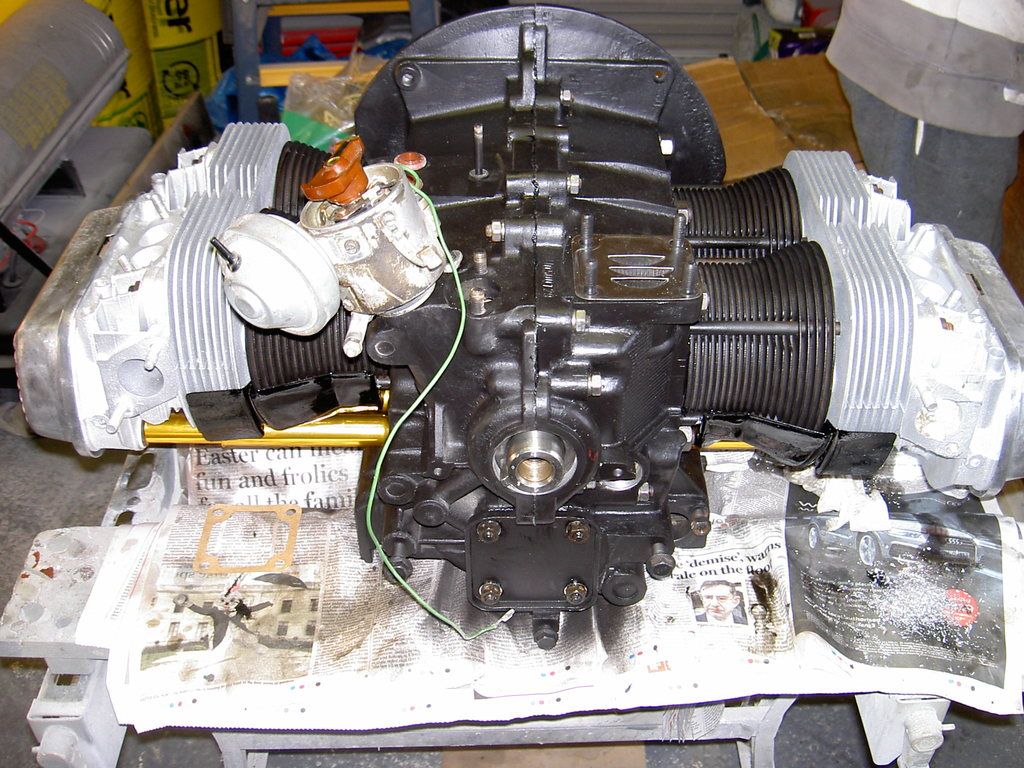
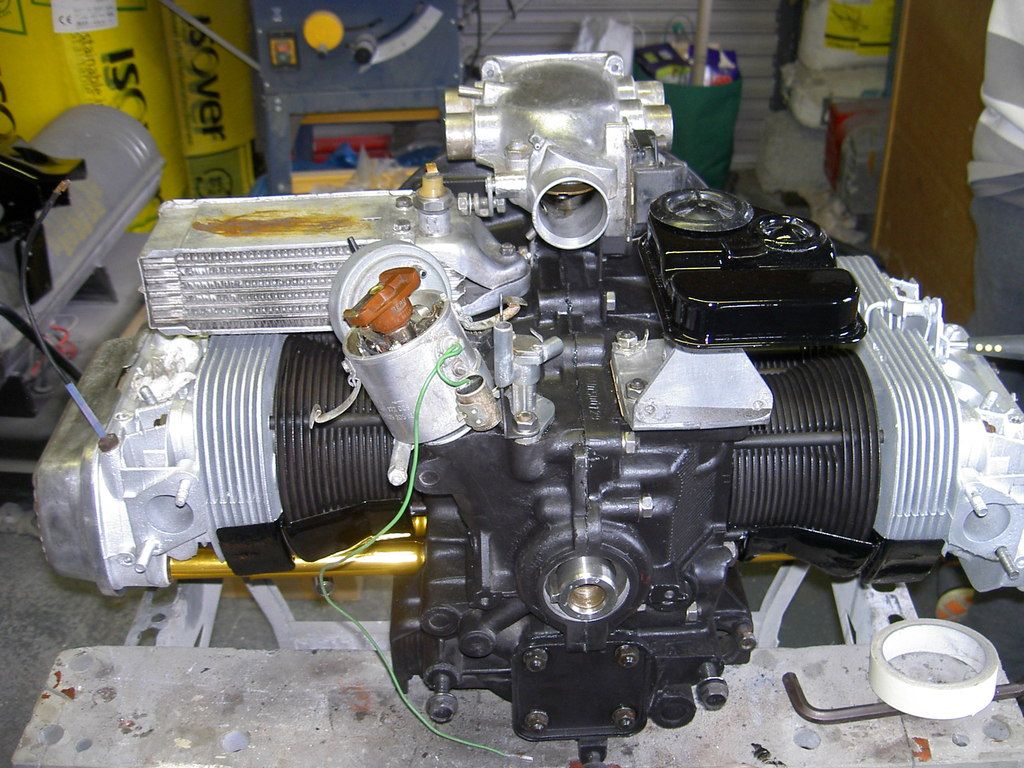
once clean i ended up de-burring as much of the rough castings as i could, with sandpaper on large areas and a dremil and small file for the tight spots. after the cases were clean and degreased for the last time, i sprayed them with an engine enamel paint which dries to a sheen finish. also sandblasted as many engine parts as possible (not the cases though).
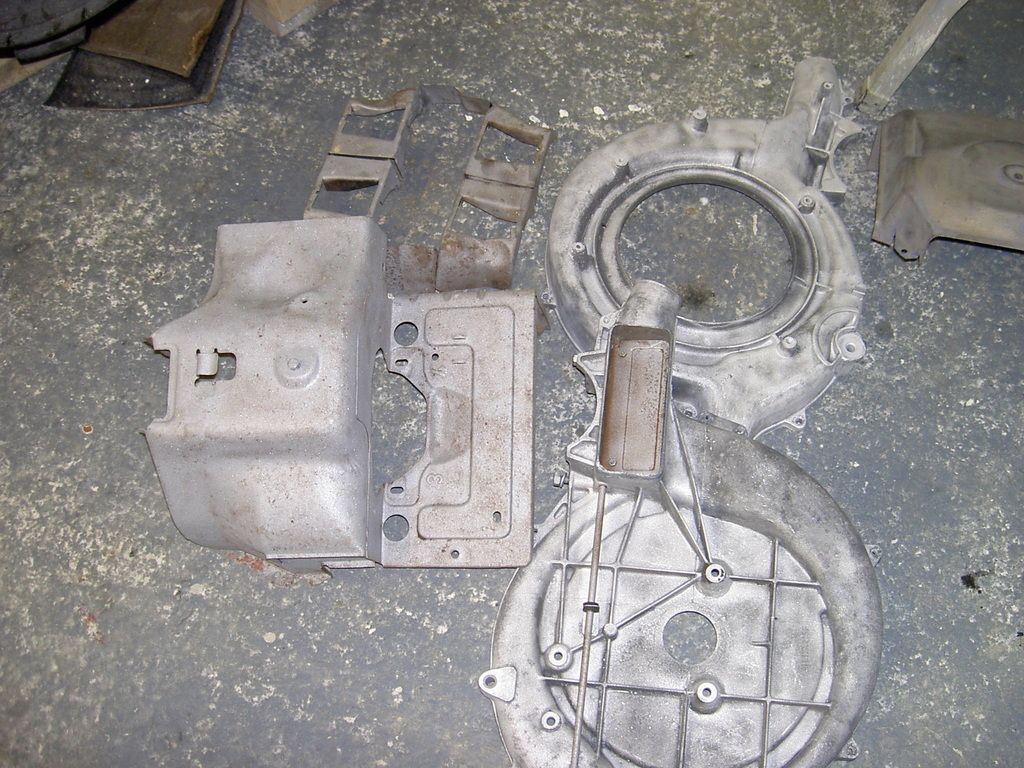
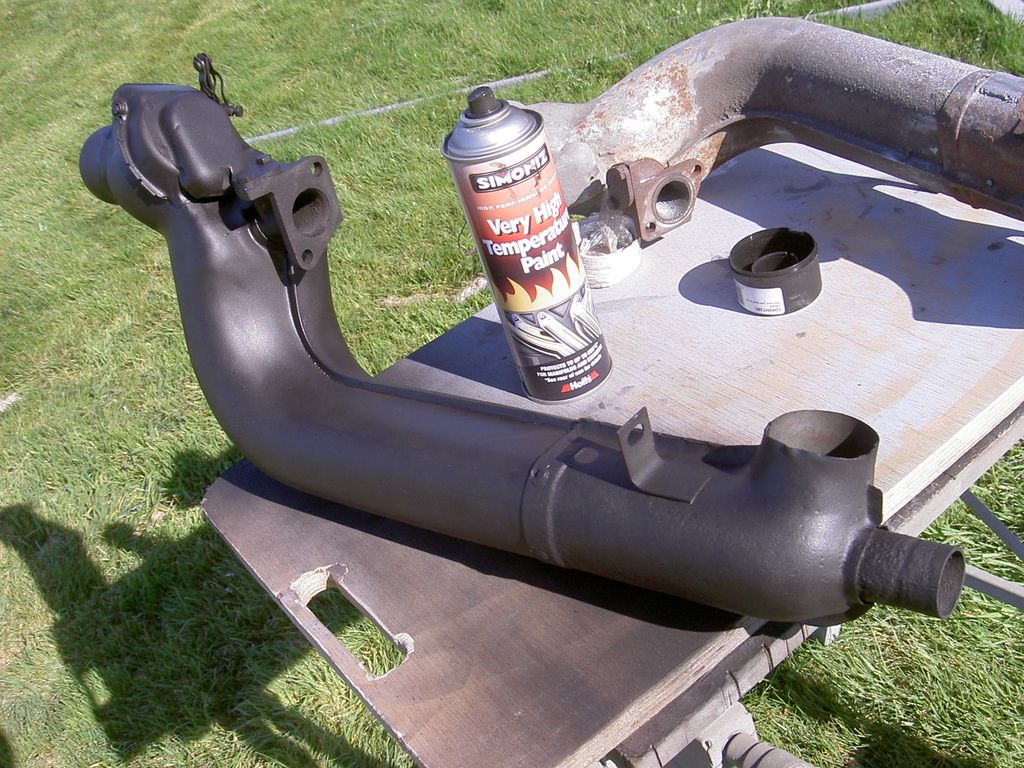
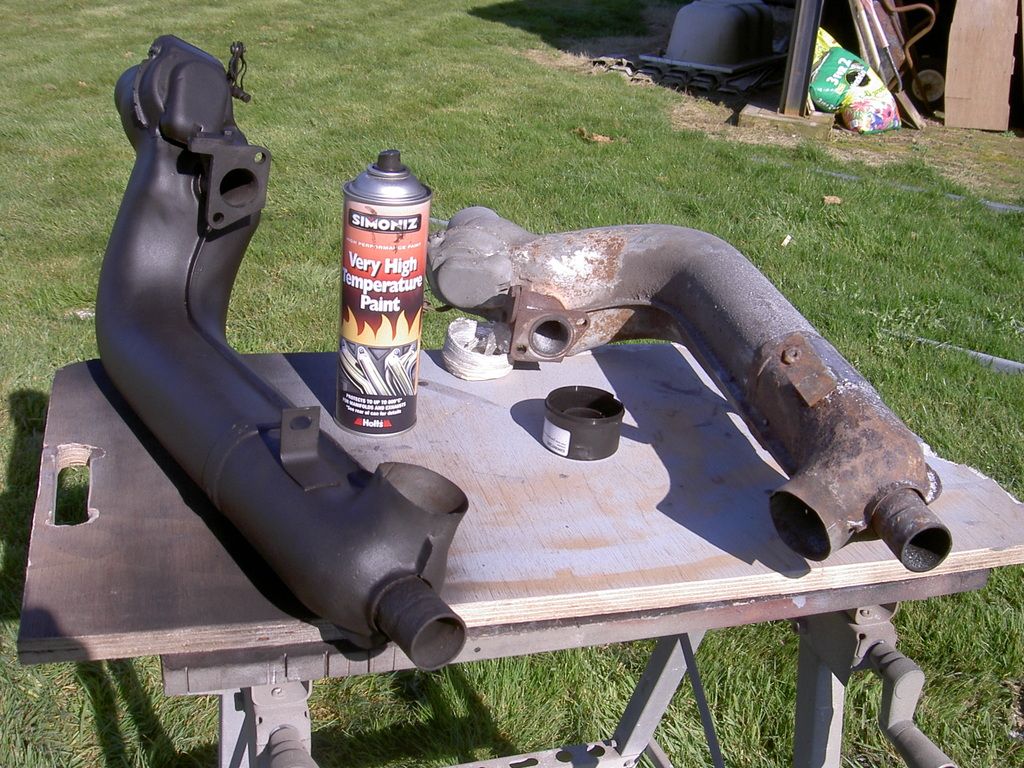
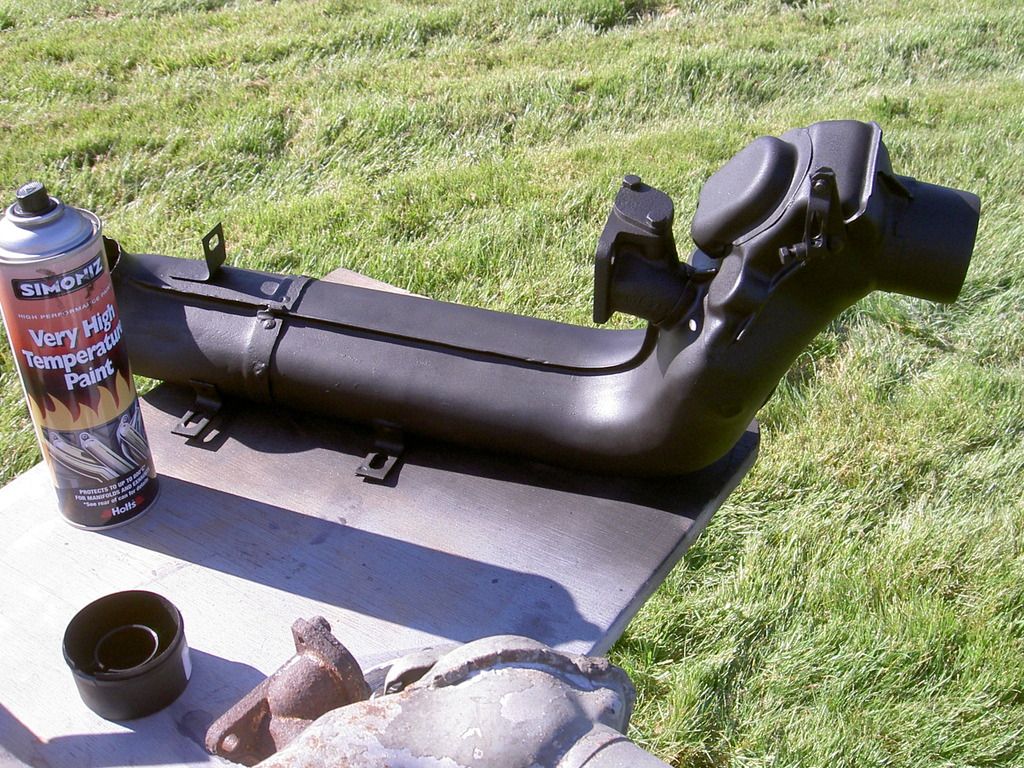
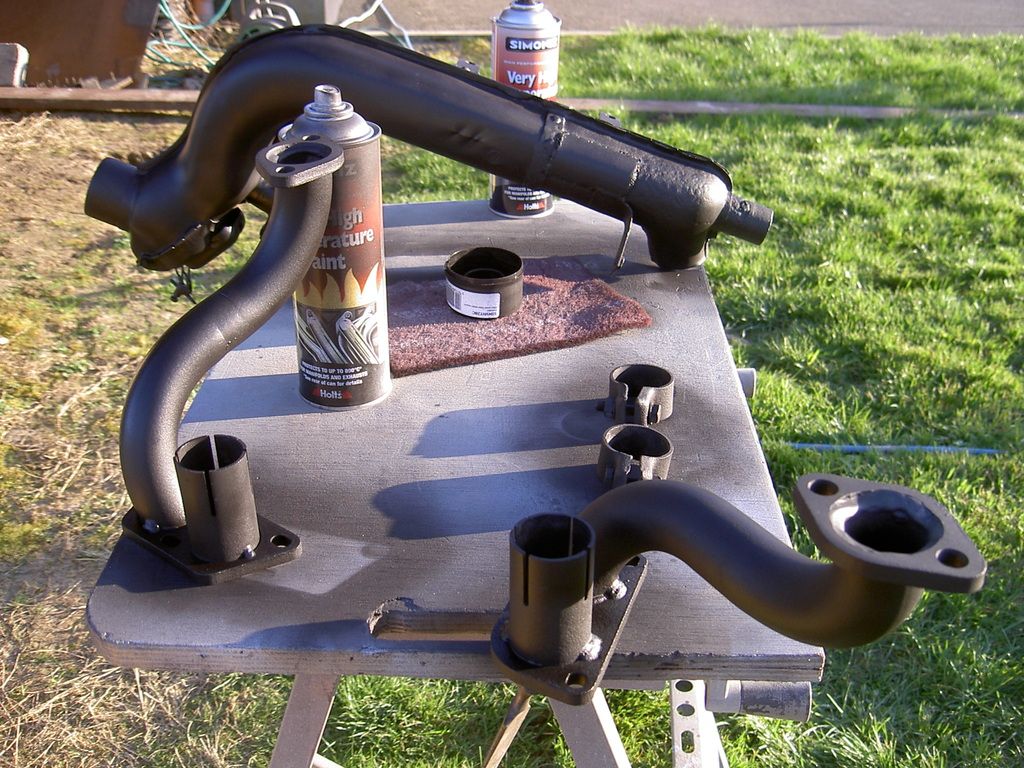
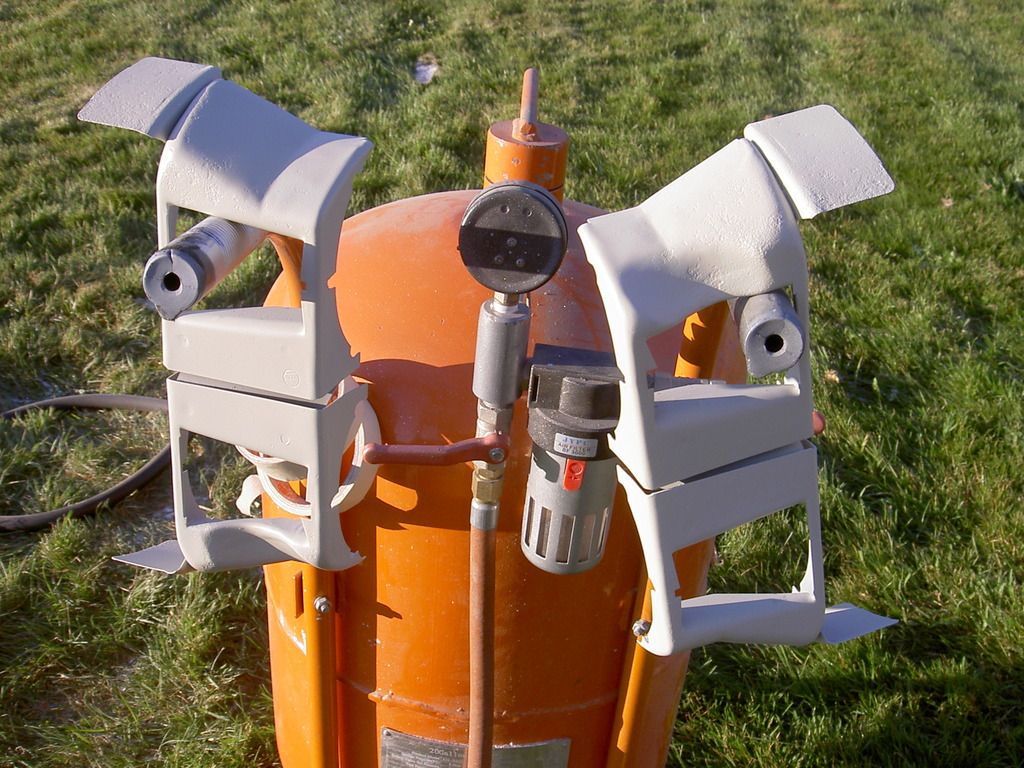
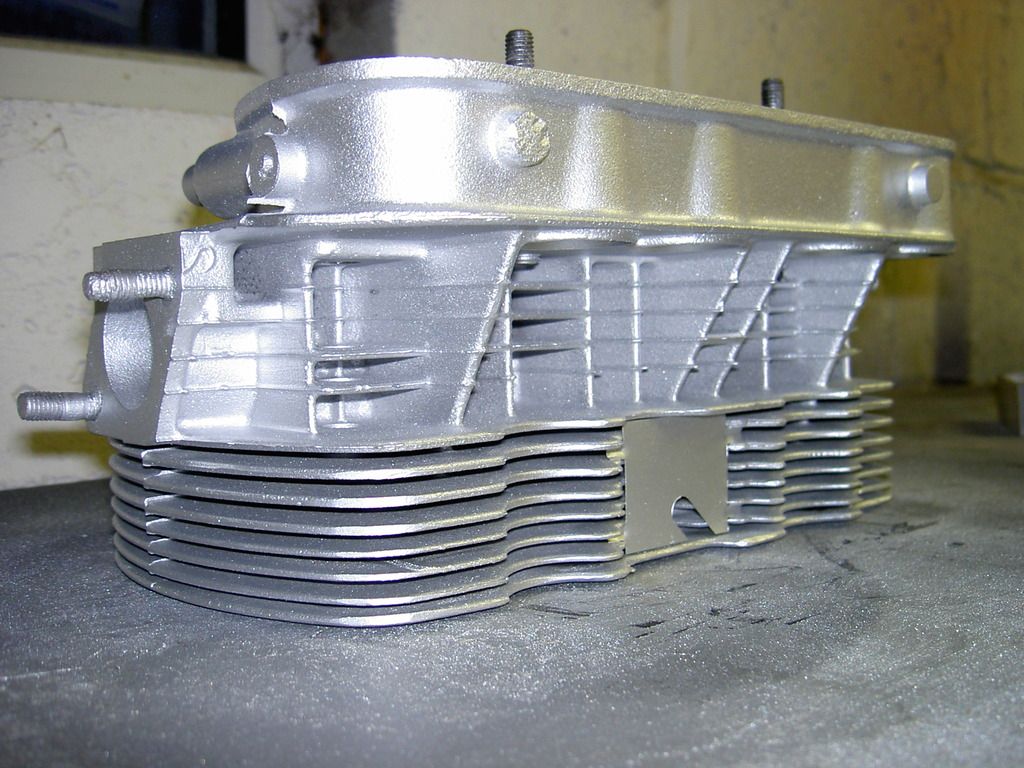
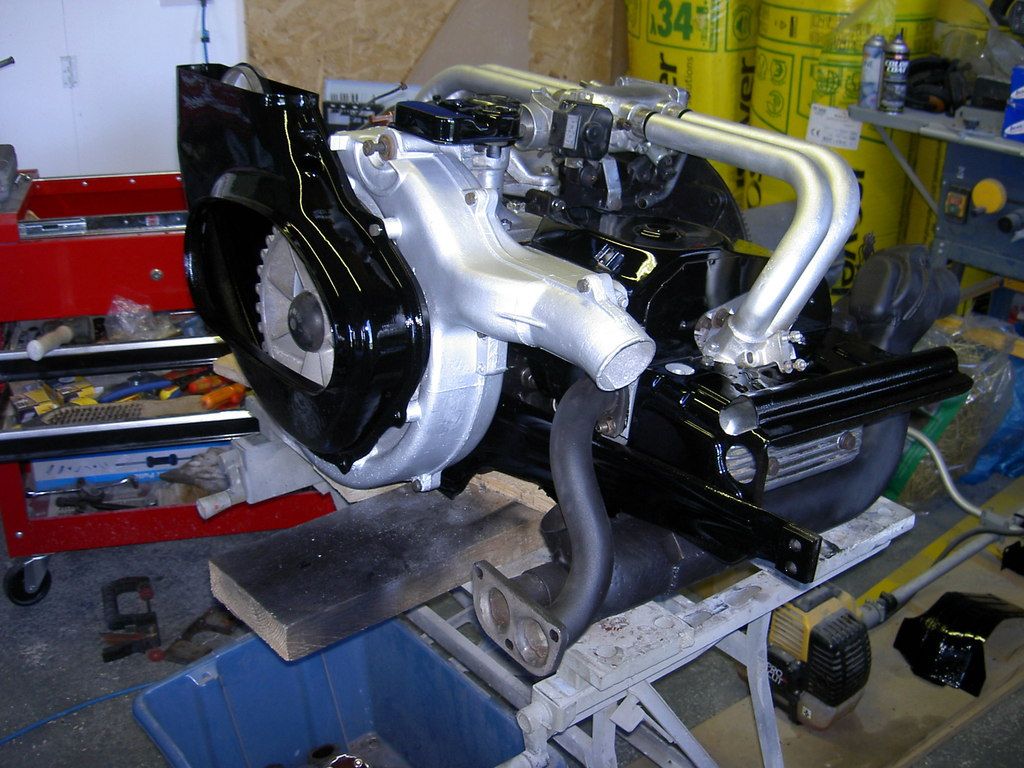
the heat exchangers were in good shape,
one of them did require a tiny patch welded on put other than that in good condition, i sandblasted both of them and afterwards finished them with very high temp paint, the paint needs to dry but will only cure properly with heat so i sparked up the bbq to heat treat some parts. (misses wouldnt let me use the oven!! shes funny like that.)


i ended up splitting the cases. then washed an degreased washed again degreased again....
i grabbed a large garden bin (clean of course). filled it with hot soapy water, ran the compressor up and stuck the air line in to the water to agitate it all around the engine cases.
once clean i ended up de-burring as much of the rough castings as i could, with sandpaper on large areas and a dremil and small file for the tight spots. after the cases were clean and degreased for the last time, i sprayed them with an engine enamel paint which dries to a sheen finish. also sandblasted as many engine parts as possible (not the cases though).
the heat exchangers were in good shape,
one of them did require a tiny patch welded on put other than that in good condition, i sandblasted both of them and afterwards finished them with very high temp paint, the paint needs to dry but will only cure properly with heat so i sparked up the bbq to heat treat some parts. (misses wouldnt let me use the oven!! shes funny like that.)
You Love It.!!!
Re: orange fastback
Impressive stuff, and your heat exchangers are better than many, particularly the exhaust pipe itself, which can rust through and leak into the heating system. The outer shrouds don't get all that hot - its the fins and pipes with exhaust gases running through that get hot, but it's worth getting a decent coating of paint on the shrouding to hold the rust at bay.
Dave.
Re: orange fastback
Thanks dave...
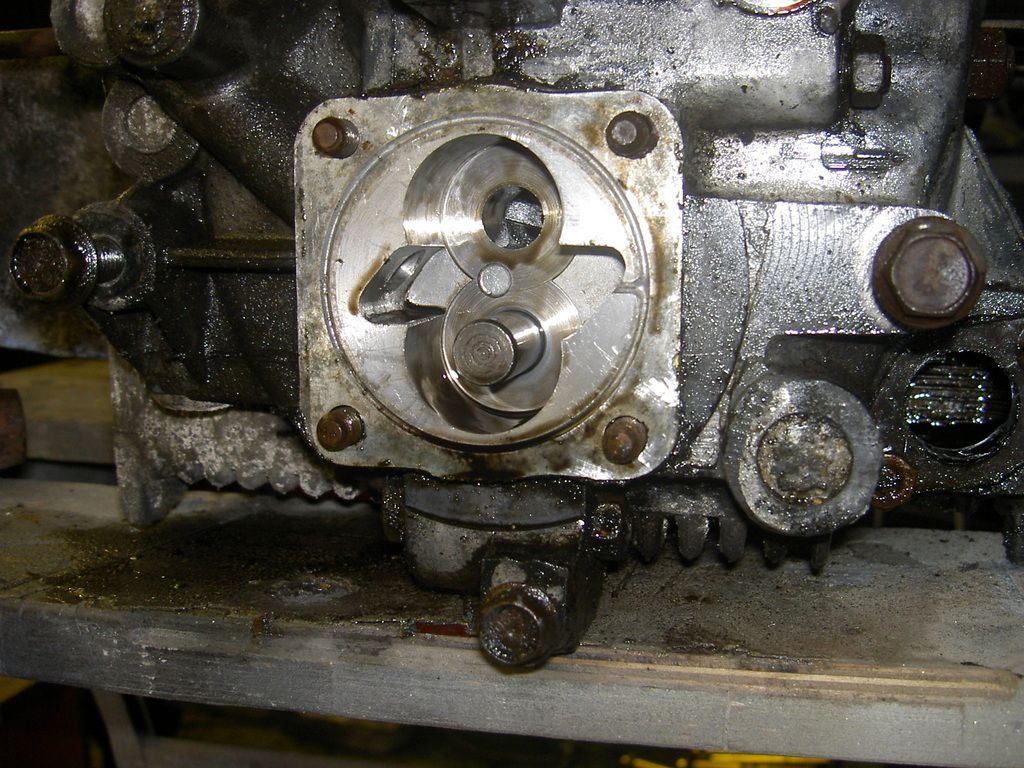
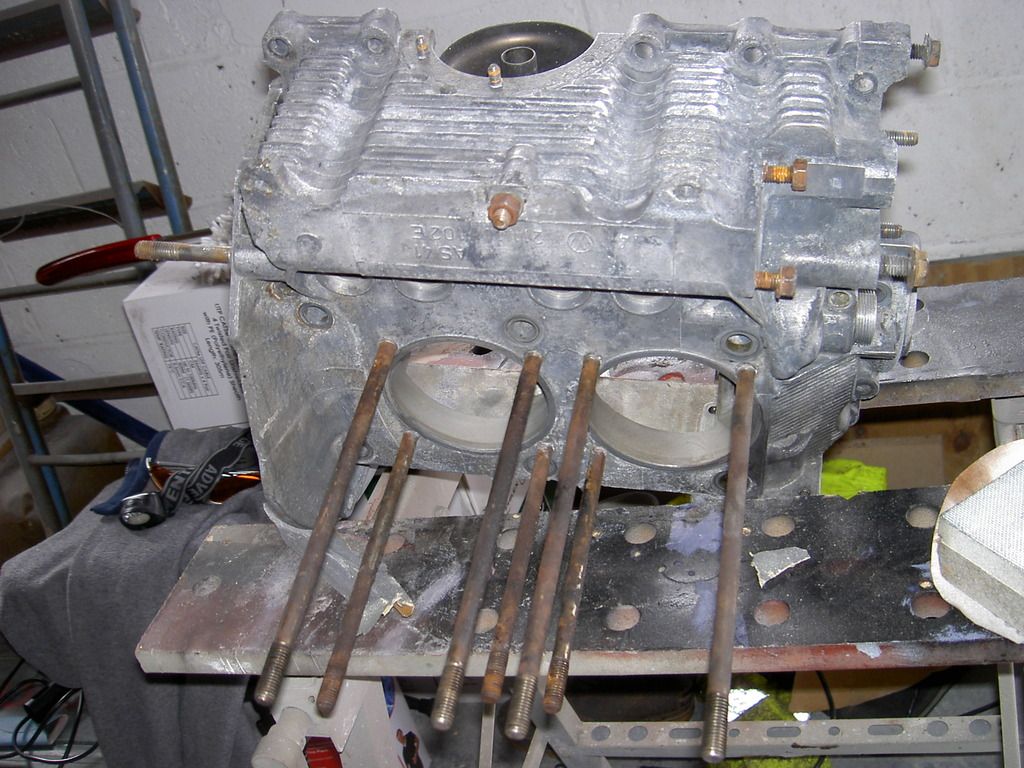
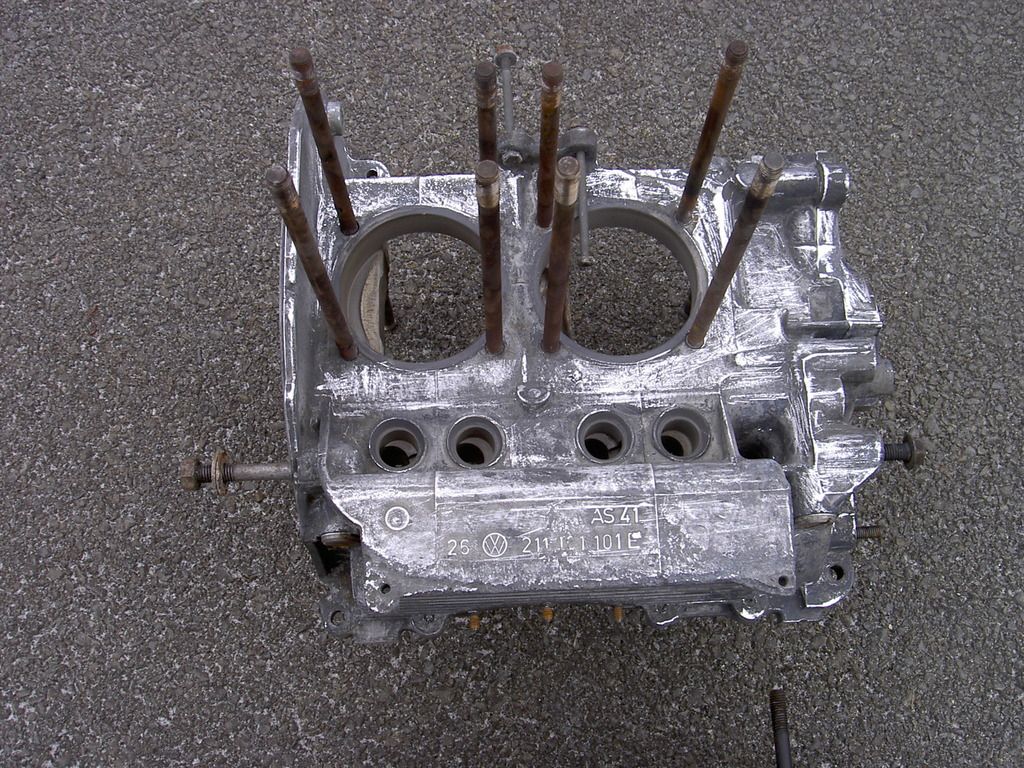
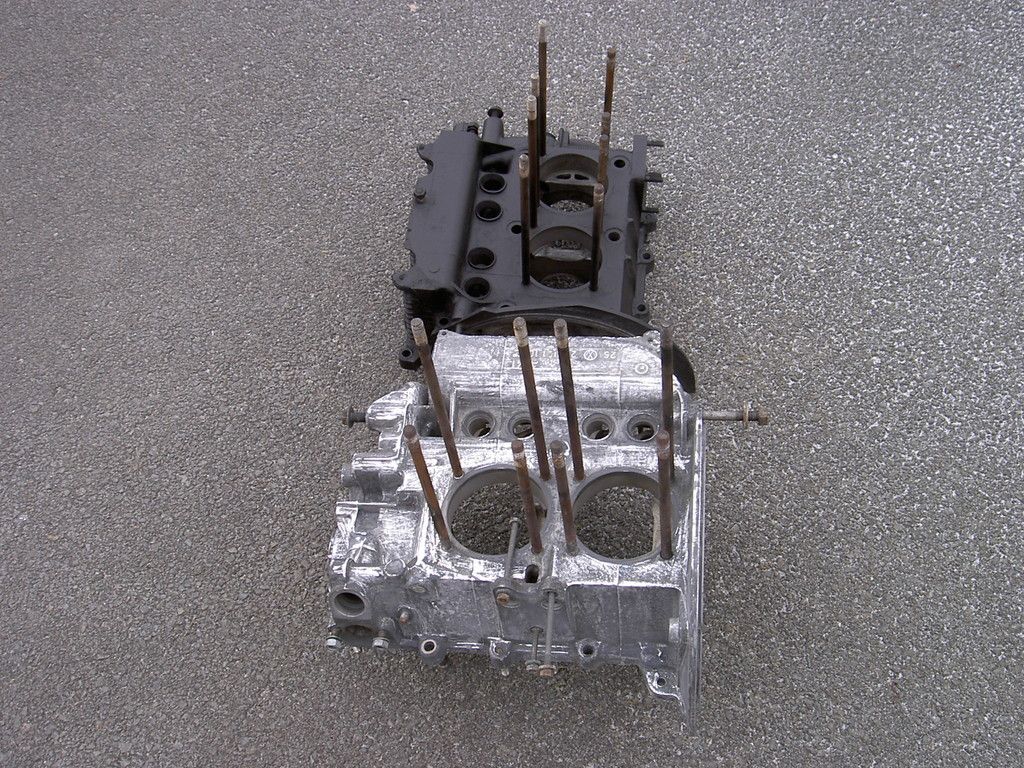
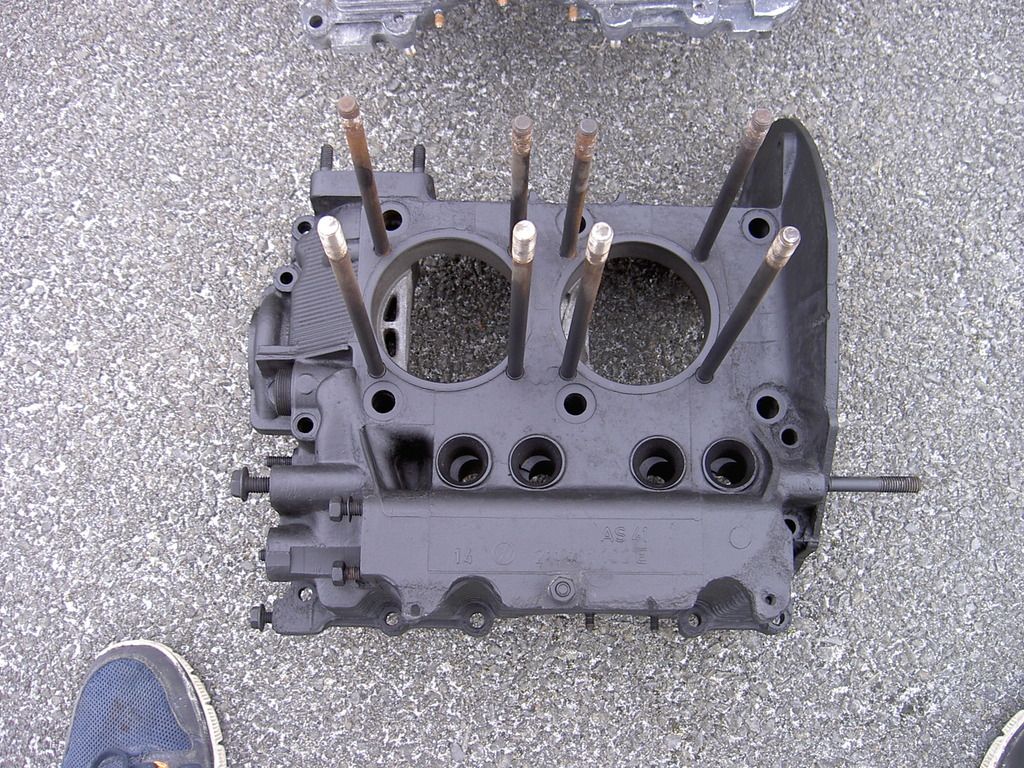
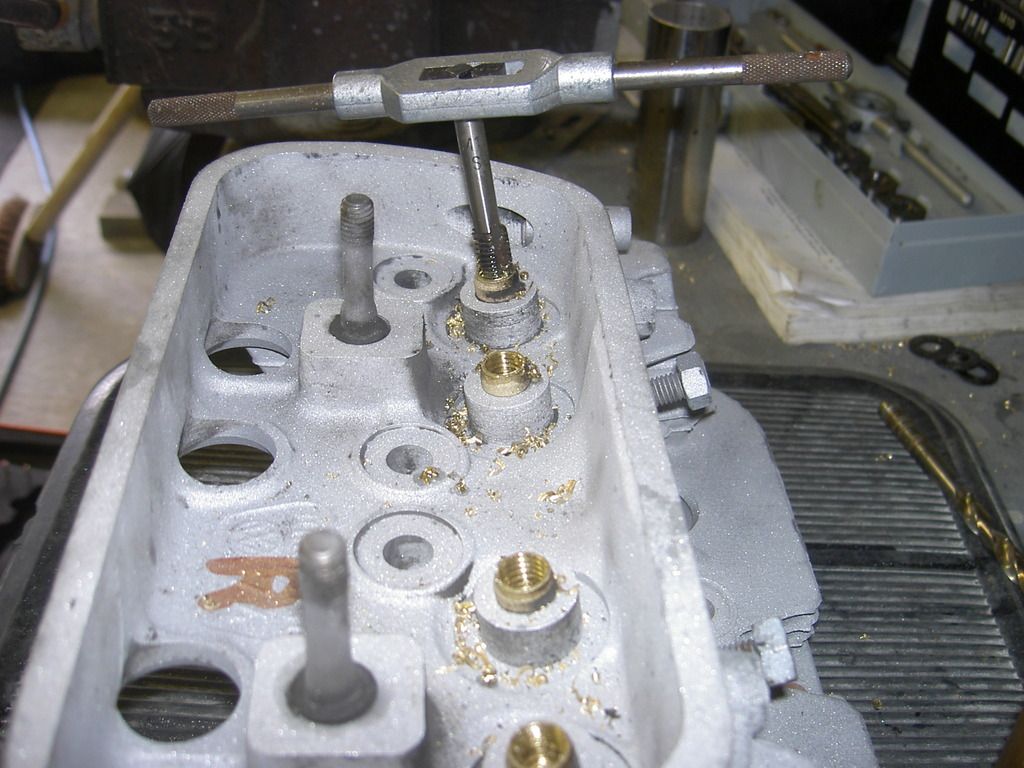
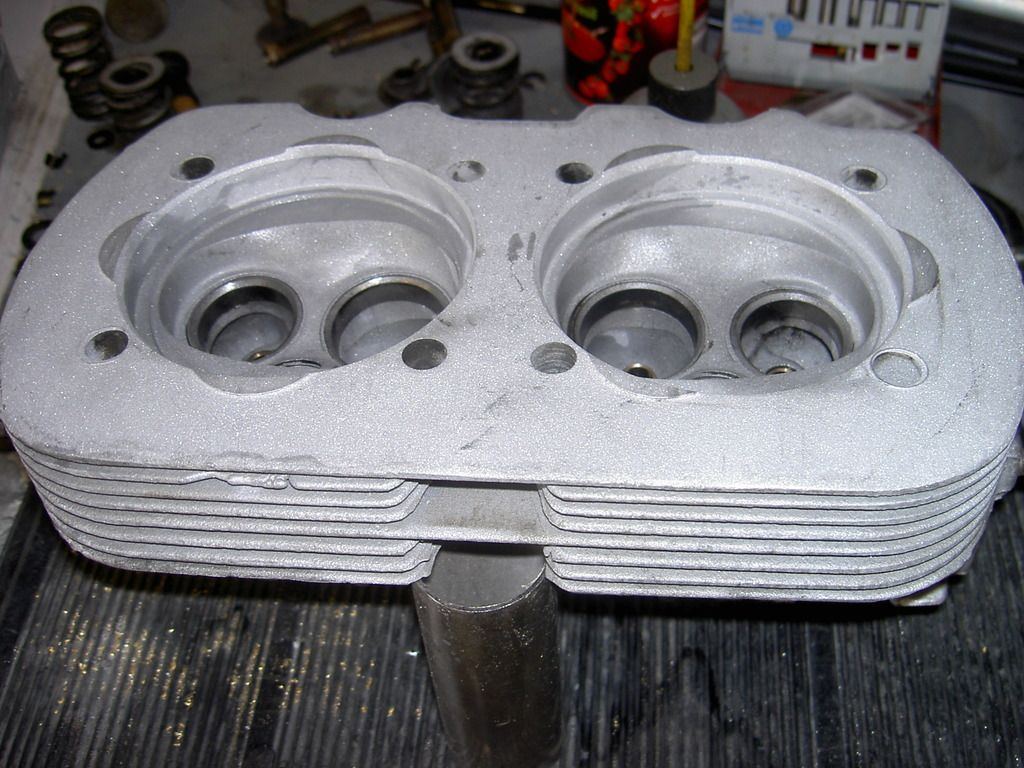
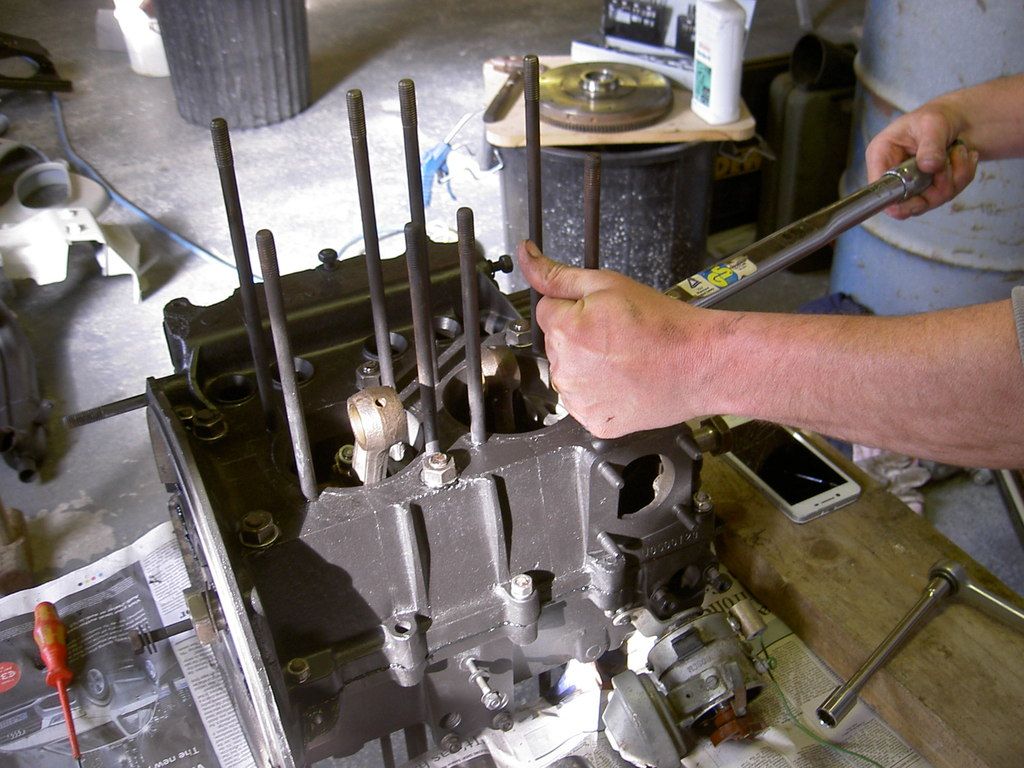
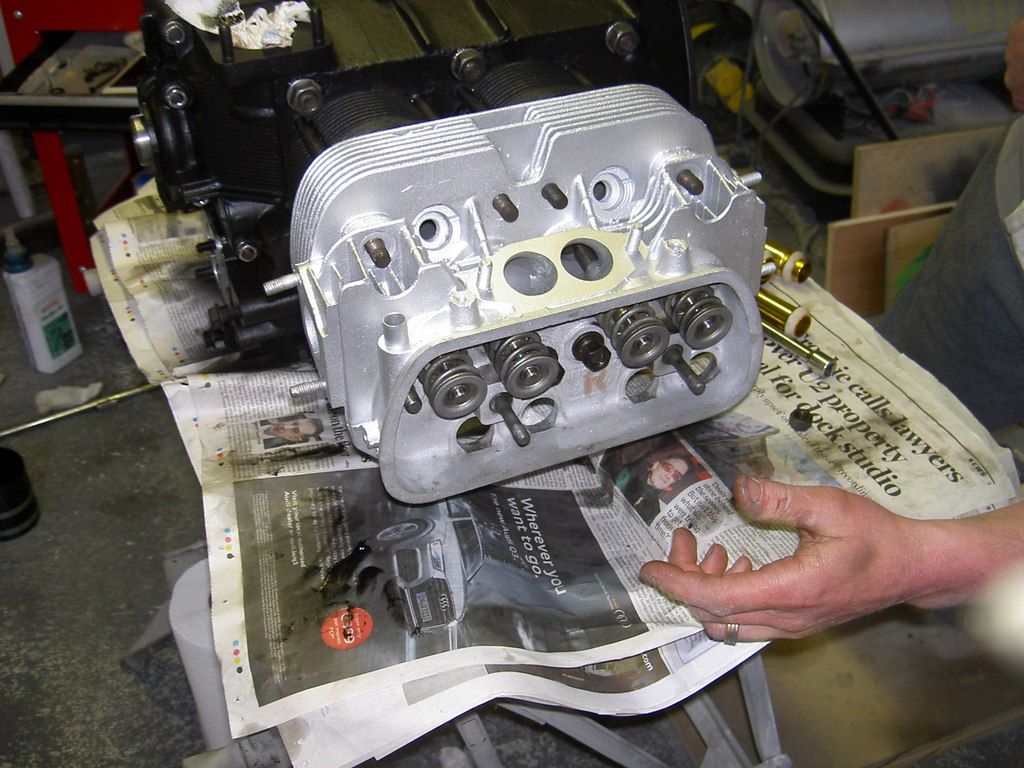
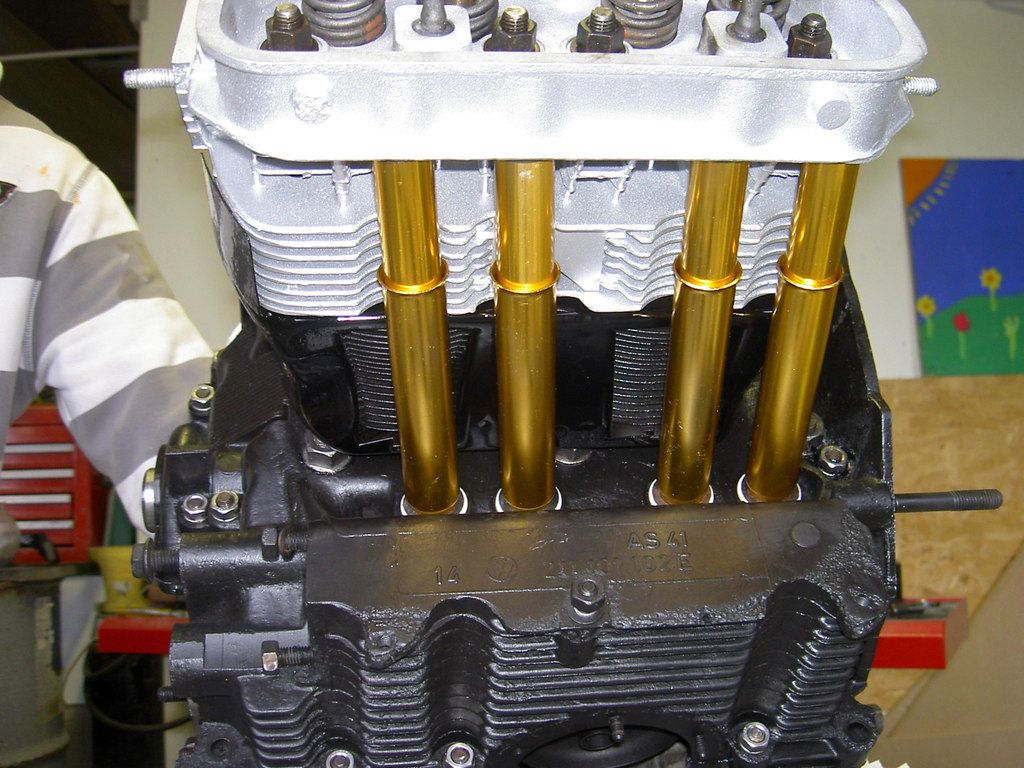
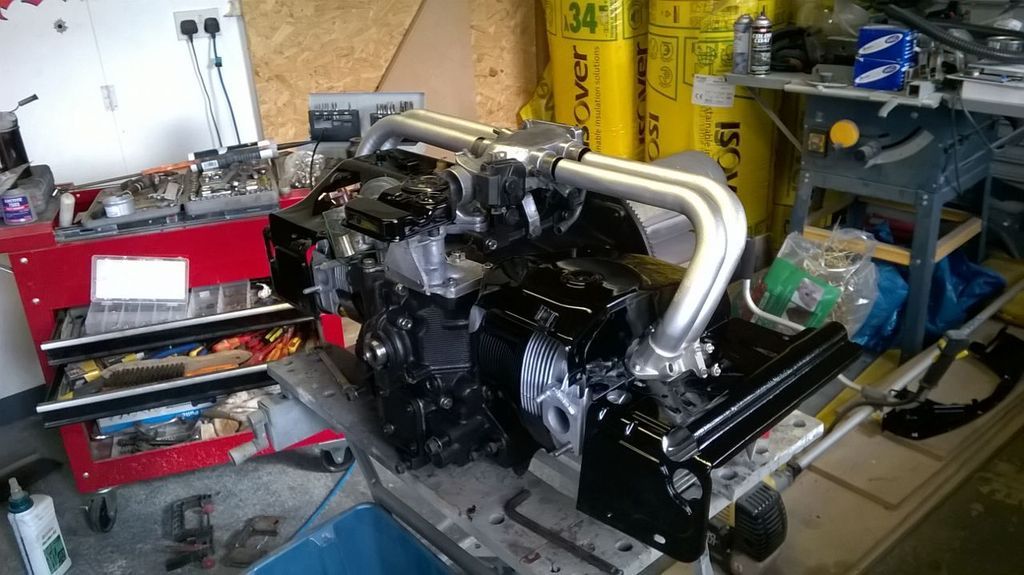
A bit of head work..
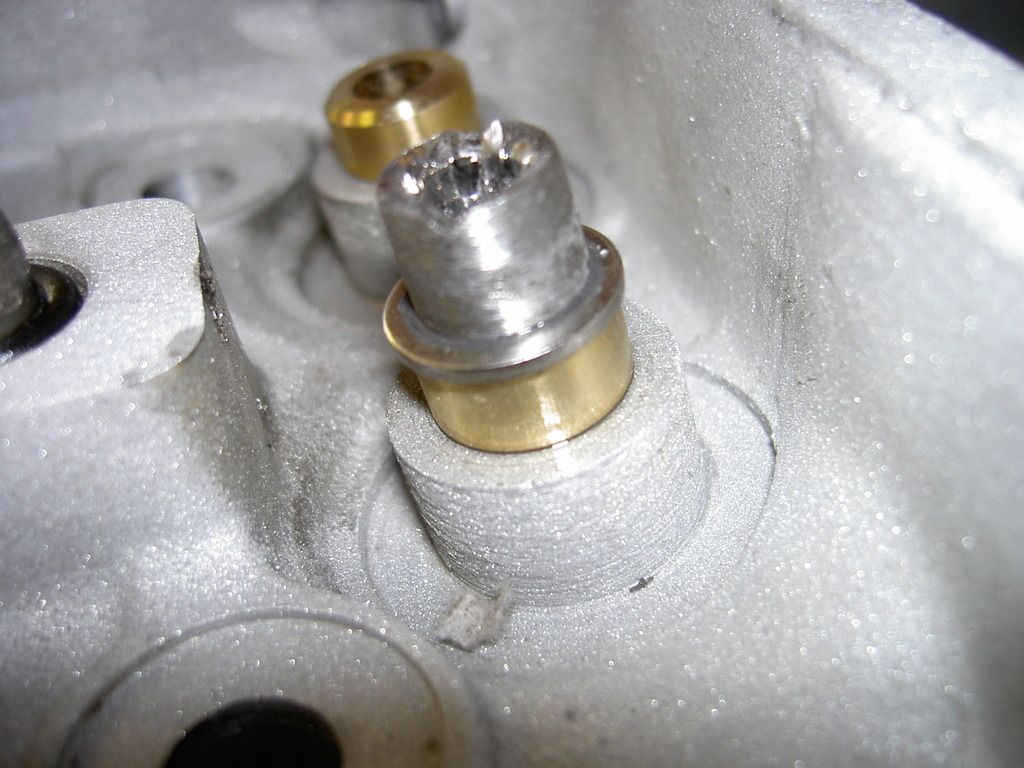
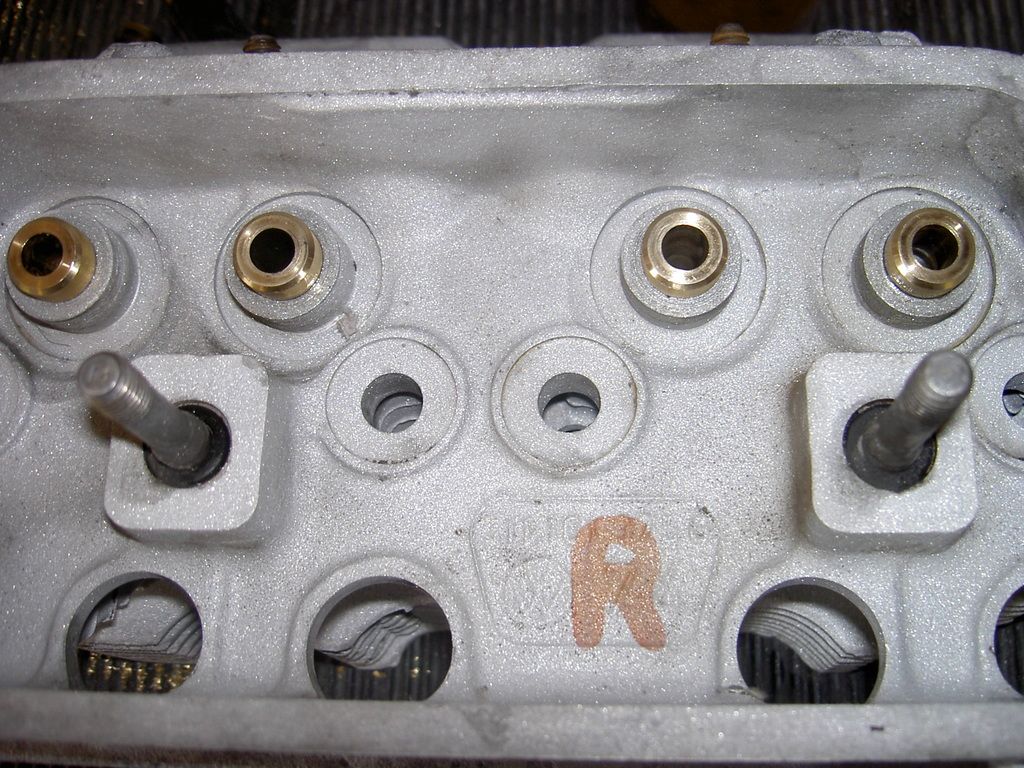
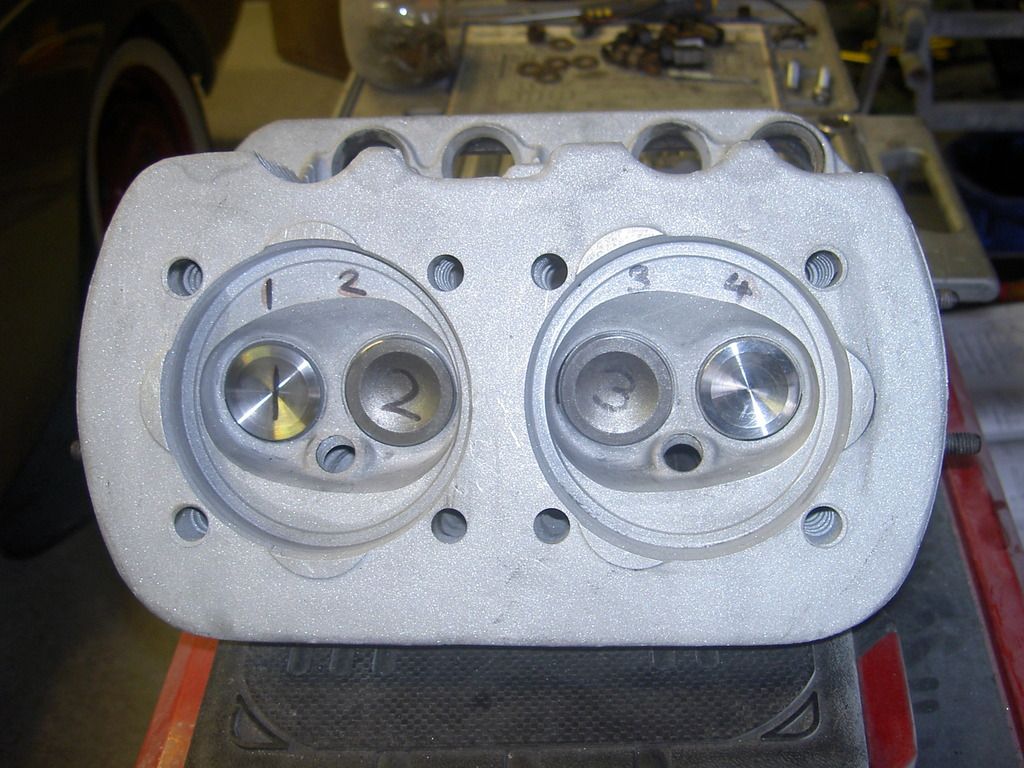
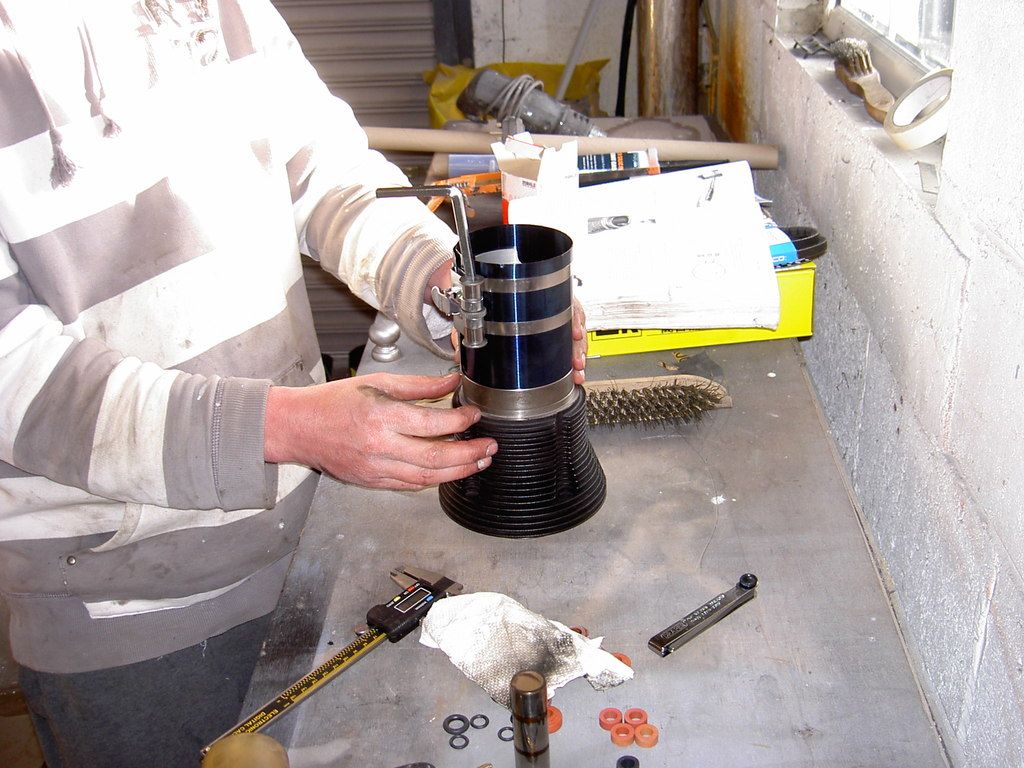
the valve guides had more play than id liked especially the exhaust ones, so ordered up new ones and new valves.
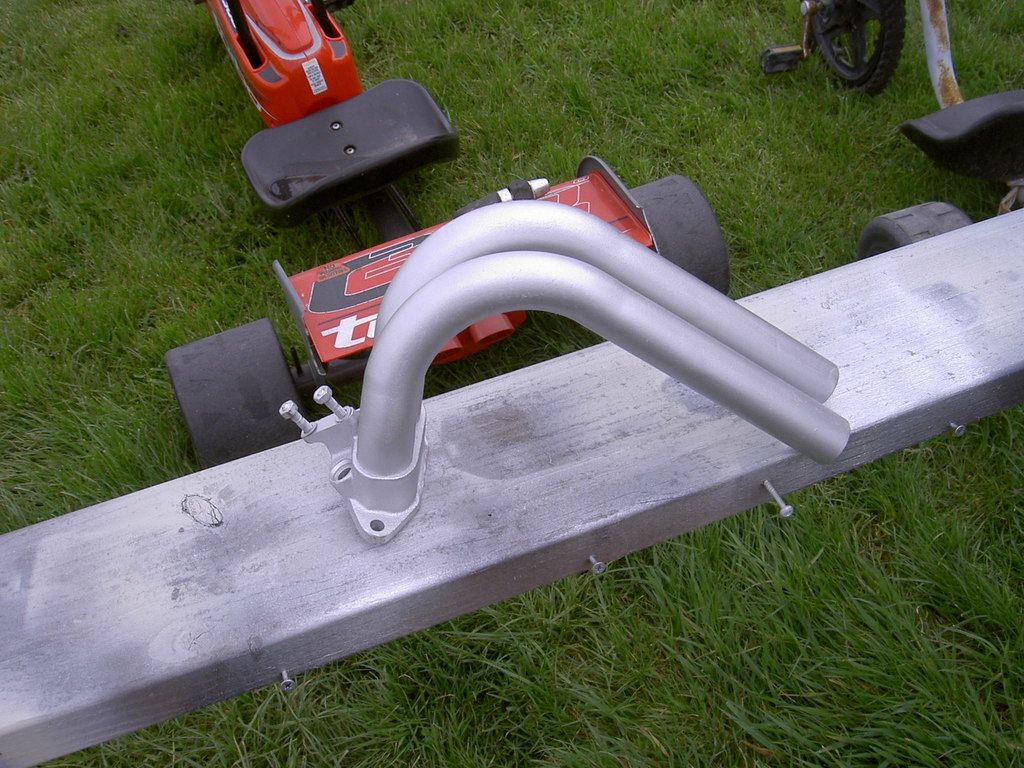
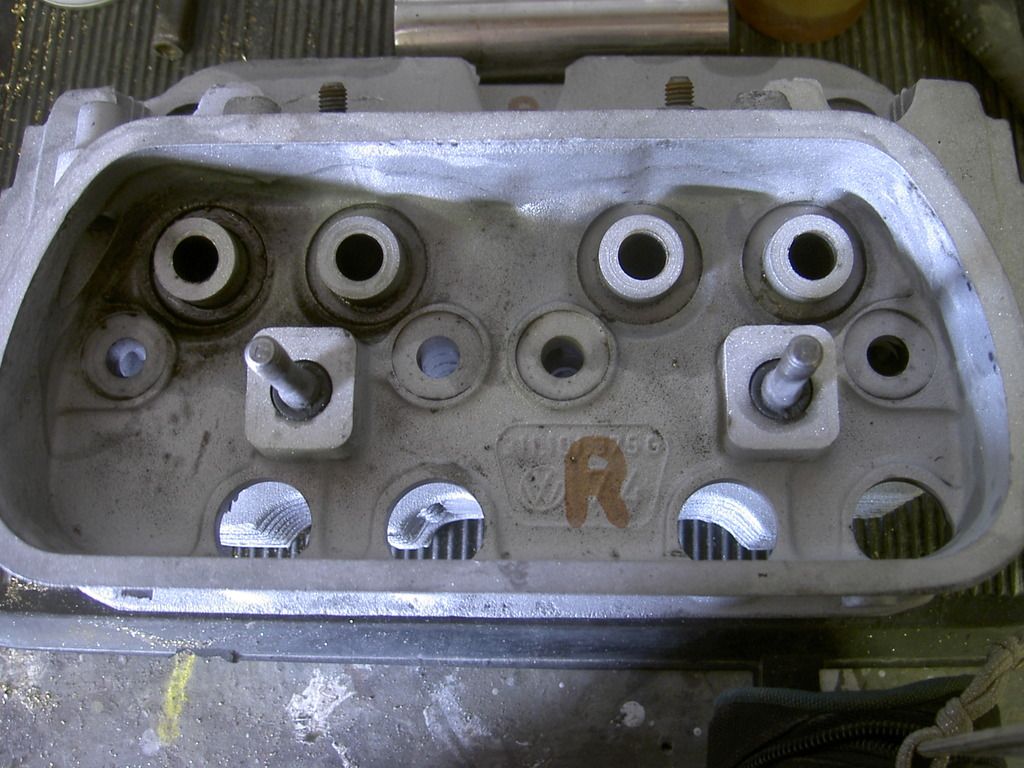
i blasted the heads clean which came up nice ,then treated them to the same high temp heat paint as before, this time in silver
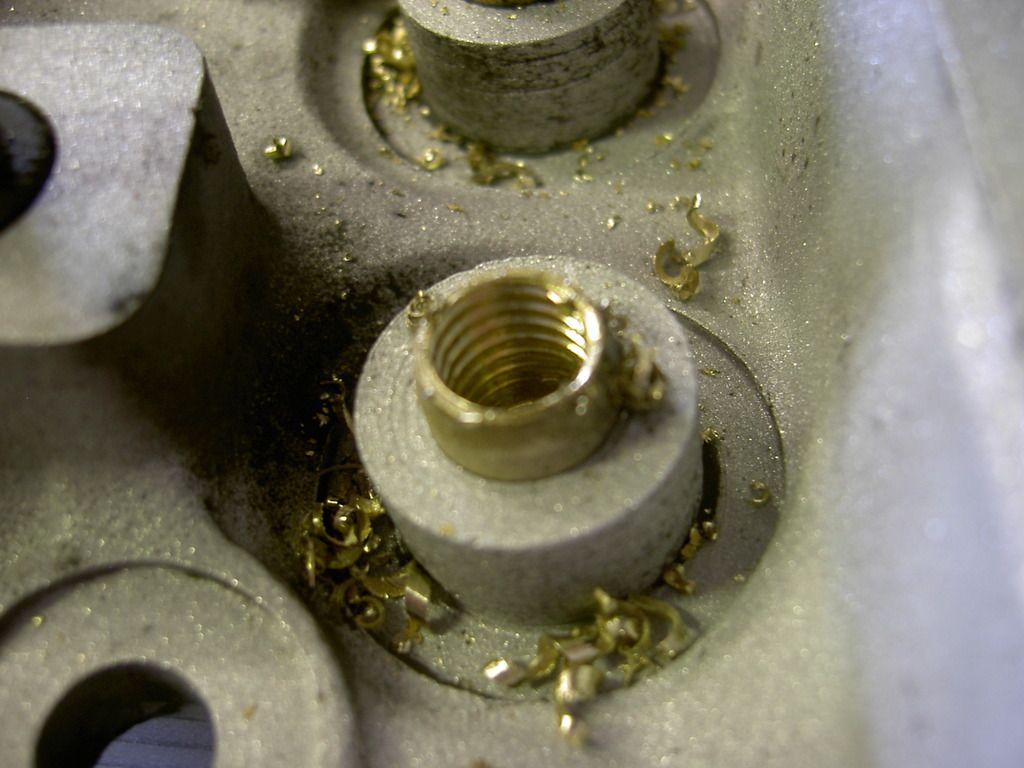
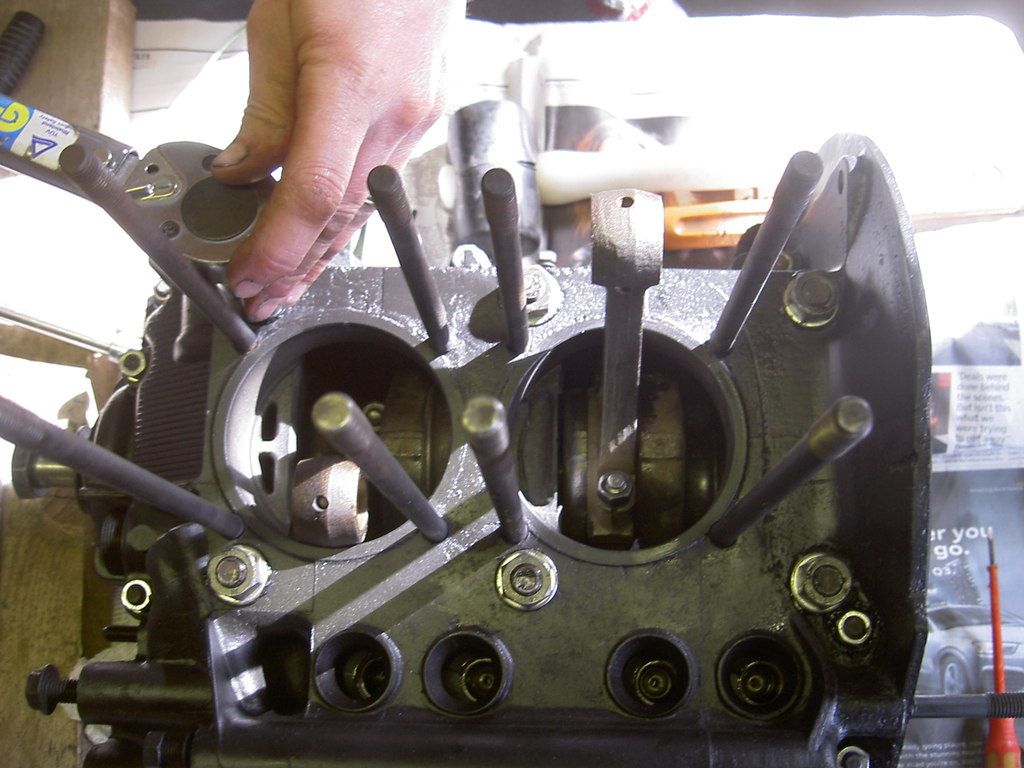
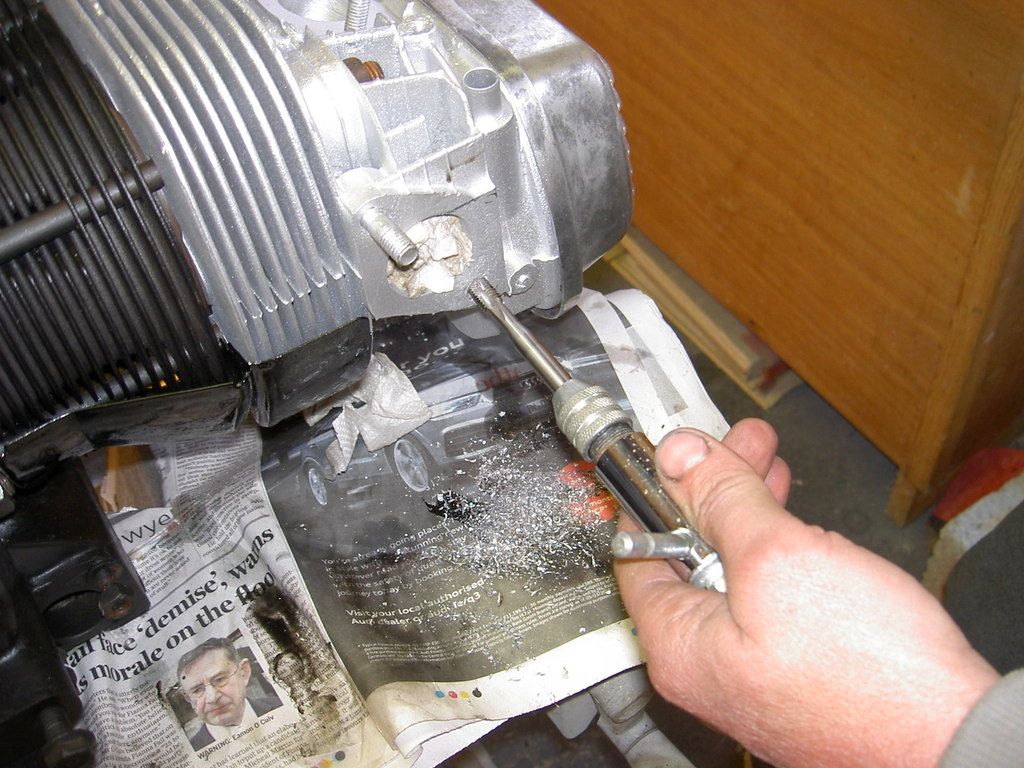
i found the easiest way to remove the guides was to open them out slightly with a clearance drill to suit a 10mm tap (think it was 10)
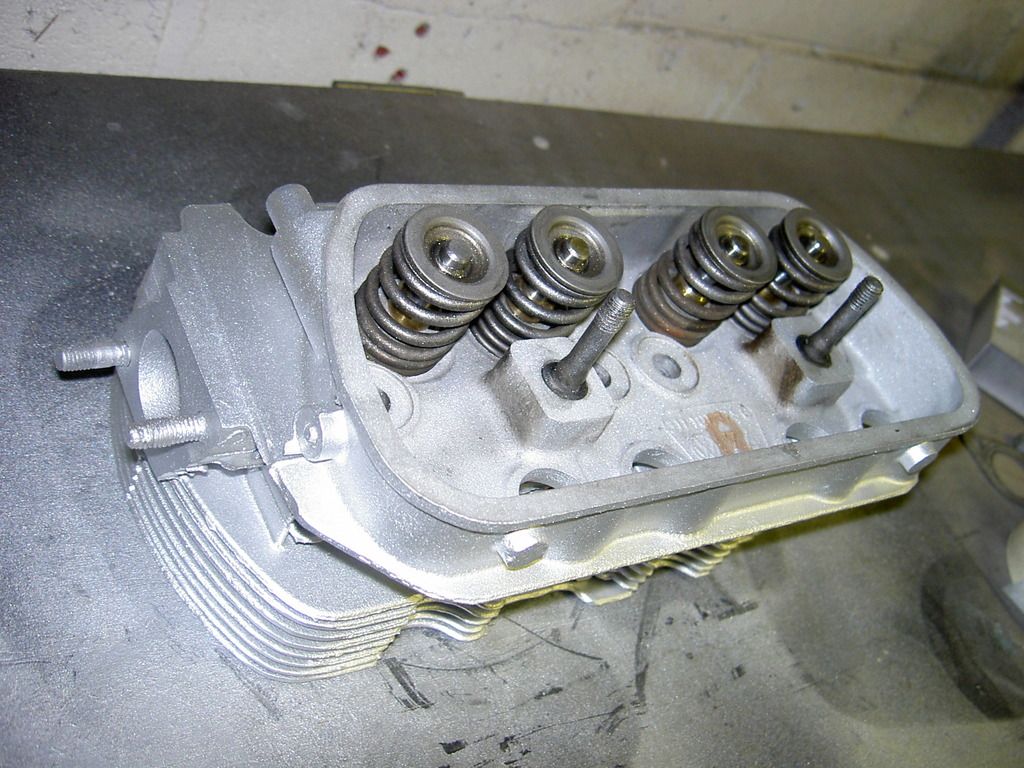
then screw in a 10mm bolt to cap off the end, and then from the other side use my hammer drill on hammer only setting and with a masonry bit vibrate them straight out, worked a charm..to install the new guides i found an allen head bolt which fitted in the guides snugly with no wiggle room so not to score the guides bore, and again used the drill on hammer to drive them in nice and easy, i also put the guides in the freezer well before putting them in. new valves were lapped in using a coarse then fine paste, and the head put back together.
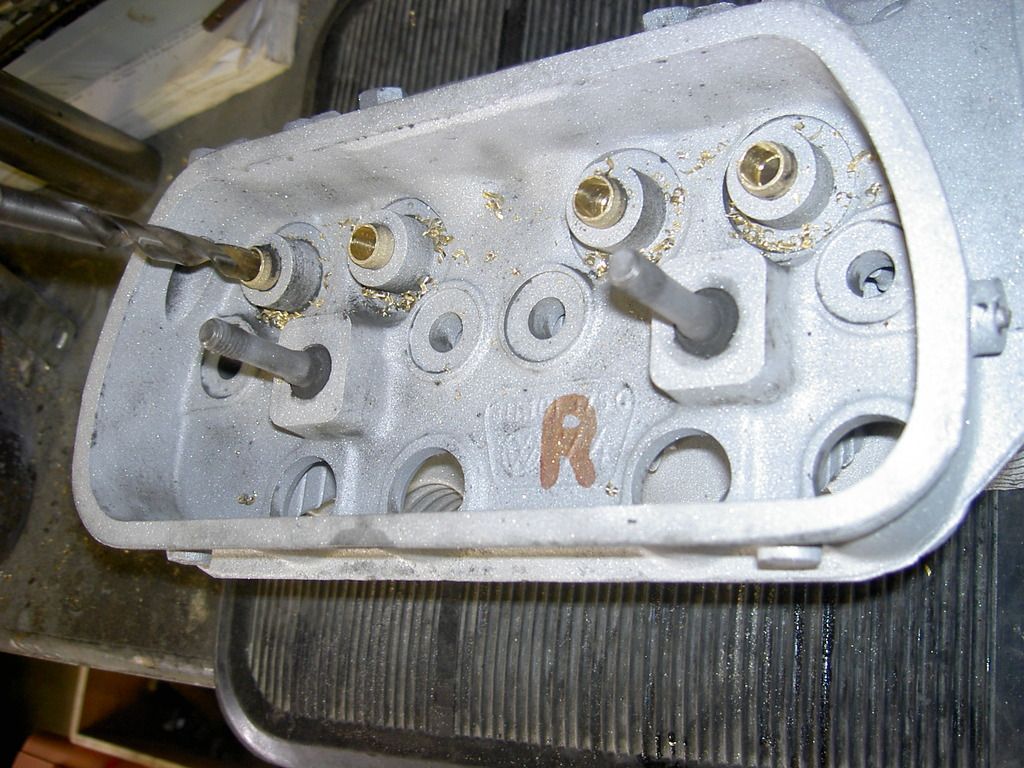
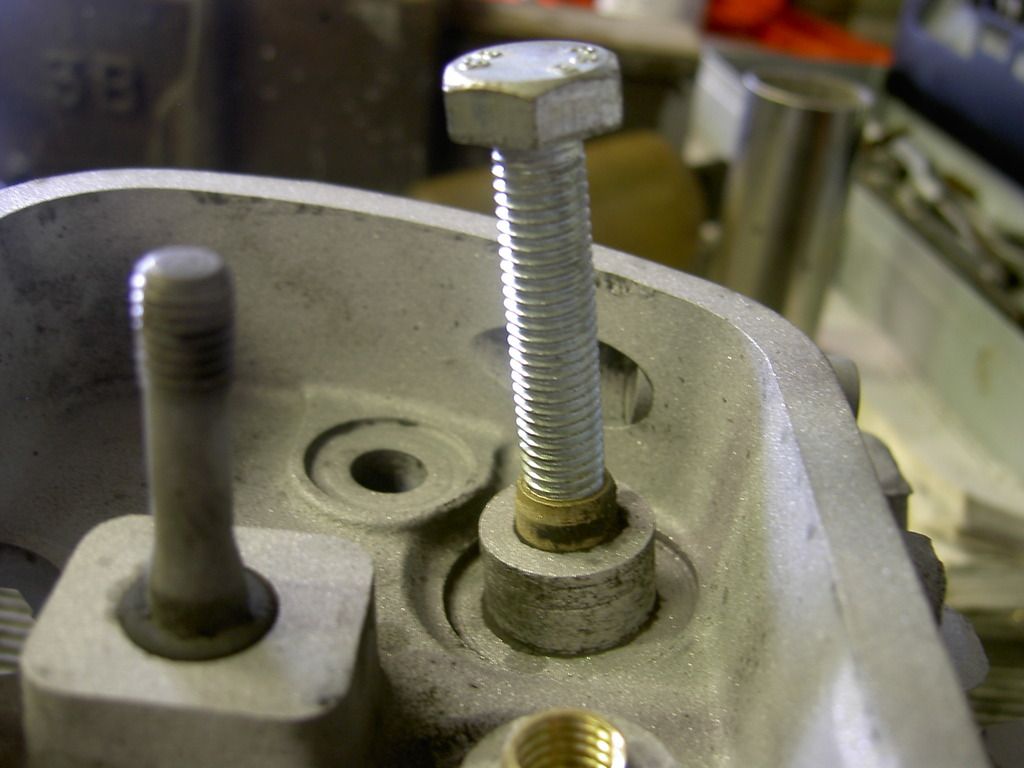

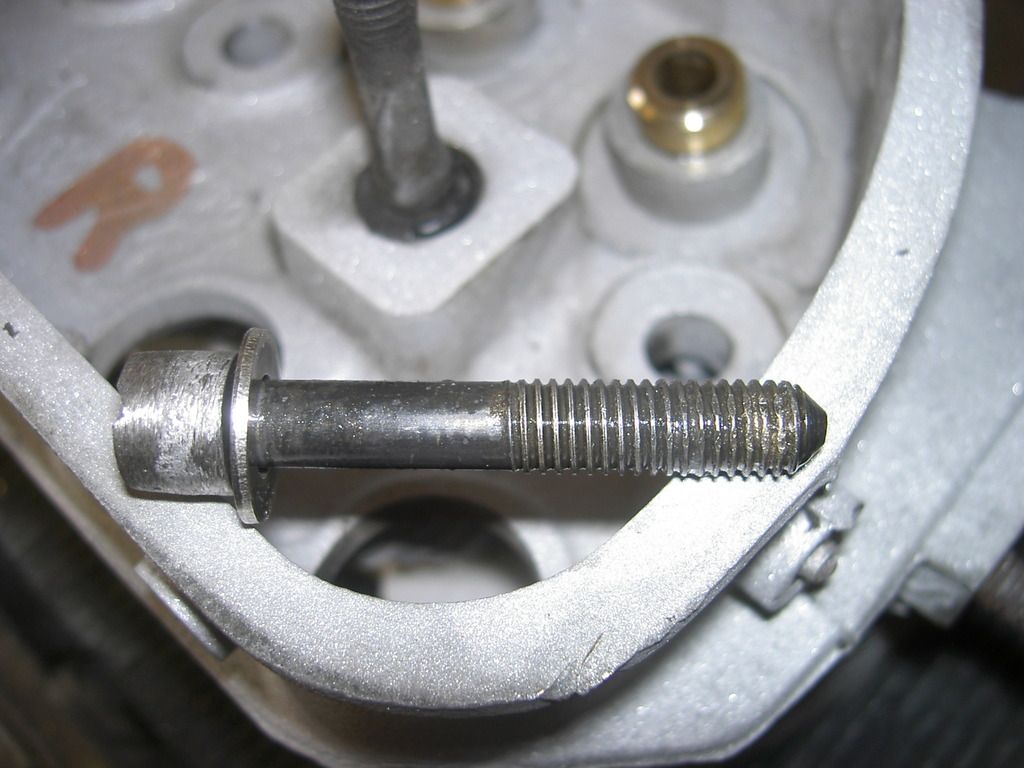
i wasnt happy with a few of the head studs
few of them looked like they wouldnt hold up to much so ordered up new ones and replaced
the ropey looking ones..
A bit of head work..
the valve guides had more play than id liked especially the exhaust ones, so ordered up new ones and new valves.
i blasted the heads clean which came up nice ,then treated them to the same high temp heat paint as before, this time in silver
i found the easiest way to remove the guides was to open them out slightly with a clearance drill to suit a 10mm tap (think it was 10)
then screw in a 10mm bolt to cap off the end, and then from the other side use my hammer drill on hammer only setting and with a masonry bit vibrate them straight out, worked a charm..to install the new guides i found an allen head bolt which fitted in the guides snugly with no wiggle room so not to score the guides bore, and again used the drill on hammer to drive them in nice and easy, i also put the guides in the freezer well before putting them in. new valves were lapped in using a coarse then fine paste, and the head put back together.
i wasnt happy with a few of the head studs
few of them looked like they wouldnt hold up to much so ordered up new ones and replaced
the ropey looking ones..
You Love It.!!!
Re: orange fastback
Excessive valve rock due to guide wear is the main reason for valve heads 'dropping', which wrecks the engine, so very wise to sort those out.
In many cases cracks between valve seats and spark-plug holes mean a new head anyway.
That looks an effective way to do the job.
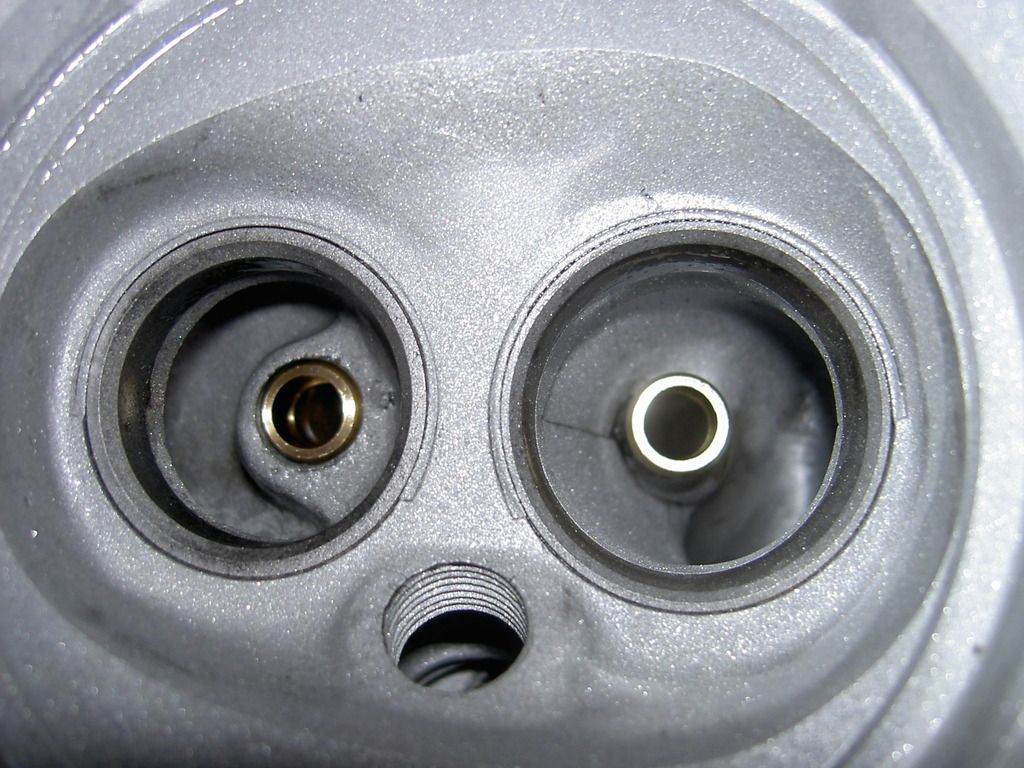
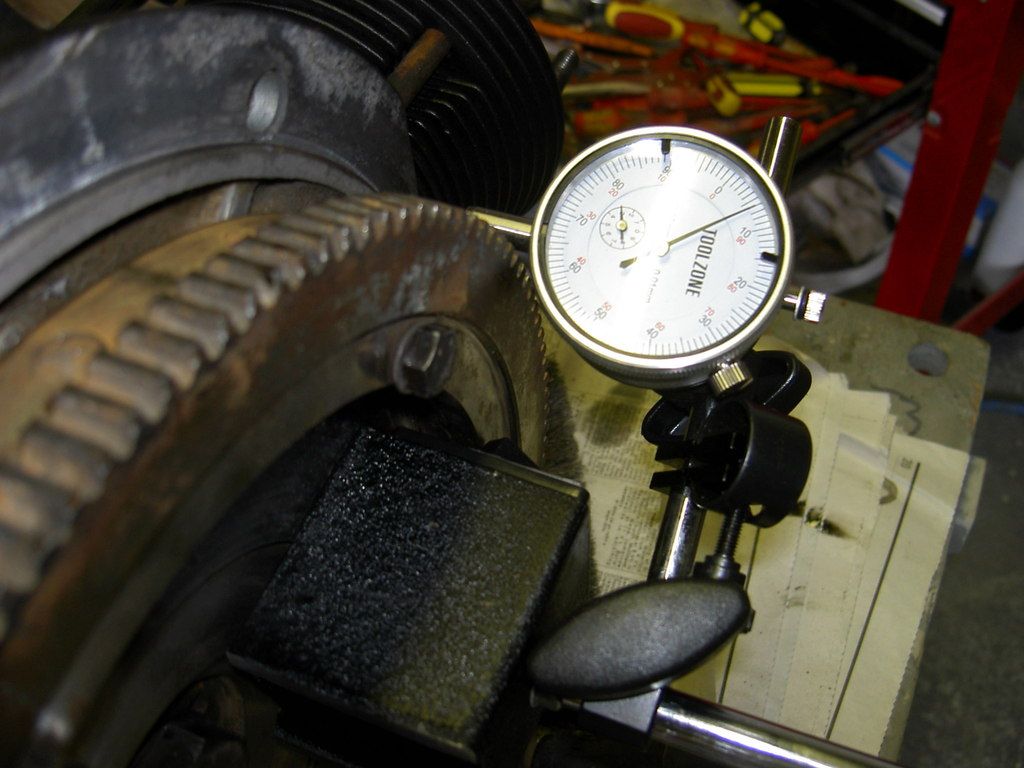
Are the lines around the inner end of the guide anything worrying, or just in the casting? (looks like the inlet valve).
Did you have to ream the guides after inserting them? Do you need to skim the sealing surfaces in the combustion chambers for the barrels?
I have this to look forward to on mine, and I'm wondering if my competence and skills are up to it.
Interesting to see the Trades Description Act note. Going to Stonor last year, I was checking the Variant speedo against the GPS, and it was spot-on, unlike the Mk5 Golf which reads almost 10% over, and the Mk3 Golf which is about 5% optimistic. Maybe you can sue the manufacturers if you get a ticket for exceeding the speed limit, so they've made them over-read.
In many cases cracks between valve seats and spark-plug holes mean a new head anyway.
That looks an effective way to do the job.
Are the lines around the inner end of the guide anything worrying, or just in the casting? (looks like the inlet valve).
Did you have to ream the guides after inserting them? Do you need to skim the sealing surfaces in the combustion chambers for the barrels?
I have this to look forward to on mine, and I'm wondering if my competence and skills are up to it.
Interesting to see the Trades Description Act note. Going to Stonor last year, I was checking the Variant speedo against the GPS, and it was spot-on, unlike the Mk5 Golf which reads almost 10% over, and the Mk3 Golf which is about 5% optimistic. Maybe you can sue the manufacturers if you get a ticket for exceeding the speed limit, so they've made them over-read.
Dave.
Re: orange fastback
Dave i examimed the heads and all seemed fine so i pretty sure i would have noticed any cracks. I can see what you mean from the picture but its only casting marks. When i blasted the heads i was really carefull around the combustion area, and made an effort not to hit that area full on, i turned down the pressure really low, the media im using is ultra fine crushed glass, and can be used delicately when needed,
i didnt ream out the guides as the valve fit was very good. No sticking points and a piston like feeling to them. (That makes sence in my head). Im by no means a vw master mechanic, and theres plenty others out there that would have a lot more experience, but i feel competent enough to tackle the oily bits. i found a great information source on you tube. The guy is called "vwdarrin" and has some great videos, i found if i had a question in my head, i would find the answer in one of his videos.
i didnt ream out the guides as the valve fit was very good. No sticking points and a piston like feeling to them. (That makes sence in my head). Im by no means a vw master mechanic, and theres plenty others out there that would have a lot more experience, but i feel competent enough to tackle the oily bits. i found a great information source on you tube. The guy is called "vwdarrin" and has some great videos, i found if i had a question in my head, i would find the answer in one of his videos.
You Love It.!!!


Re: orange fastback
Lovely job - something to be really proud of.
Did you source a replacement foam pad for the top of the oil cooler? That's quite important as it directs the cooling airflow through the oil-cooler vanes. If it's not there, much of the air flows over the top between the cooler and engine tin, and can be a problem in hot weather or when the engine is working hard.
Did you source a replacement foam pad for the top of the oil cooler? That's quite important as it directs the cooling airflow through the oil-cooler vanes. If it's not there, much of the air flows over the top between the cooler and engine tin, and can be a problem in hot weather or when the engine is working hard.
Dave.
Re: orange fastback
thanks again dave...
yes i replaced the foam pad. i used a grey scotch brite pad and cut it to size (the type used for scuffing back paint work).it takes up the void that the foam pad did and im thinking it wont perish and fall apart like the foam does..
yes i replaced the foam pad. i used a grey scotch brite pad and cut it to size (the type used for scuffing back paint work).it takes up the void that the foam pad did and im thinking it wont perish and fall apart like the foam does..
You Love It.!!!