68 Fastback
Re: 68 Fastback
I know Purplepeter I was so disappointed about that. I didn't know there was a web until after they had started on the sills and by that time they had nearly finished one side and it was too late. So I just got them to carry on without them. I don't think they are there for rigidity but maybe to separate the outer sill from the inner and heater channel. The panel beater has done work on other Type 3's and has not seen the web before, but then again it most always ends up as a pile of rust. I'll add it in next time.....
Craig
1970 Type 3 Fastback 1600TL Automatic (Australian assembled)
1974 Westfalia Camper 1800
1970 Type 3 Fastback 1600TL Automatic (Australian assembled)
1974 Westfalia Camper 1800
Re: 68 Fastback
Nice bit of welding on this little baby, I wish I could weld.
Mark.
Mark.
-
Tight yorkie mick

- Posts: 131
- Joined: 24th February 2015 - 12:09am
- Location: rotherham
Re: 68 Fastback
Thankyou for the pics Craig, they will help when I start mine.
And thanks for the comment Marc, I'm looking forward to getting this on the road,
And thanks for the comment Marc, I'm looking forward to getting this on the road,
-
Tight yorkie mick
- Posts: 131
- Joined: 24th February 2015 - 12:09am
- Location: rotherham
Re: 68 Fastback
Went for an auto welding mask, but because I'm childish it had to be this one 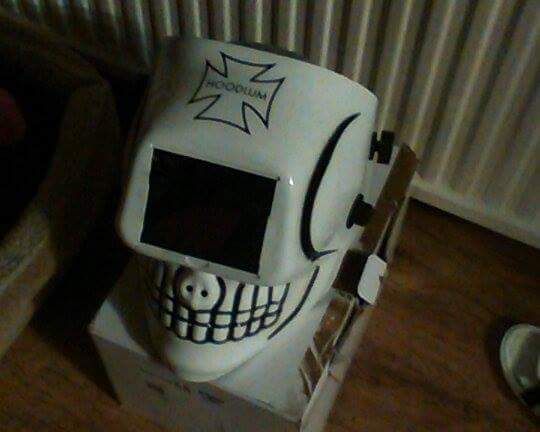
I am very impressed with it, should help with my repairs.
Also got all repairs to floor pan in, still needs return lip trimming back but all done on to cills next.

I am very impressed with it, should help with my repairs.
Also got all repairs to floor pan in, still needs return lip trimming back but all done on to cills next.

Re: 68 Fastback
It certainly saves a load of money to do the fiddling fabrication, and is very satisfying to save all that dough too, and do a good job. You don't have to be a tight yorkie to appreciate that!
Dave.
-
Tight yorkie mick
- Posts: 131
- Joined: 24th February 2015 - 12:09am
- Location: rotherham
Re: 68 Fastback
No but it helpsEditor wrote:It certainly saves a load of money to do the fiddling fabrication, and is very satisfying to save all that dough too, and do a good job. You don't have to be a tight yorkie to appreciate that!
I do enjoy the repairs but my favourite bit is,
the first go up the road. The Fasty style is certainly growing on me, I may look into another type 3 after this is on the road. I've always fancied a notch but the square certainly looks a useful tool. I may have been converted
Re: 68 Fastback
loving your welding TYM......shame I moved my squareback down to essex......I could have done with you!!
mark.
mark.
-
Tight yorkie mick
- Posts: 131
- Joined: 24th February 2015 - 12:09am
- Location: rotherham
Re: 68 Fastback
Thanks mate. Yes a bit far to pop over 
Back from my holidays I'm back into it.
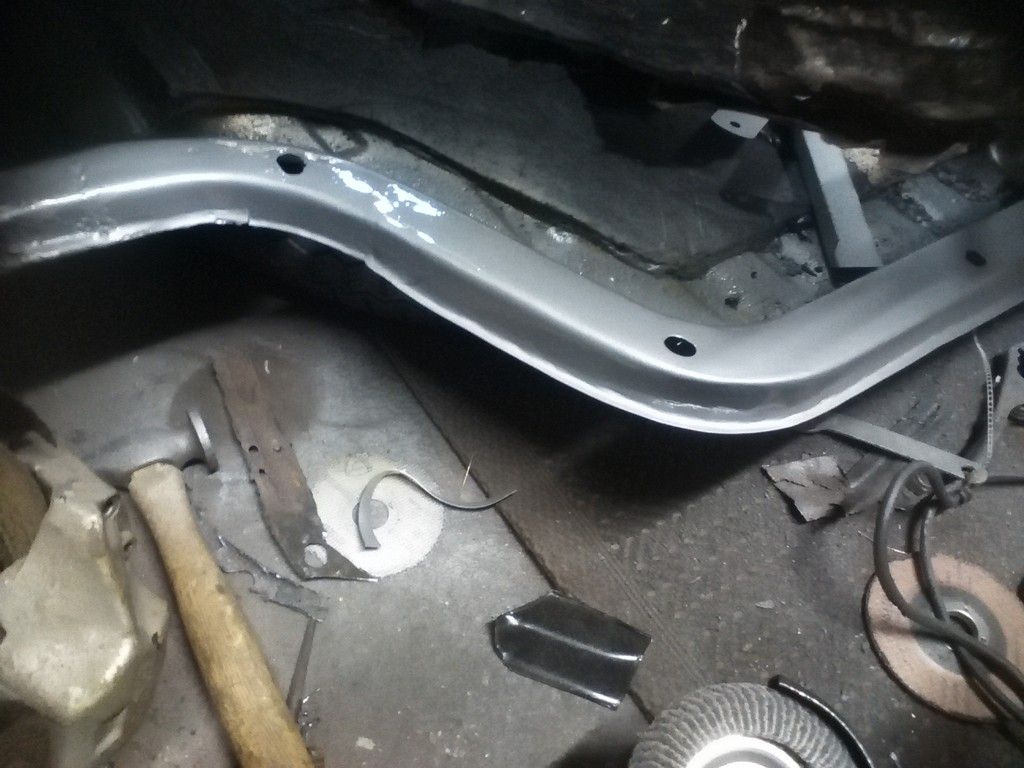
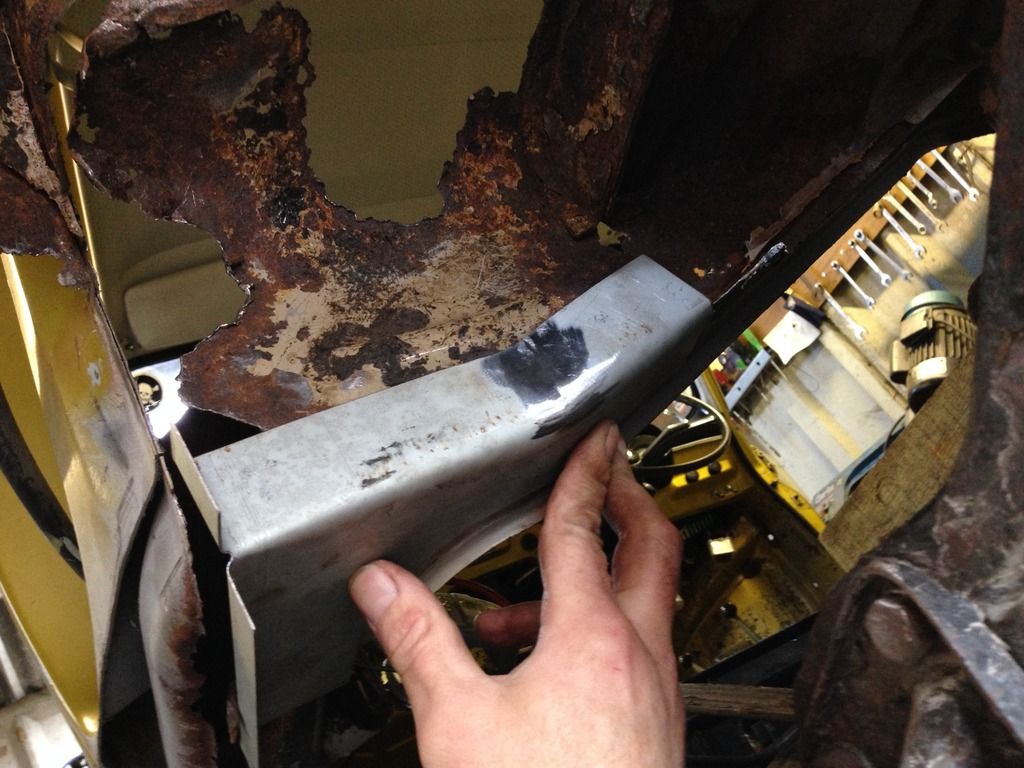
Trimming and fitting the cill and having a nose at how bad/good it really is.
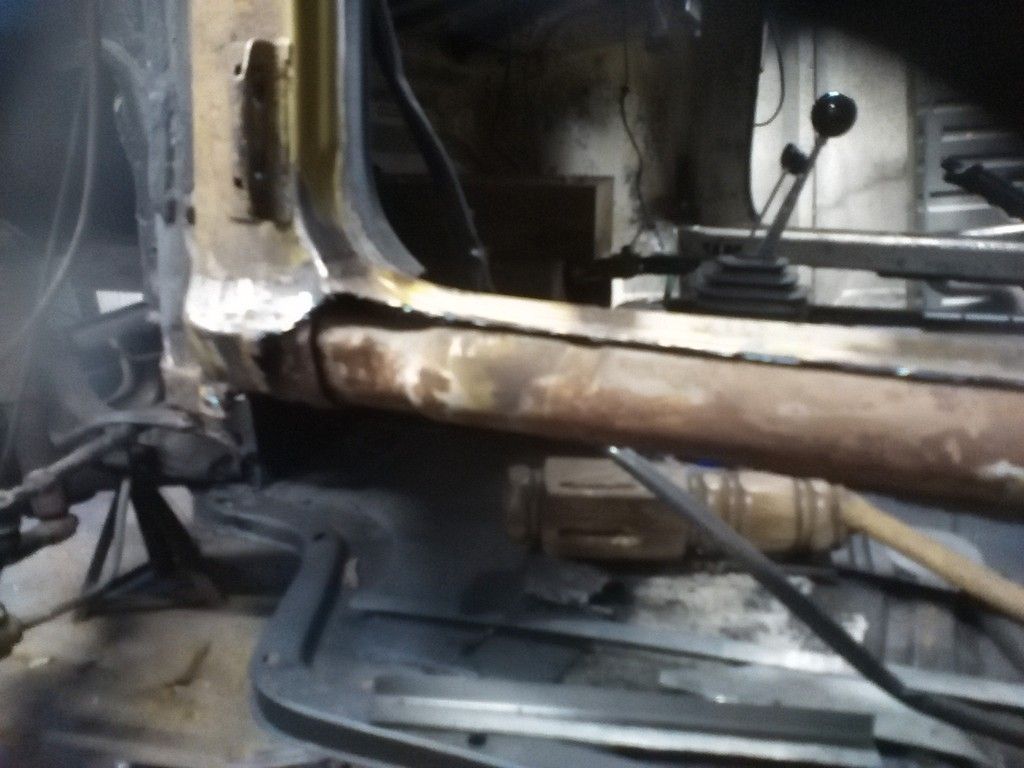
Looks like the over tube is still there, I decided to cut the original step back to see inside and to rust treat and paint, as the new cills are a nice fit, made more sense.
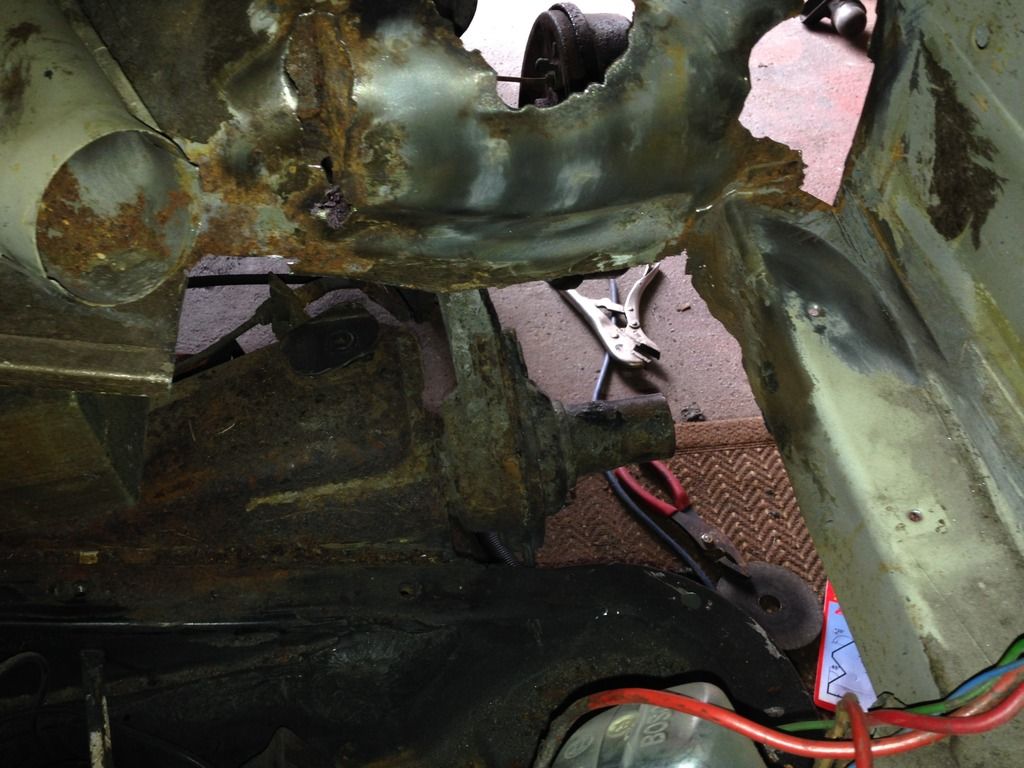
This is looking from underneath, ouch!! Won't be that bad really just a bit fiddly.
In this pic a repair edge curved at front and cill mocked up
That looks better
Lots of trial fitting and trimming to do.
Anyone got pics of this area as I'll be making an edge here too, I did look at my mates rust free square but slept since then and he lives an hour away.

Also front edge of cill is same as 74westy says a different shape, new one has an indent that I've cut out and will make an original shape section for it.
More later folks.
Back from my holidays I'm back into it.
Trimming and fitting the cill and having a nose at how bad/good it really is.

Looks like the over tube is still there, I decided to cut the original step back to see inside and to rust treat and paint, as the new cills are a nice fit, made more sense.

This is looking from underneath, ouch!! Won't be that bad really just a bit fiddly.
In this pic a repair edge curved at front and cill mocked up
That looks better

Lots of trial fitting and trimming to do.
Anyone got pics of this area as I'll be making an edge here too, I did look at my mates rust free square but slept since then and he lives an hour away.

Also front edge of cill is same as 74westy says a different shape, new one has an indent that I've cut out and will make an original shape section for it.

More later folks.
-
purplepeter
- Posts: 2339
- Joined: 8th August 2006 - 4:41pm
- Location: Bath, Avon
Re: 68 Fastback
You know they're handed don't You?
-
Tight yorkie mick
- Posts: 131
- Joined: 24th February 2015 - 12:09am
- Location: rotherham
Re: 68 Fastback
purplepeter wrote:You know they're handed don't You?
I'm fitting some full cills with extra meat at the rear , these have the u shape bit and inner arch attached.
The front door pillar bottom is indented on the cill but a full square on the car, not sure if later cars are different? I'll post a pic tomorrow.
-
purplepeter
- Posts: 2339
- Joined: 8th August 2006 - 4:41pm
- Location: Bath, Avon
Re: 68 Fastback
Oops! Sorry for the moment of horror - I thought They were short sills that only do what You can see when the wings are on
Check the fit of Your Wings before You go too far on welding up the sill
Check the fit of Your Wings before You go too far on welding up the sill
-
Tight yorkie mick
- Posts: 131
- Joined: 24th February 2015 - 12:09am
- Location: rotherham
Re: 68 Fastback
No worries, i was thinking have i? good tip about trial fitting tho. Still plenty of trimming and mock up to do. Hoping for an hour or so this morning.
-
Tight yorkie mick
- Posts: 131
- Joined: 24th February 2015 - 12:09am
- Location: rotherham
Re: 68 Fastback
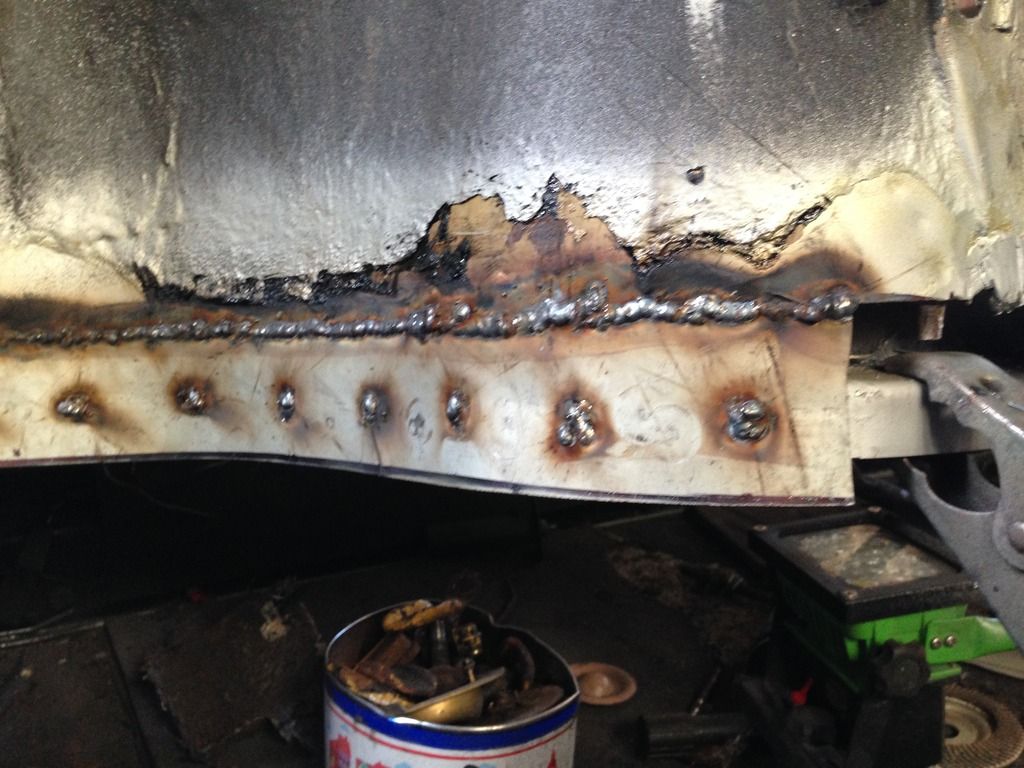
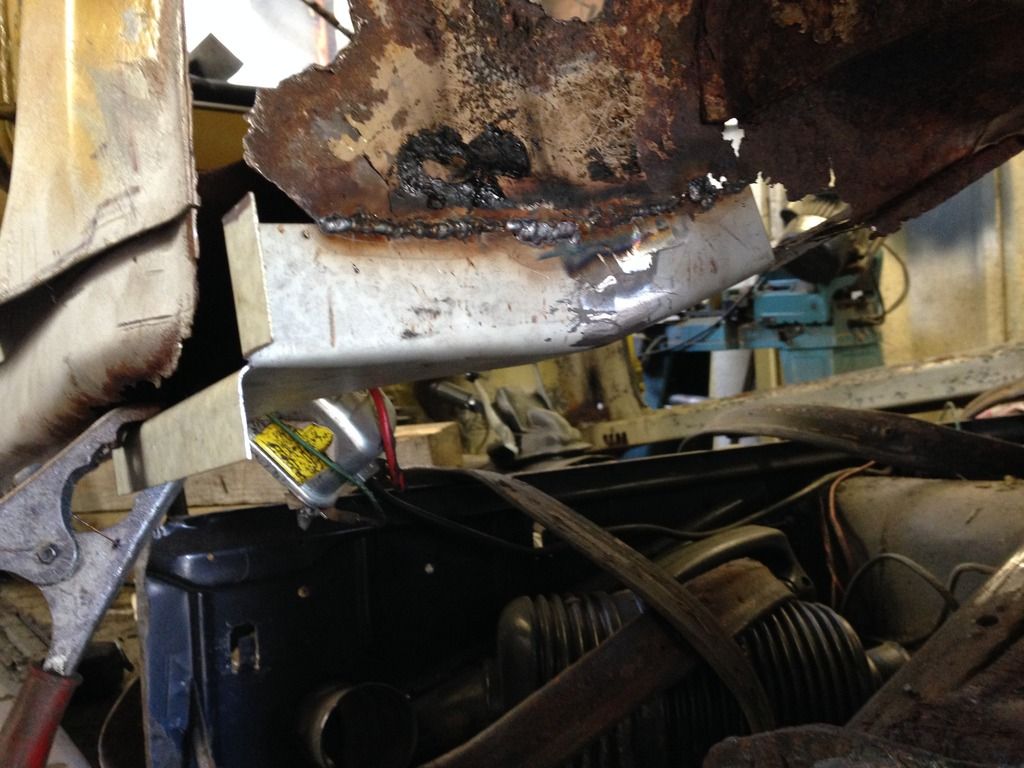
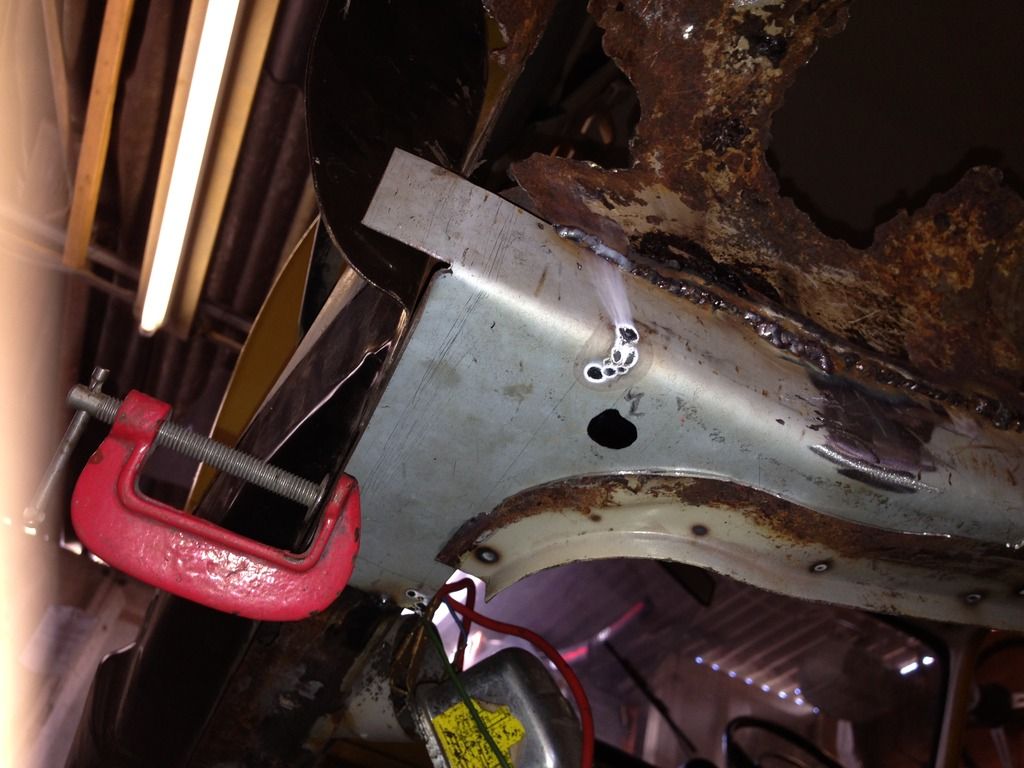
Bit of an update, did a few under Chanel repairs as there wasn't much to weld the sill to
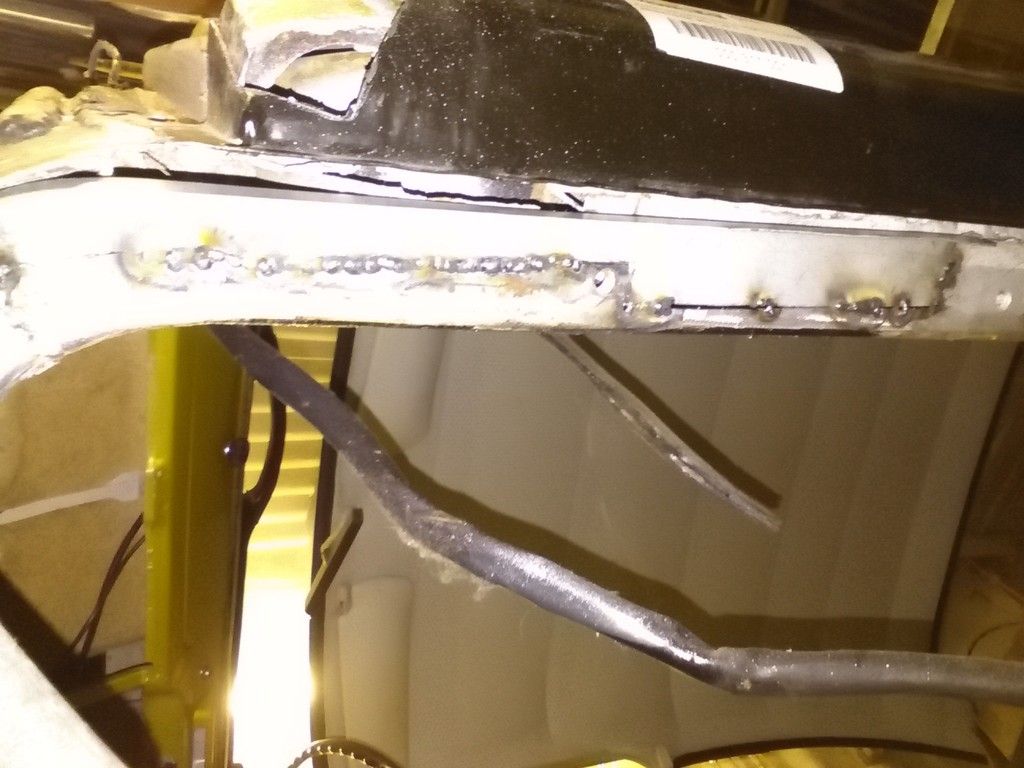
Lots of fun working upside down
Then moved to the wheel well area

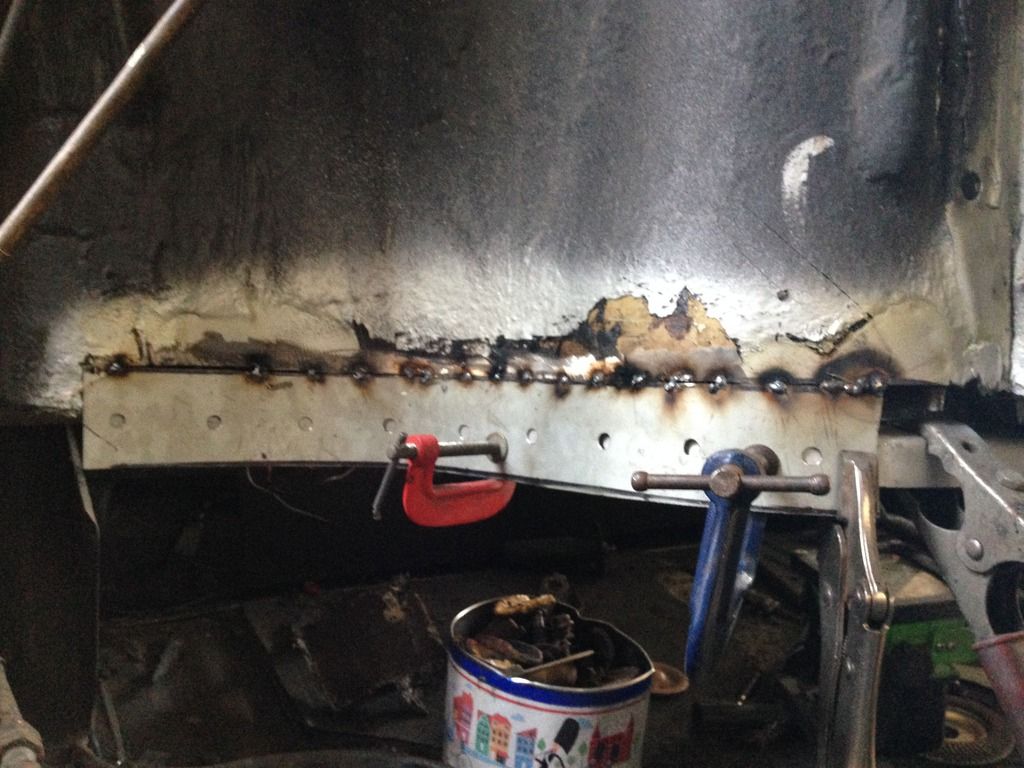
Ready to trim to length after trial fit over pan
Lots of fun working upside down
Then moved to the wheel well area

Ready to trim to length after trial fit over pan
Last edited by Tight yorkie mick on 23rd September 2015 - 3:49pm, edited 4 times in total.
-
Tight yorkie mick
- Posts: 131
- Joined: 24th February 2015 - 12:09am
- Location: rotherham
Re: 68 Fastback
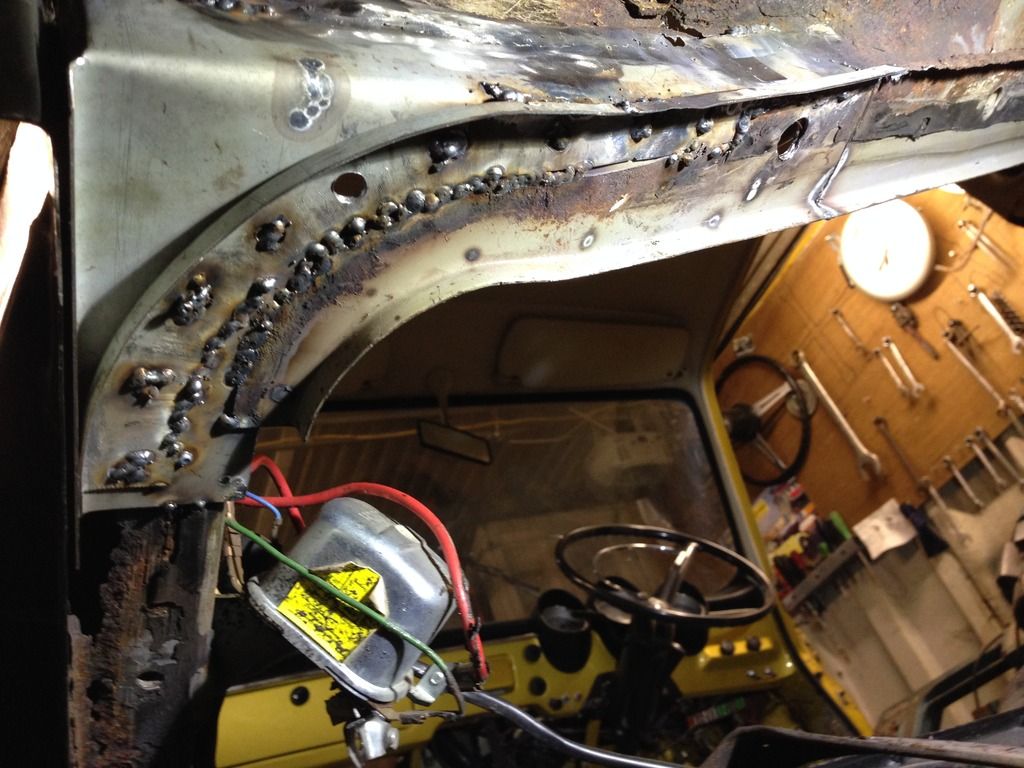
Thanks col feels better now I'm making a bit of progress
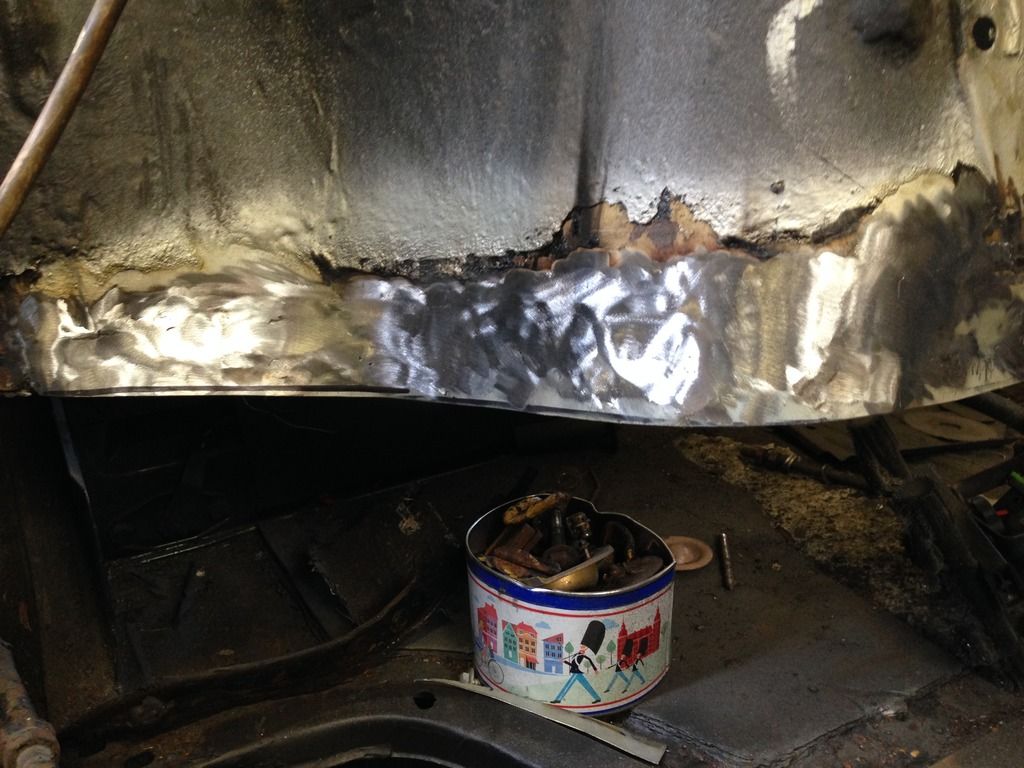 Looking a bit less Frankenstein
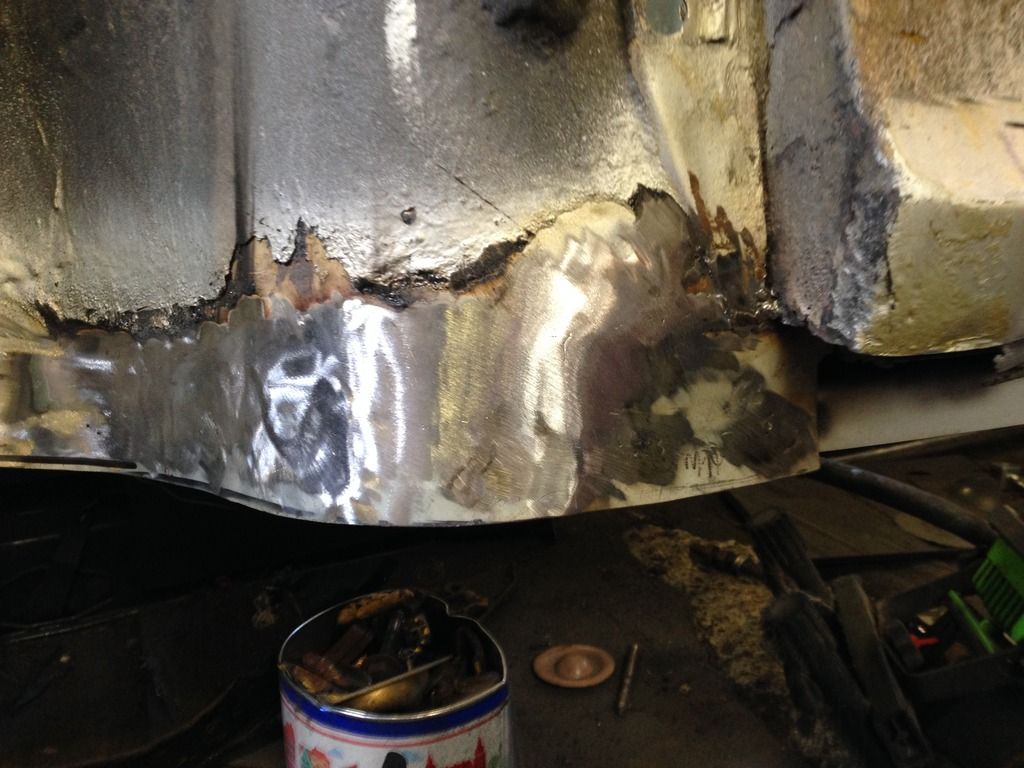
Onto sill next
 Looking a bit less Frankenstein

Onto sill next
-
Tight yorkie mick
- Posts: 131
- Joined: 24th February 2015 - 12:09am
- Location: rotherham
Re: 68 Fastback
This bit next 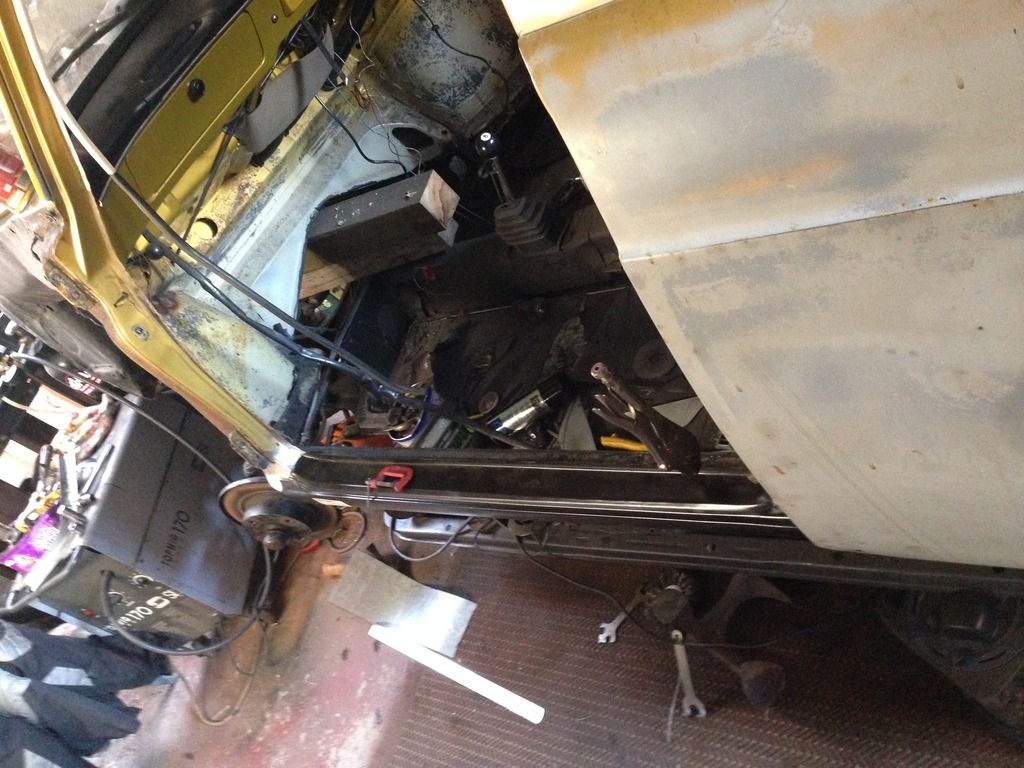

Last edited by Tight yorkie mick on 23rd September 2015 - 1:25pm, edited 1 time in total.
-
Tight yorkie mick
- Posts: 131
- Joined: 24th February 2015 - 12:09am
- Location: rotherham
Re: 68 Fastback
Thanks mr editor 
-
Tight yorkie mick
- Posts: 131
- Joined: 24th February 2015 - 12:09am
- Location: rotherham
Re: 68 Fastback
Editor wrote:You can call me Dave, Mick (if that expression isn't copyrighted now!).
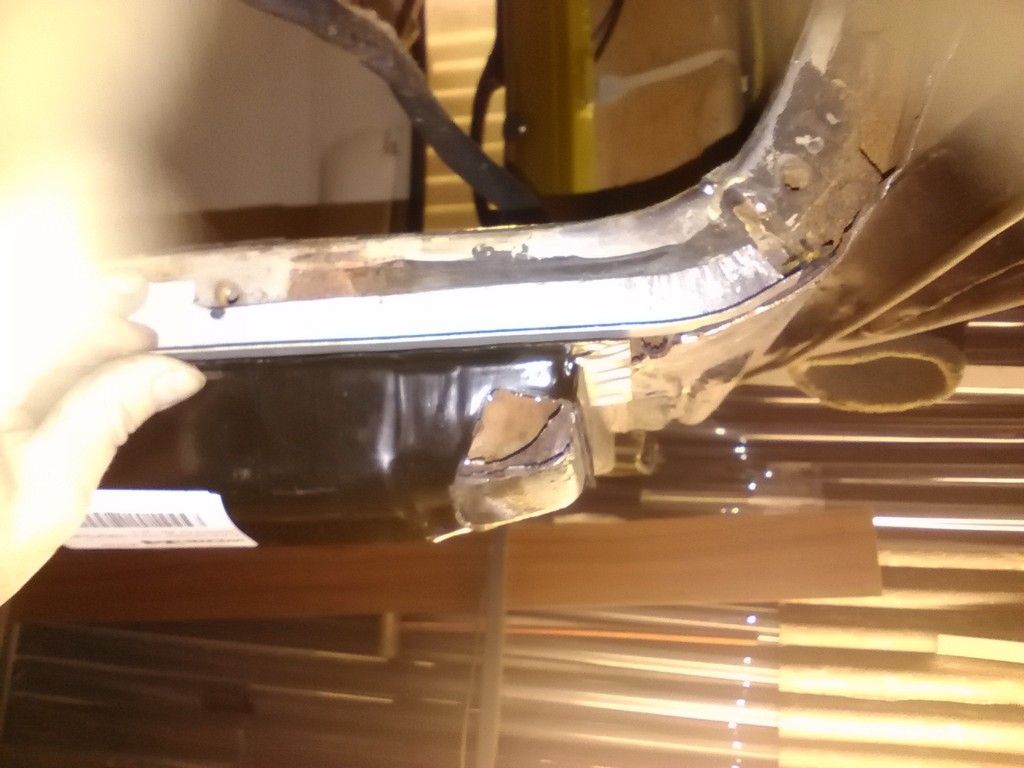
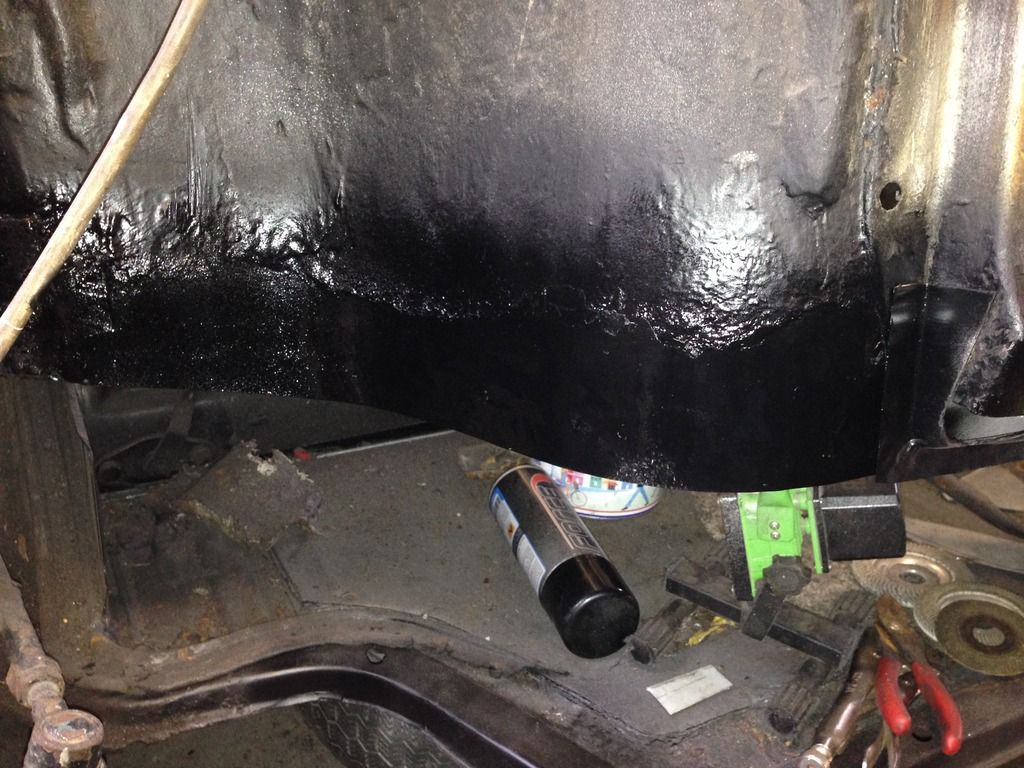
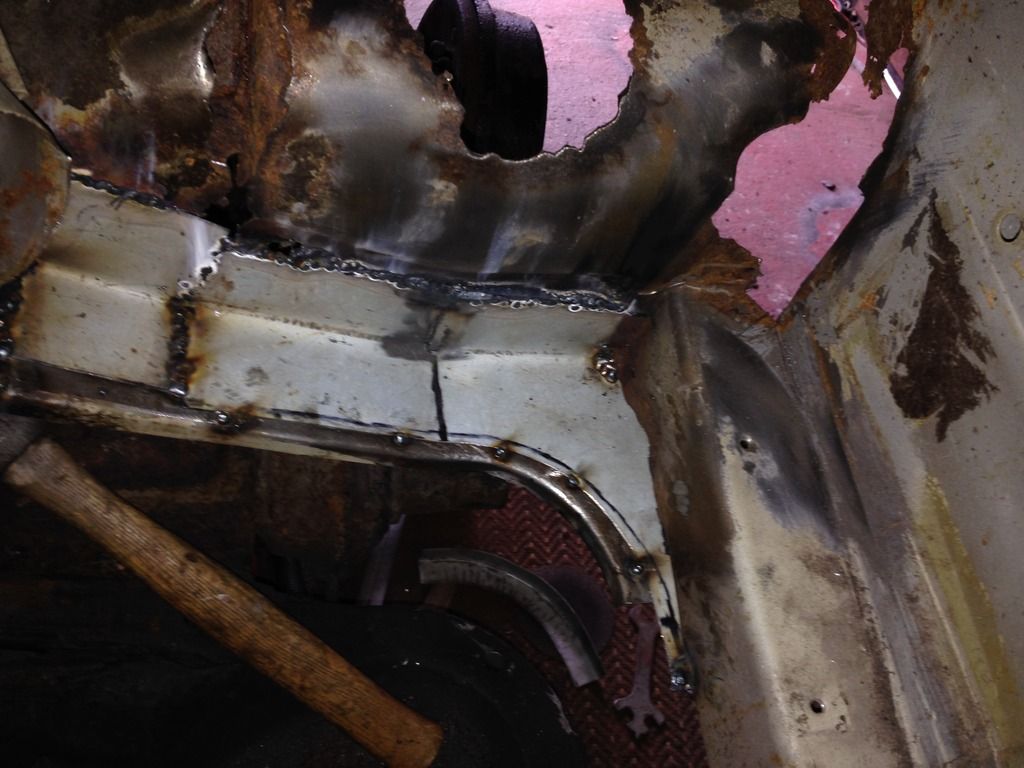
Managed a couple of hours today, I trial fitted the sill and thought I'd better sort the rear corner first as it would close off areas I may need to get to. I knew there was some fibre glass but not this much

Leaving me with this

I bought myself an engine hoist earlier in the week, skinting myself , then thinking , I should have bought paint/tyres window rubbers etc but now I'm happy I did , I used it to lift up the rear body

Worked a treat,,,I'm well happy
Looking from underneath the complete corner and lip needs work, the corners I bought are going to be perfect and save loads of time.

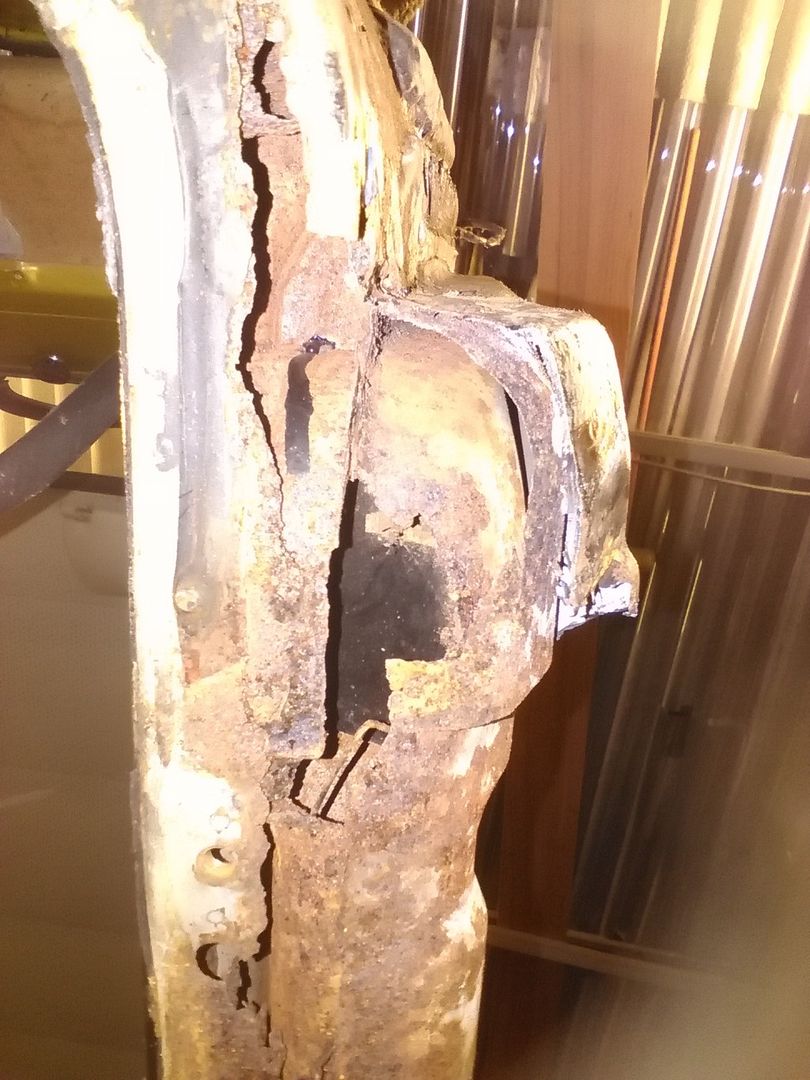
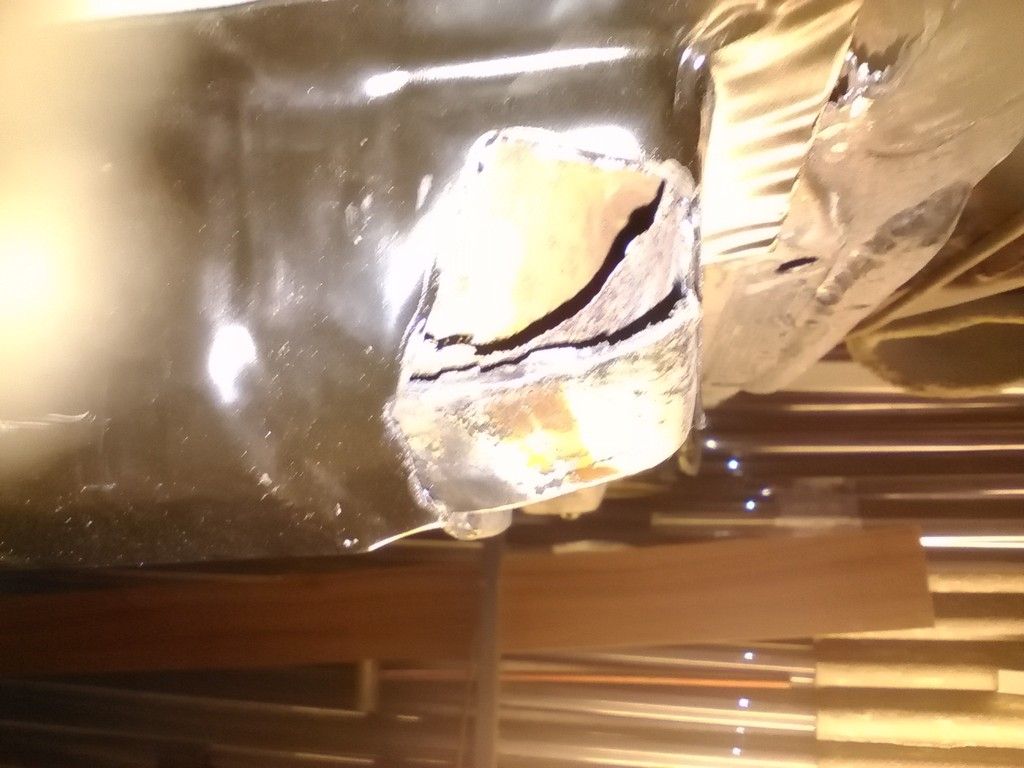
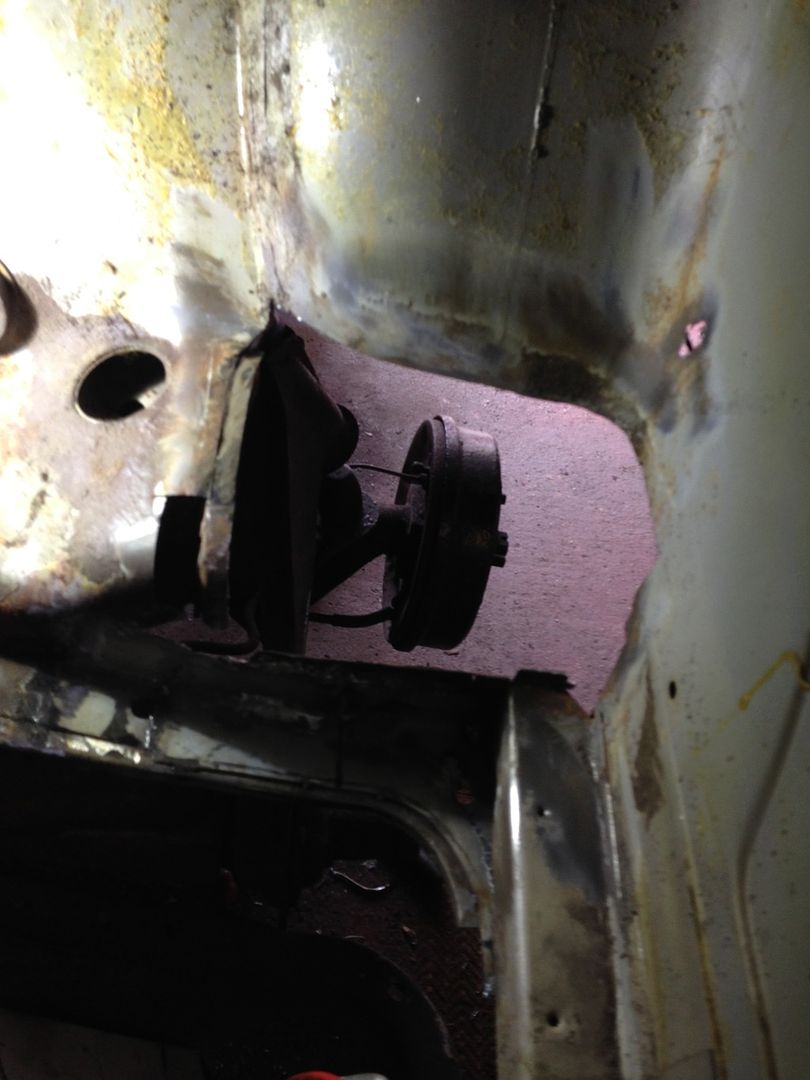
Also I'd put front tyre under car whilst I did the wheel well, it looked like this when I pulled it out today!!!!


Don't know when this happened never heard a bang! I am changing wheels anyway so no harm done, gulp!
Re: 68 Fastback
Looks like you're better off without that tyre anyway! Check the others for cracks.
That rust is typical, and happens because the seams in the air intake boxes have seam sealer which has cracked over the years and allowed water to track behind the thick factory underseal. The seat-belt mounting reinforcing plate doesn't help either, trapping salt and damp.
That rust is typical, and happens because the seams in the air intake boxes have seam sealer which has cracked over the years and allowed water to track behind the thick factory underseal. The seat-belt mounting reinforcing plate doesn't help either, trapping salt and damp.
Dave.
-
Tight yorkie mick
- Posts: 131
- Joined: 24th February 2015 - 12:09am
- Location: rotherham
Re: 68 Fastback
Luckily I'm not using any of the og rims, looks to have blown with some enthusiasm.
Only one seat belt strengthening plate was left, I'll make a couple off new ones up in a more flush design,
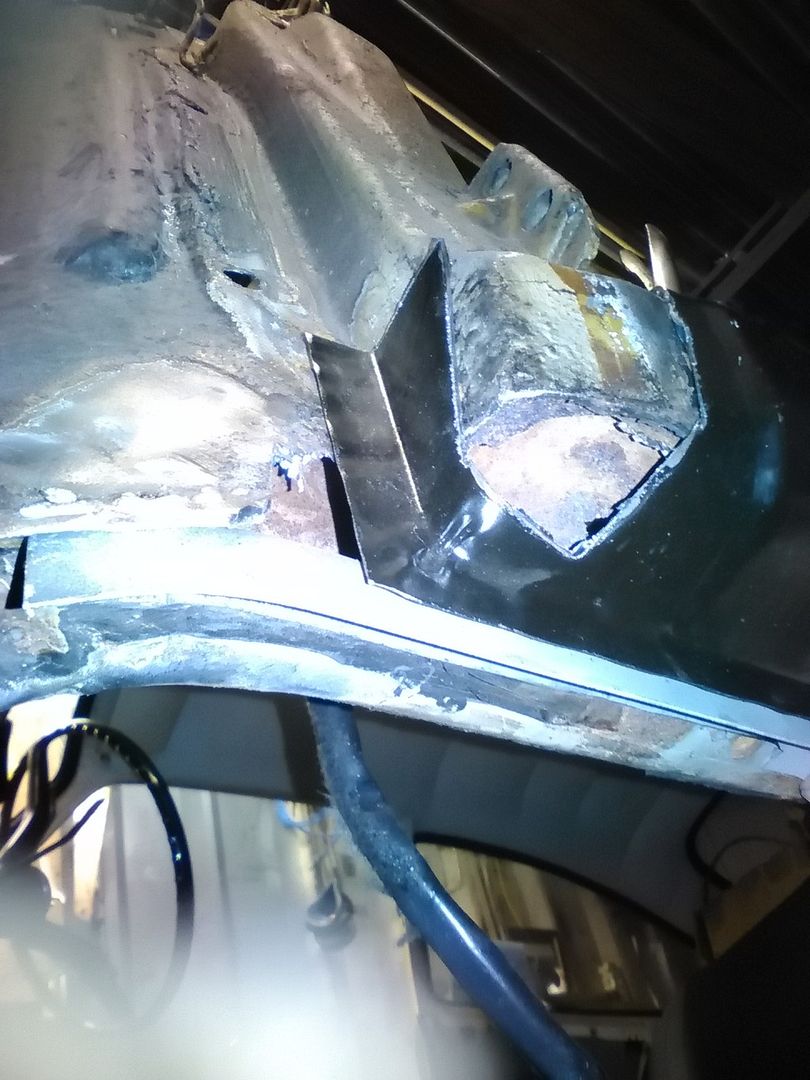
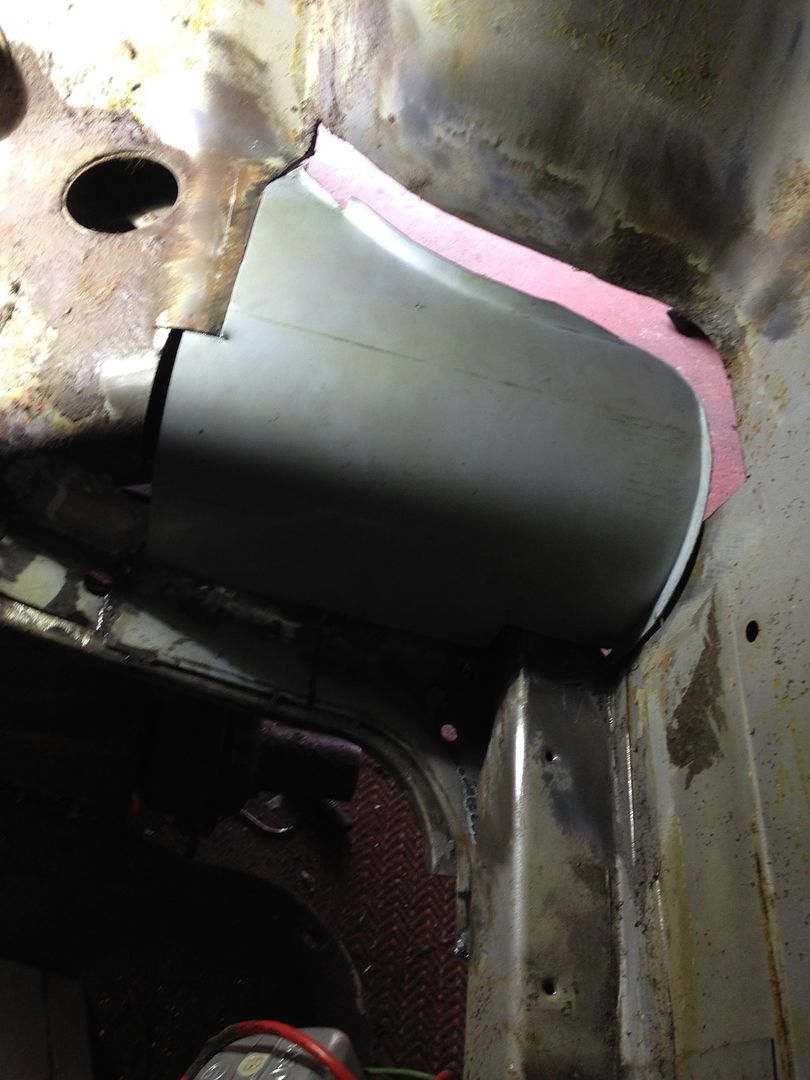
Been at it again today got a few hours in, the corner make up is fairly complex so I ended up chopping most of it out
Here's where I started

Made up a rough plate
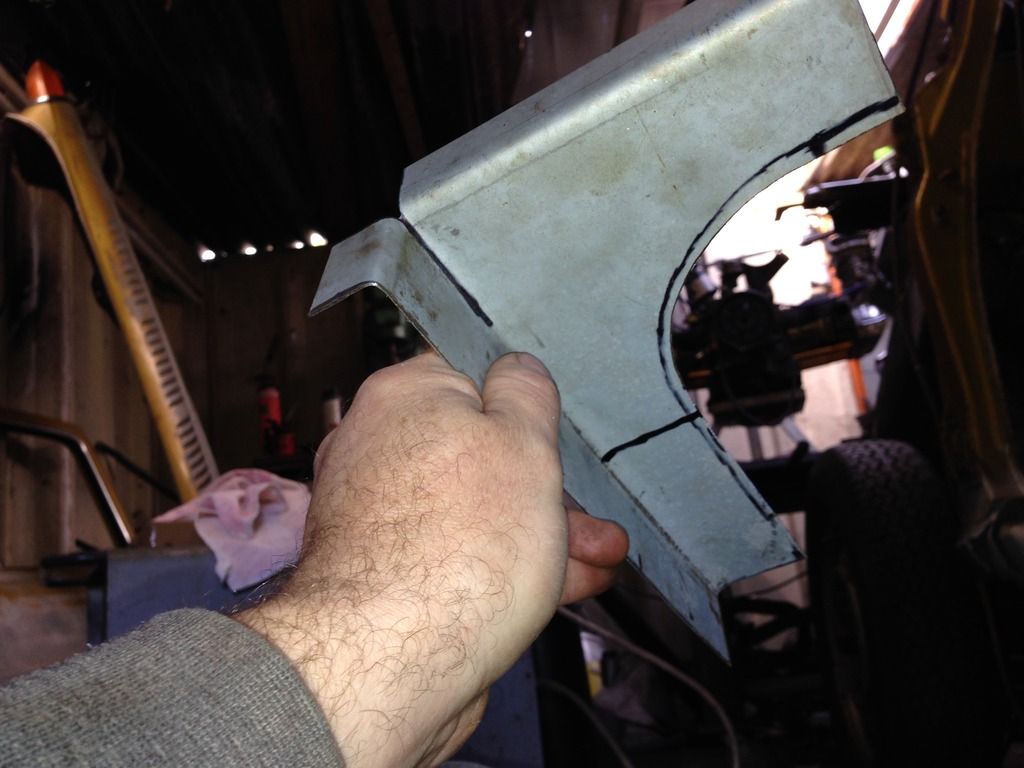
Then slit it to match curve in body, I did try shrinking ,but it was too wide and would have warped
The plate needed to be in between the body and the curved lip of the edge so chopped the lot out and trimmed off the bits I need
 Trial fit
Then chop!!
It's at this stage I wonder what happened to the fairly solid car I bought
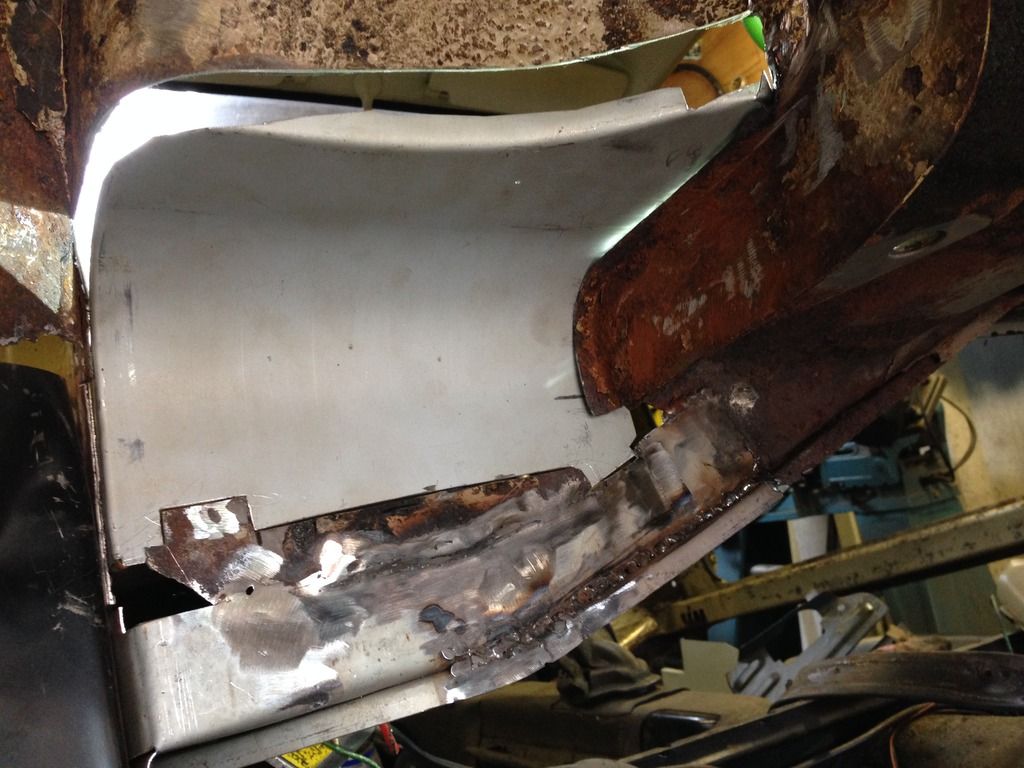
Started to feel better once I'd put this bit back in
Still lots to do, next was the inner lip edge, ( the outside is completely missing)
A nice reference pic (found on the samba) it's approximately 60mm wide (internal)
I'll make up an outer edge next session.
Repaired a few other bits inside too
Next is outer curve and then look at the repair sections I bought and see if they will save me any time or not, I may just do the repairs myself and sell these on ? See how i feel next time, once it's all ground back. More later
Only one seat belt strengthening plate was left, I'll make a couple off new ones up in a more flush design,
Been at it again today got a few hours in, the corner make up is fairly complex so I ended up chopping most of it out
Here's where I started

Made up a rough plate

Then slit it to match curve in body, I did try shrinking ,but it was too wide and would have warped

The plate needed to be in between the body and the curved lip of the edge so chopped the lot out and trimmed off the bits I need
 Trial fit
Then chop!!

It's at this stage I wonder what happened to the fairly solid car I bought
Started to feel better once I'd put this bit back in

Still lots to do, next was the inner lip edge, ( the outside is completely missing)
A nice reference pic (found on the samba) it's approximately 60mm wide (internal)

I'll make up an outer edge next session.

Repaired a few other bits inside too

Next is outer curve and then look at the repair sections I bought and see if they will save me any time or not, I may just do the repairs myself and sell these on ? See how i feel next time, once it's all ground back. More later
Re: 68 Fastback
Keep on grafting the panels in and before long you'll have a finished car, no hold on that's what I said to myself and it took 4 years!!! All the usuall places mick an your getting it done, keep going
Colin..
Colin..
You Love It.!!!
Re: 68 Fastback
Looking good so far. These pictures look so familiar. All the same places. When its all done it will be worth it. Really enjoying driving my solid Fastback.
Hi My name is Paul...................... Fasty back together again !!!!!!!!!!
-
Tight yorkie mick
- Posts: 131
- Joined: 24th February 2015 - 12:09am
- Location: rotherham
Re: 68 Fastback
Thanks fellas small steps and I'll get there some day:)

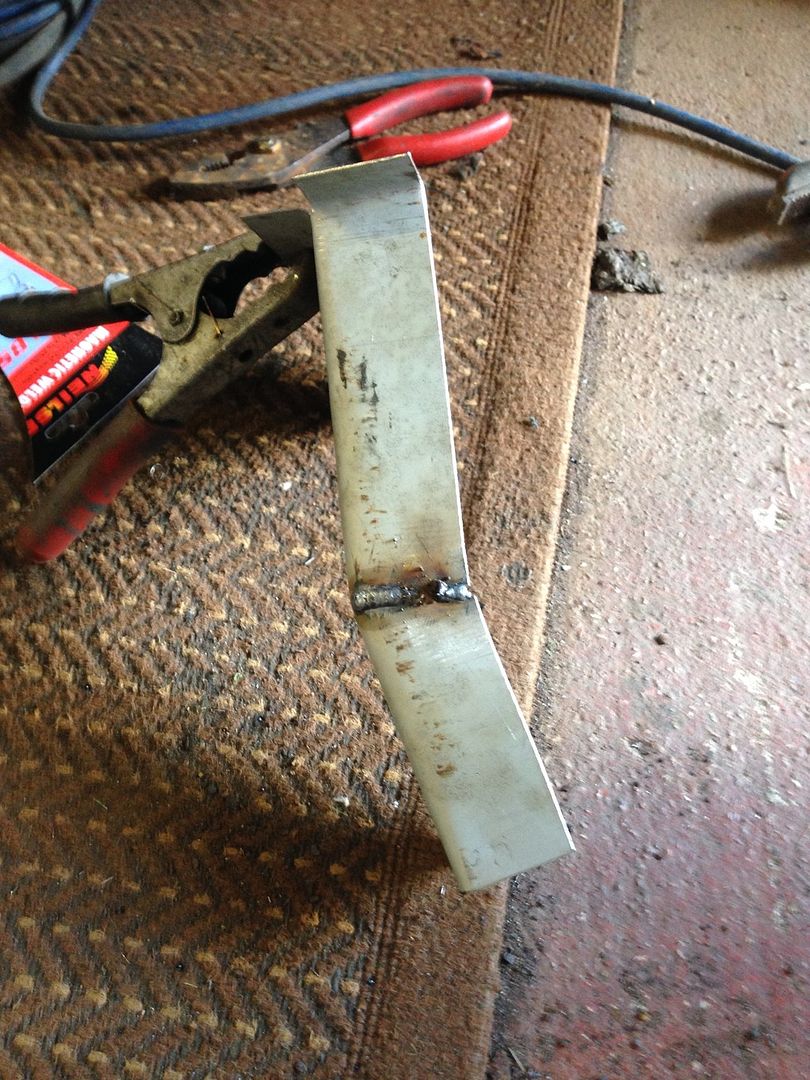
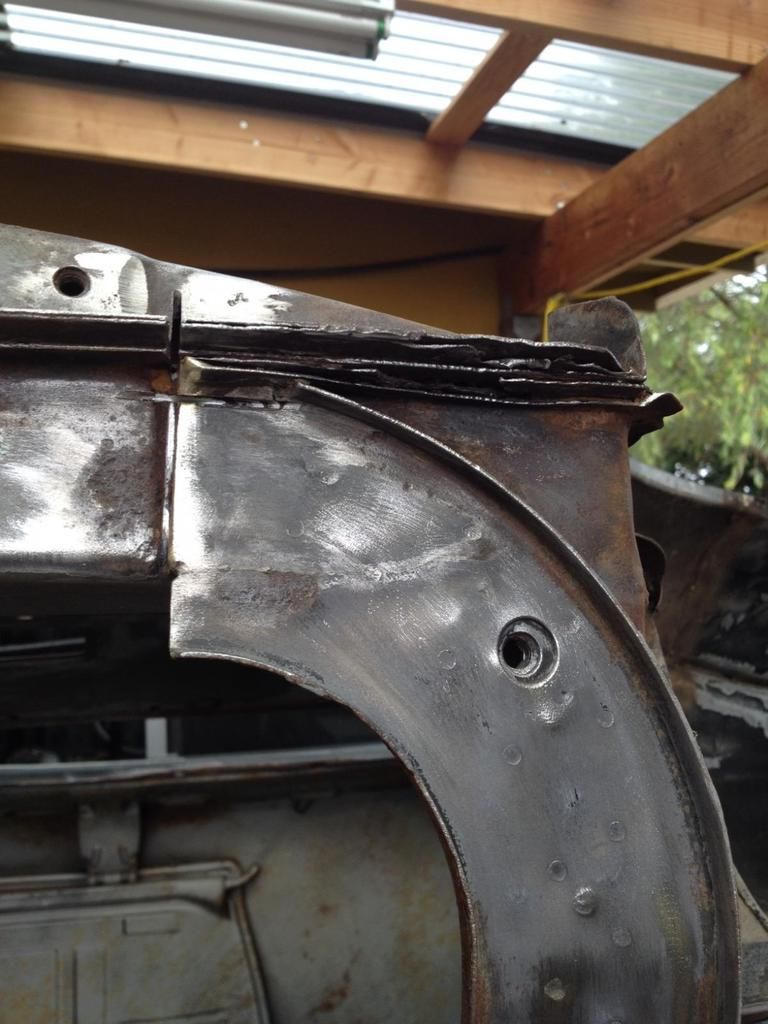
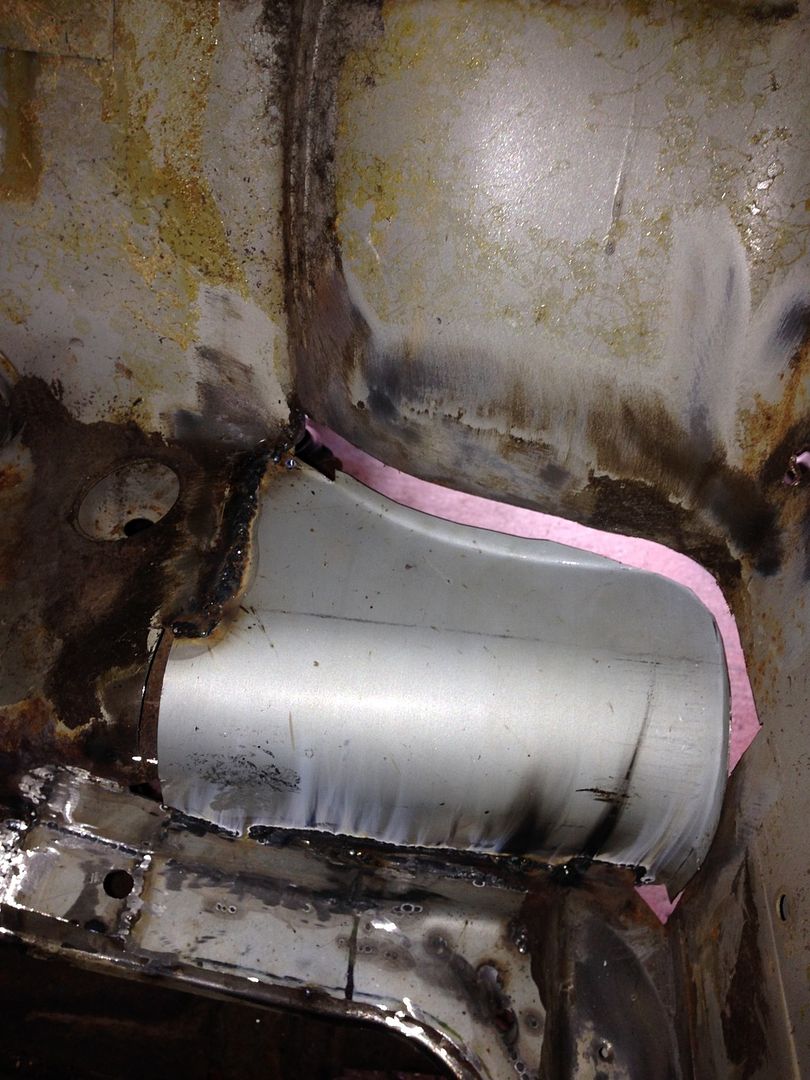
Outer lip made up,
Not the prettiest welding but will be solid once fully finished and fettled back, should look a bit prettier too
Next is to trim this to fit edge to edge

[/img]Taking ages this but will be worth it.

Outer lip made up,

Not the prettiest welding but will be solid once fully finished and fettled back, should look a bit prettier too
Next is to trim this to fit edge to edge

[/img]Taking ages this but will be worth it.
Last edited by Tight yorkie mick on 1st October 2015 - 8:23pm, edited 5 times in total.
-
Tight yorkie mick
- Posts: 131
- Joined: 24th February 2015 - 12:09am
- Location: rotherham
Re: 68 Fastback
Decided to use the over panels as I had used up the sheet I bought, as they are ment to be over panel repairs, they don't fit exactly and needed a fair bit of trimming, so I chopped out all the old frilly bits
Was still a bit small but I can make up the fill in bits,
 http://i199.photobucket.com/albums/aa21 ... .jpg[/img]
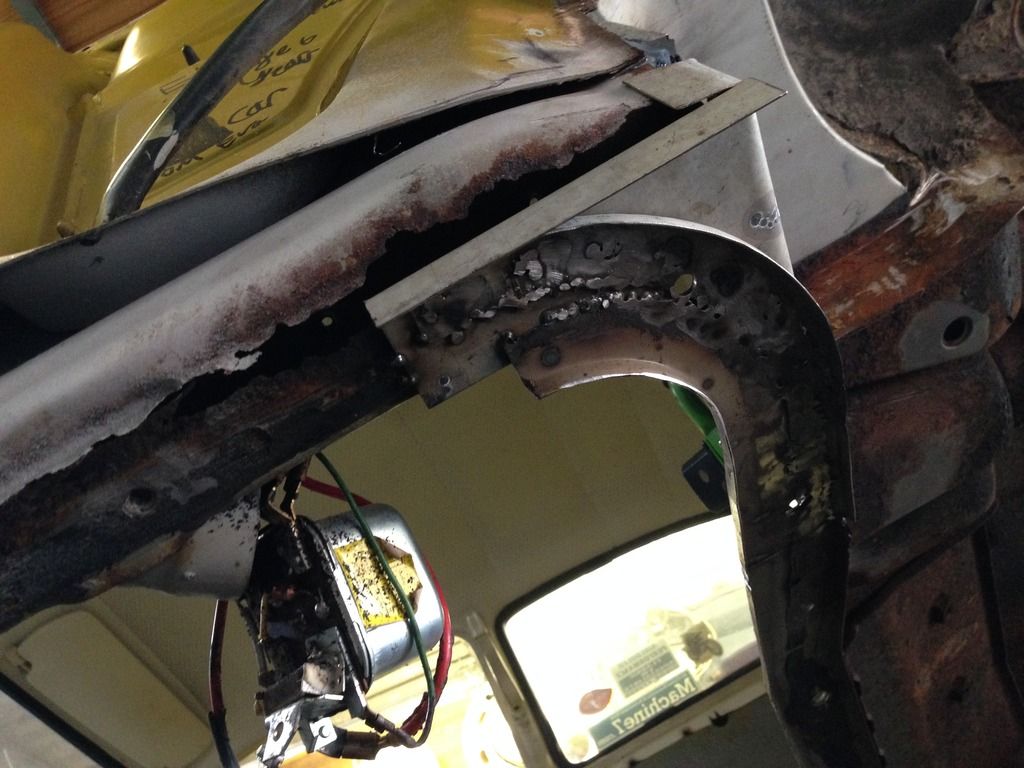
Underside cleaned up a bit too, happier now it's going back in

Was still a bit small but I can make up the fill in bits,
 http://i199.photobucket.com/albums/aa21 ... .jpg[/img]


Underside cleaned up a bit too, happier now it's going back in
Last edited by Tight yorkie mick on 1st October 2015 - 2:35pm, edited 1 time in total.